Water Heater Replacement: A Homeowner’s Step-by-Step Guide
Learn how to replace a water heater, compare tank vs tankless, understand permits, and plan maintenance to maximize efficiency and lifespan.

By the end of this guide you will complete a water heater replacement, from choosing the right unit to safely installing it or coordinating with a licensed pro. You’ll learn when replacement is needed, what to expect from labor, and how to avoid common mistakes. Key requirements include a compatible replacement model, proper venting or gas connections, and compliance with local codes.
What water heater replacement means
Water heater replacement is more than swapping an old tank for a newer model. It involves selecting a unit that matches your home's hot-water demand, ensuring proper connections, venting (for gas models), electrical safety, and code compliance. For many households, it's a step toward improved energy efficiency, better reliability, and reduced maintenance in the long run. According to Heater Cost, replacing an aging unit with a properly sized, high‑efficiency model can yield meaningful energy savings and fewer service calls. This decision should factor in fuel source, climate, and household usage patterns. A well‑chosen replacement can also improve shower comfort, reduce sediment buildup, and lower the chance of sudden outages during peak usage.
When you should replace versus repair
A water heater replacement becomes more sensible when recurring problems emerge that repairs won’t reliably fix. Signs of aging include consistent leaks at the tank, frequent pilot or ignition issues, rust-colored water, and noticeably longer hot water wait times. If repair costs begin to accumulate or the unit fails to meet current energy standards, replacement is often the economical path. Consider the difference in energy efficiency between an older model and a newer high-efficiency unit, along with potential upgrades to venting or wiring. Planning ahead also helps avoid an emergency swap during winter when hot water is most needed.
Tank vs tankless: choosing the right model
Tank-style heaters store hot water and are known for simplicity and lower upfront costs, while tankless systems heat water on demand and can save space and energy over time. Gas-fired units generally offer fast recovery and lower operating costs in colder climates, whereas electric models are common in milder areas or where gas lines are not present. Tankless units can provide endless hot water but may have higher installation complexity and upfront costs. When selecting, size matters: a unit too small will run out of hot water during peak use, while an oversized unit wastes energy. Look for energy efficiency ratings and compare installation compatibility with your home’s venting and electrical capacity.
Sizing, efficiency, and fuel sources
Proper sizing ensures reliability and comfort. A correctly sized unit matches your family’s hot water usage, the number of bathrooms, and peak daily demand. Efficiency matters for long-term operating costs, so prioritize models with higher energy factors and low standby losses. Primary fuel sources influence operating cost, with gas often offering faster recovery in colder seasons and electric systems offering simpler installation where gas isn’t available. When evaluating options, consider (a) energy efficiency ratings, (b) warranty duration, and (c) compatibility with future upgrades like recirculating pumps or smart thermostats.
Permits, warranties, and hiring a contractor
Many jurisdictions require a permit for water heater replacement, and inspections ensure the job meets local codes. A solid warranty, including on labor, is a valuable safeguard against early failures. If you’re unsure about gas connections, venting, or electrical work, hire a licensed professional. Ask for a written estimate, confirm disposal of the old unit, and verify that the installer follows manufacturer guidelines. Keep a record of serial numbers and installation dates for warranty claims and future service.
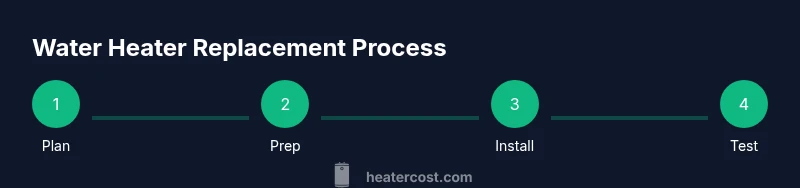
The replacement process at a high level
A typical replacement involves selecting the right model, turning off utilities, draining the old unit, disconnecting lines, removing the existing tank or unit, preparing the space, installing the new heater, connecting lines and venting (if applicable), restoring utilities, and performing initial startup tests. Throughout, safety is paramount: verify power or gas is off, protect yourself from hot surfaces, and ensure the area remains dry. After installation, check for leaks, confirm proper venting, and verify temperature settings. Routine maintenance should follow to extend the life of the unit.
Maintenance after installation to extend life
Regular maintenance makes a big difference. Schedule periodic inspections of fittings and valves, drain the tank to remove sediment, and test the pressure relief valve. Keep the area clear of debris and ensure adequate combustion air for gas models. Consider a yearly professional check for gas units and semi‑annual DIY checks for electrical units. A proactive maintenance plan helps prevent costly failures and maintains efficiency over the life of the water heater.
Tools & Materials
- New water heater unit (tank or tankless)(Select model with appropriate capacity and energy rating)
- Gas shut-off valve / electric disconnect switch(Shut off power or gas before work)
- Pipe wrenches (adjustable and fixed)(Two sizes recommended)
- Pliers, screwdrivers (flathead and Phillips)(For clamps, screws, and fittings)
- Teflon tape and pipe thread sealant(Seal connections on hot and cold lines)
- Drain pan and a drain hose(Catch water and direct away from work area)
- Buckets and towels(Contain spills and cleanup)
- Copper or PEX piping and fittings (as needed)(To connect to existing supply lines)
- Shut-off valves for cold water supply(Optional if pre-existing valve is present)
- Vent/Flue components (for gas units)(Only if replacing with a different vent configuration)
- Safety gear (gloves, goggles)(Protect hands and eyes)
Steps
Estimated time: Estimated total time: about 3-6 hours depending on space and whether venting or electrical work is required
- 1
Confirm replacement scope and select the unit
Assess household hot-water needs, review energy options, and choose between tank vs tankless and gas vs electric. Ensure the chosen model fits the space and local code requirements.
Tip: Use sizing charts from manufacturers and verify available venting or electrical capacity before purchasing. - 2
Shut off utilities and relieve system pressure
Turn off power at the breaker or disconnect switch, shut off the cold-water supply, and open a hot-water faucet to relieve pressure. This prevents splashes and scalding as you work.
Tip: Take a quick photo of existing connections for reference during reassembly. - 3
Drain the old tank
Attach a drain hose to the tank’s drain valve and drain into a suitable location. Keep a bucket handy for any residual water and wipe up spills promptly to avoid slip hazards.
Tip: Open the pressure‑relief valve slightly to vent air and improve drainage. - 4
Disconnect and remove the old unit
Carefully disconnect hot and cold water lines, gas line or electrical connections, and venting components if applicable. Remove the old unit from the space with a helper if needed.
Tip: Label or photograph connections for easier reassembly with the new unit. - 5
Prepare space and install the new heater
Position the new heater, ensure it is level, and install any necessary venting, clearance, and mounting hardware. Verify the area has adequate access for future maintenance.
Tip: Install new shut-off valves if the existing ones are old or difficult to operate. - 6
Connect supply lines and venting
Reconnect cold and hot water lines with appropriate fittings and sealants. If you’re using gas, connect the gas line and ensure proper venting; for electric, verify the conduit and disconnect are secure.
Tip: Use jacketed piping where possible to reduce heat loss and condensation. - 7
Restore utilities and set initial parameters
Turn power or gas back on, restore the cold-water supply, and bring hot water to the faucet to purge air from the system. Set the thermostat to a safe, comfortable temperature.
Tip: Run several gallons of hot water to remove air and check for leaks at every connection. - 8
Test, inspect, and finalize
Check all connections for leaks, test the heater’s operation, and ensure venting (if present) functions correctly. Verify compliance with local permit requirements and document the installation date for warranty.
Tip: Document serial numbers and keep receipt for future service or warranty claims.
Got Questions?
Do I need a permit for water heater replacement?
In many areas, a permit is required to ensure the installation meets code requirements. Check with your local building department or a licensed contractor. An inspection may be needed after installation.
Most places require a permit and possible inspection; check with your local authorities.
Can I replace a gas water heater myself?
Gas installations involve gas lines, venting, and combustion safety. If you’re not trained in gas work, hire a licensed professional for safety and code compliance.
Gas work is dangerous; it’s best to hire a licensed pro for safety and codes.
What should I consider when choosing a replacement?
Consider fuel type, space, efficiency, warranty, and compatibility with existing venting and electrical systems. Tank vs tankless has different costs and maintenance needs.
Think about space, fuel type, and efficiency to pick the right model.
How often should I service a water heater?
Regular checks for leaks, pressure relief valve operation, and sediment removal help extend life. A professional check every few years is common.
Keep an eye on leaks and valve function; annual quick checks help.
What is the typical lifespan after replacement?
Lifespan depends on model, usage, and maintenance. High-efficiency units with good maintenance can provide many years of reliable hot water.
New units can last many years with proper maintenance.
Should I consider upgrading to a tankless system?
Tankless systems offer on-demand hot water and compact space benefits, but installation complexity and upfront cost vary. Evaluate your hot-water habits and budget.
Tankless can save space and energy; weigh upfront costs.
Watch Video
The Essentials
- Plan sizing before purchase to avoid waste.
- Shut off utilities and drain safely to prevent leaks.
- Verify venting and electrical connections after install.
- Maintain a maintenance schedule to extend life.