Replace Hot Water Heater: A Practical Step-by-Step Guide
A thorough, easy-to-follow guide to replacing your hot water heater. Learn planning, safety, installation, testing, and maintenance with practical tips for homeowners, renters, and property managers.

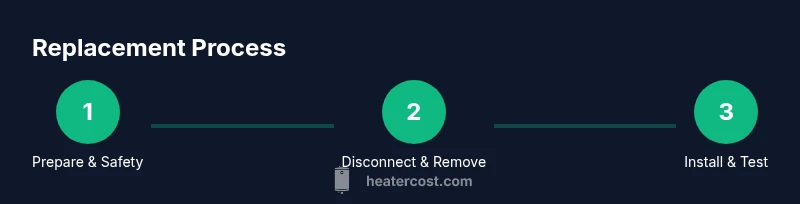
This guide helps you replace hot water heater systems safely and efficiently. You’ll learn how to evaluate when replacement is warranted, select the right type, plan for permits, then execute removal and installation with proper safety checks, testing, and maintenance. By following these steps, homeowners can minimize risk, save energy, and ensure reliable hot water delivery.
Evaluating replacement needs: age, efficiency, and reliability
If your current hot water heater is aging, leaking, or costing more to run than a newer model, it may be time to replace. The decision combines several factors: the unit’s age, the frequency of repairs, energy efficiency, and your household hot water demand. According to Heater Cost analysis, many households find long-term savings by upgrading to a more efficient unit rather than repeatedly repairing an aging tank. Look for signs like mineral buildup, rust around connections, or diminished recovery speed—the point at which you’re waiting longer for hot water. A planned replacement also offers an opportunity to upgrade to energy-saving technologies such as a higher-efficiency gas or electric unit, or even a compact tankless system that can meet peak demands with reduced standby losses. Consider your family size, peak usage, and whether you want to keep an electric or gas-powered setup to guide your choice.
Types of hot water heaters: tank vs tankless and energy considerations
Hot water heaters come in several configurations, each with pros and cons. Traditional storage tanks (gas or electric) provide consistent hot water and are typically lower upfront cost, but they lose energy through standby heat. Tankless on-demand models heat water as it’s needed, reducing energy waste but often requiring higher upfront costs and more complex installation. Solar water heaters or hybrid heat pump models can further reduce energy use but may require more space and climate considerations. When choosing, assess your home’s fuel availability, initial budget, climate, and long-term energy goals. Tank options are easier to size for typical family needs, while tankless systems can offer significant energy savings if the unit is properly sized for your peak demand. For most homes, a high-efficiency tank or a modern tankless option presents a sensible balance of performance and cost over time. Heater Cost’s guidance emphasizes selecting a model with an Energy Factor (EF) or Uniform Energy Factor (UEF) that aligns with your usage pattern.
Planning the replacement: measurements, capacity, and permits
Before you buy a replacement, verify the heater’s capacity and space requirements. Most households replace with a unit that mirrors the old system’s capacity, but you may have opportunities to upgrade in line with current demand and building codes. Measure the existing footprint, clearance around the unit, and venting path if you’re replacing a gas heater. Check local requirements for permits and inspections; many jurisdictions require a permit for plumbing work or gas/electrical changes. If you’re in a multi-unit building, consult the property manager or homeowner association for specific rules. A careful plan reduces surprises at install time and helps ensure you’re compliant with safety codes and standards. The planning phase is also when you decide on optional upgrades, such as expansion tanks or advanced temperature controls, which can improve long-term reliability.
Site preparation and safety checks
Safety is the foundation of any replacement project. Begin by turning off power at the breaker and shutting off the gas supply (for gas units) or isolating the electrical service for electric heaters. Clear the installation area of obstacles and place drop cloths to catch any drips. Gather all required tools and materials, and ensure a stable, level mounting surface with proper support. Check nearby valves, piping, and ventilation for accessibility and condition. If you’re replacing a gas water heater, inspect the venting system for obstructions and proper slope to ensure safe operation. Always wear protective gloves and eye protection, and avoid working alone if possible. Keep a bucket, towels, and a container ready to catch water and condensate during draining.
Removing the old heater safely
The removal process begins with fully draining the tank to minimize spill risk. Disconnect water supply lines, power or gas connections, and venting as appropriate. If copper piping must be cut, use a pipe cutter and ensure you cap or plug open lines to prevent leaks. Have a helper assist with lifting the unit, especially in tight spaces or when the heater is heavy. Retrieve the old unit for recycling or disposal according to local regulations. Salvageable components such as expansion tanks or vent pipes can sometimes be reused, but typically they’re replaced to meet current codes. Document the old setup so you can mirror connections on the new unit, and double-check the remaining plumbing for any signs of wear that could fail after reinstallation.
Installing the new heater: mounting, clearances, and venting
Position the new heater in the prepared space with manufacturer-recommended clearances for access and service. Secure the unit to studs or a platform if required, ensuring stability. For gas installations, connect the venting path with proper seals and sealants; for electric units, ensure the electrical disconnect and grounding are correctly installed. Attach water supply lines with appropriate fittings and Teflon tape, taking care to avoid overtightening. Install an expansion tank if required by code or if your system benefits from it. Reconnect the temperature and pressure relief valve with appropriate discharge piping and ensure it runs to a safe location. Finally, restore power or gas according to the manufacturer’s instructions and test the system for leaks.
Connecting utilities, venting, and safety devices
After mounting, connect water lines with the correct fittings and ensure all joints are leak-tight. Reinstall or upgrade the expansion tank if your system calls for it, and verify the T&P valve is functional with a test discharge. For gas models, connect the gas supply and verify the line for leaks using a safe method; for electric models, ensure the breaker is correctly sized and strapped. Venting must be continuous and unobstructed for gas appliances to prevent dangerous buildup of exhaust. Install a carbon monoxide alarm nearby as an extra safety precaution. Armed with proper tools and following the manufacturer’s instructions, you can ensure a safe, compliant installation that provides reliable hot water for years to come.
Pressure, temperature, and expansion considerations
Set the thermostat or flow controls to a safe, efficient level—typically 120°F (49°C) is a common target for many homes. This helps prevent scalding and reduces energy use. If your system is susceptible to thermal expansion, install or verify the expansion tank and ensure the relief valve is correctly connected to a safe discharge path. Regularly inspect valves, pressure, and vent components to prevent minor leaks from becoming bigger problems. If you notice frequent pressure fluctuations, it could indicate problems with supply pressure or improper installation. An correctly sized expansion device and pressure settings can extend the life of the heater and prevent stress on pipes.
Post-installation testing, maintenance plan, and common pitfalls
With full water and electrical or gas connections re-established, perform a thorough test: turn on power or flame, run hot water through several fixtures, and check for leaks at every connection. Verify proper operation of the relief valve by gently lifting the discharge lever. Plan annual maintenance, including periodic flushing to remove mineral buildup, inspecting anode rods, and testing the thermostat. Keep records of inspections and service dates to track the heater’s condition. Common mistakes include skipping permits, improper venting, or over-tightening connections. Following the manufacturer’s guidelines and local code requirements minimizes failures and ensures a long, safe service life.
Tools & Materials
- New hot water heater (tank or tankless)(Choose capacity based on household demand and energy source)
- Adjustable pipe wrenches(For loosening and tightening plumbing connections)
- Screwdrivers (Phillips and flathead)(For mounting screws and electrical connections)
- Teflon tape and pipe thread sealant(Seal threaded connections to prevent leaks)
- PEX or copper piping and fittings(Match the existing system type)
- Pipe cutter(Useful for copper piping)
- Expansion tank (if required by code)(Check local codes and system needs)
- Pressure relief valve(Must be compatible with unit and code-compliant)
- Vent piping and sealant (gas heater)(Ensure proper venting configuration)
- Gas line wrench and gas leak detector (for gas units)(Safety checks and proper isolation)
- Voltage tester(Confirm electrical safety before touching wiring)
- Buckets, towels, and rags(Contain spills and clean up drips)
- Personal protective equipment (gloves, goggles)(Protect from sharp edges and splashes)
Steps
Estimated time: 2-6 hours
- 1
Turn off utilities and prep area
Power down the circuit breaker for the water heater and close the gas valve or shut off the electric supply to the unit. Clear the area, lay down towels, and place a bucket for any residual water. This initial safety step reduces the risk of shock, flare-ups, or leaks during the replacement.
Tip: Double-check with a voltage tester to verify there’s no electrical current before touching any wires. - 2
Drain the tank and relieve pressure
Attach a hose to the drain valve and open it to allow water to flow into a safe drain. Open a hot water tap elsewhere to vent air and speed drainage. This minimizes the risk of a pressurized blast when connections are broken and helps remove sediment from the tank.
Tip: Be prepared for hot water; wear gloves and keep a thermometer handy for safety checks after draining. - 3
Disconnect old heater connections
Carefully disconnect water supply lines, electrical leads or gas lines, and, if needed, vent piping. Keep track of each connection’s orientation to simplify reinstalling the new unit. If you encounter corroded fittings, pause and address corrosion before continuing.
Tip: Label each line with masking tape to avoid mix-ups during reassembly. - 4
Remove the old heater
With help if possible, lift the old unit from its mounting and move it to a disposal location. Inspect the mounting surface for damage and clean the area to prepare a solid base for the new unit. Take photos of the old setup for reference during installation.
Tip: Do not rush the lift; even smaller units can be heavy and awkward to move. - 5
Prepare site and install the new heater
Position the new heater in place, ensuring required clearances. Install the venting and mounting hardware, if applicable, and attach the water, gas or electric connections following the manufacturer’s directions. If replacing a gas heater, verify venting is correct and sealed.
Tip: Check that the unit sits level and has proper clearance for service and maintenance. - 6
Connect utilities and safety devices
Reconnect water lines with suitable fittings, install the expansion tank if required, and attach the pressure-relief valve discharge piping. For gas models, reconnect the gas line and test for leaks; for electric, ensure proper grounding and breaker protection.
Tip: Use soap-test on joints to detect leaks before filling. - 7
Fill, purge air, and test
Slowly fill the tank while opening a hot water faucet to purge air. Once the tank is full, remove the air source and restore power or gas. Lightly test to verify that water heats evenly and that there are no leaks at connections.
Tip: Run hot water at multiple fixtures to ensure the system is fully purged of air. - 8
Final checks and start-up
Check the thermostat settings and adjust as needed for comfort and efficiency. Inspect for any signs of leaks, verify venting operation (if applicable), and confirm the unit is heating properly. Schedule a follow-up inspection if you’re unsure about performance.
Tip: Keep a log of maintenance dates and any performance notes for future reference.
Got Questions?
Do I need a permit to replace a hot water heater?
Permits vary by location and project scope. In many areas, plumbing, gas, or electrical work requires a permit and inspection after installation. Check with your local building department before starting.
Permits depend on your location and the work involved. Contact your local building department before starting.
Can I replace a hot water heater myself, or should I hire a professional?
DIY replacement is possible for experienced homeowners, especially when installing electric units. Gas and venting work typically require licensed professionals to meet safety codes and insurance requirements.
DIY is possible if you have the right skills, but gas and venting work usually require a licensed professional.
What maintenance should I do after installation?
Flush the tank or system per manufacturer guidance at regular intervals, test the pressure relief valve annually, inspect connections for leaks, and check thermostat settings for safety and efficiency.
Flush the system, test the relief valve, and check settings and connections regularly.
What factors affect the lifespan of a water heater?
Lifespan depends on usage, water quality, and maintenance. Proper installation and periodic maintenance can extend life beyond average expectations, while hard water or neglect may shorten it.
Lifespan depends on usage, water quality, and maintenance; proper care helps it last longer.
How do I determine the right size for a replacement?
Size should reflect your household water demand, number of bathrooms, and simultaneous hot water needs. An installer or online sizing calculator can help match capacity to your home.
Match size to your household needs with help from an installer or calculator.
Watch Video
The Essentials
- Assess when replacement is necessary based on age, efficiency, and reliability.
- Choose between tank and tankless by considering usage, climate, and upfront cost.
- Plan permits and professional help when required to stay compliant.
- Follow safety steps, test thoroughly, and maintain records for longevity.
- Establish a maintenance routine to extend heater life and energy efficiency.