How to Replace a Gas Water Heater: A Step-by-Step Guide
Learn how to replace a gas water heater safely and efficiently with a homeowner-friendly plan that covers permits, tools, installation steps, maintenance, and cost considerations from Heater Cost.

This guide shows you how to replace a gas water heater safely and efficiently. You’ll learn planning steps, permit considerations, tool lists, a clear step-by-step process, and post-install maintenance tips. While some jurisdictions require a licensed pro, this framework helps homeowners understand what the project entails and what to expect.
Why replacing a gas water heater matters
Replacing a gas water heater is often a smart move when the unit is aging, leaking, or becoming inefficient. A modern gas unit typically offers better energy efficiency, improved reliability, and enhanced safety features. For many homes, upgrading can reduce energy bills and improve hot-water consistency, especially during peak usage. When you learn how to replace gas water heater components and plan ahead, you’ll avoid emergency outages and costly repairs. The Heater Cost team notes that proper sizing, venting, and installation practices are key to long-term performance and safety. If your current heater is more than 10–12 years old, or you notice rust-colored water, pilot-light issues, or unusual noises, it’s time to evaluate replacement vs repair.
As you begin, keep in mind that a replacement is a larger project that touches gas lines, venting, water lines, and electrical (if applicable). Proper safety sequencing and adherence to local codes are critical. This approach helps homeowners make informed decisions and reduces the risk of leaks, CO exposure, or improper combustion.
When to replace vs repair
A repair makes sense for minor issues on a newer unit, such as a faulty thermostat or a faulty element. If repairs become frequent or if the cost of repeated repairs approaches a substantial fraction of a new unit’s price, replacement is often more economical in the long run. Consider replacement if you:
- See persistent leaks around the tank or connections
- Notice rust, corrosion, or excessive sediment buildup
- Experience inconsistent hot water or longer recovery times
- Believe the efficiency is far below current standards despite maintenance
Keep in mind that older gas water heaters may be less compatible with modern venting requirements and safety controls. In these cases, replacement isn’t just about hot water—it’s about safer operation and improved energy efficiency over the life of the system. The decision should weigh upfront installation costs against long-term energy savings.
Safety considerations and code compliance
Safety is non-negotiable when replacing a gas water heater. Before you touch any gas line, shut off the fuel supply and ventilate the area if you smell gas. Install detectors near living spaces to monitor for CO. Never perform work on gas piping with an open flame or while gas is flowing. If you’re unsure about gas line work, hire a licensed gas fitter. Local codes may require permits for installation, inspections for venting adequacy, and proper vent termination. Always verify that the new unit complies with the required Venting Class and BTU rating, and install an appropriate expansion tank if your plumbing system requires one. The goal is safe combustion, proper venting, and adherence to manufacturer instructions.
Permits, codes, and choosing a replacement
Planning the replacement begins with understanding permit requirements in your area. Many jurisdictions require a permit for installing or relocating a gas appliance, and an inspection may verify venting, connections, and overall safety. When selecting a replacement, consider size based on a first-hour rating (FHR) and your household hot-water needs. A larger tank isn’t always better if your climate or usage doesn’t demand it. Factor in venting compatibility, installation location, and clearance around combustible materials. Look for units with high energy efficiency ratings and a reliable manufacturer warranty. If you’re replacing an older, non-condensing model, you may gain significant efficiency benefits with a modern condensing unit.
Sizing, venting, and location considerations
Appropriate sizing depends on peak hot-water demand across showers, laundry, and dishwashing. Oversizing or undersizing can lead to wasted energy or inadequate supply. Venting is critical for safety; most gas heaters use venting to expel combustion byproducts. If the existing venting isn’t adequate for a new model, you’ll need to upgrade the vent type or size. The installation location should allow for accessible service, proper clearance from walls and cabinets, and a safe distance from combustibles. A level concrete pad or stand is recommended for stability and to prevent tipping.
Tools and materials you'll need
A successful replacement starts with a clear checklist. You’ll need a mix of basic hand tools, gas-safe connectors, and safety equipment. Common essentials include:
- Adjustable wrenches, pipe wliers, and a level
- Gas-rated flexible connectors and pipe sealant rated for gas
- A new T&P relief valve and discharge pipe, if required
- A new expansion tank when local codes require it
- Copper or CPVC piping with appropriate adapters
- A shut-off valve key, pipe cutter, and bucket for drainage
- A gas leak detector spray or soapy water solution for leaks
Having these items on hand reduces delays and keeps the job moving smoothly. Always follow the manufacturer’s instructions for your specific model and check for compatibility with your existing gas supply and venting.
What to expect during installation (overview)
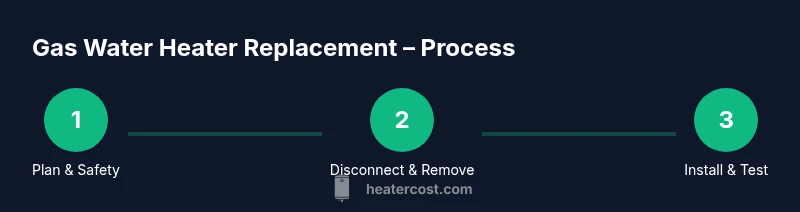
A typical replacement follows a logical sequence: prepare the area, isolate the gas and water supplies, drain the old tank, remove it, position the new unit, connect water and gas lines, install venting, test for leaks, fill the tank, and finally ignite and verify proper operation. The process may require an inspection before and after to verify code compliance. Expect some disruption, particularly if you need to adjust the vent or reroute gas piping. If you encounter unusual pipe configurations or corroded connections, pause and reassess. Safety, planning, and careful testing are the hallmarks of a successful replacement.
Maintenance after installation
After installation, flush the tank to remove any sediment and verify the correct operation of the T&P relief valve. Test the gas burner for clean ignition and the venting for proper drafting. Set the thermostat to a comfortable, energy-saving setting and schedule annual maintenance with a professional. Regular inspections of the gas line, venting, and connections help prevent leaks and ensure safe operation over time. Periodic draining and checking the anode rod (where applicable) can extend the life of the tank.
Common mistakes to avoid
Common mistakes include skipping permits, inadequate venting, using incompatible pipe fittings, and neglecting a proper pressure test for gas lines. Don’t reuse an old expansion tank if your system requires a new one, and never ignore gas odors—shut off the gas supply and call the utility or a licensed technician immediately. Rushing the installation or skipping the final testing phases can lead to dangerous leaks or CO exposure. Always follow the manufacturer’s guidelines and local codes to avoid costly rework.
Tools & Materials
- Gas shut-off valve key or wrench(Essential for isolating the gas line during removal/installation)
- Gas-rated flexible connector(Must be rated for natural gas or propane; match gas type)
- Adjustable wrenches and pipe wrench(For loosening/tightening connections safely)
- Pipe cutter and deburring tool(For copper/CPVC pipe work; ensure clean cuts)
- Copper/CPVC piping and adapters(As required by your installation plan and code)
- T&P relief valve and replacement discharge pipe(Install per manufacturer instructions; code requires discharge run to safe location)
- Expansion tank (if required by code)(Check local code and system needs)
- Pipe dope or gas-rated sealant(Use only products rated for gas connections)
- Soapy water solution or gas leak detector spray(Test for leaks on all gas connections)
- Gas leak detector or alarm (CO detector near living areas)(Ensure early warning in case of leaks or combustion byproducts)
Steps
Estimated time: 3-6 hours depending on space, venting changes, and familiarity
- 1
Shut off gas and water
Close the cold-water supply to the heater and shut off the gas at the main valve. If present, switch off power at the circuit breaker. This step prevents accidental gas flow and water leakage during removal.
Tip: Verify gas flow with a spray of soapy water around joints before re-opening later. - 2
Drain the tank
Attach a hose to the tank’s drain valve and direct effluent to a drain or outside. Open the drain valve and allow the tank to empty. This reduces weight and minimizes splashing when removing the heater.
Tip: Keep a bucket handy for any stubborn drips and wear eye protection. - 3
Disconnect gas line and venting
Carefully disconnect the gas supply line and the vent pipe from the old unit. Cap exposed lines temporarily and ensure the area is well-ventilated. Use appropriate wrenches and avoid twisting fittings.
Tip: Never use a flame to check for leaks—use a gas-safe detector or soapy water. - 4
Remove the old heater
With the connections detached, lift the old heater from its mounting and move it to a safe disposal area. Use a helper if the unit is heavy or awkward to maneuver.
Tip: Place a blanket or moving pads to protect walls and floors during removal. - 5
Prepare the new heater and vent
Position the new heater on a level pad. Check clearance to walls and cabinets and attach the venting to ensure proper drafting. Confirm the vent material matches your unit’s requirements.
Tip: Verify vent clearance and alignment before final seating to avoid rework. - 6
Connect water and gas lines
Attach the cold-water inlet and hot-water outlet, plus the gas supply line with the new connector. Install the T&P valve and discharge piping per manufacturer instructions. Tighten joints without over-torquing.
Tip: Use sealant or thread tape rated for gas on threads only; do not apply to water threads. - 7
Test, vent, and ignite
Turn on gas supply and check for leaks with soapy water. Refill the tank, bleed air, and light the burner according to the manufacturer’s instructions. Confirm proper flame color and draft in the vent.
Tip: Have a flashlight handy to inspect the ignition area and flame for uniform color. - 8
Finalize and cleanup
Secure the unit, remove temporary caps, and clean the area. Schedule a professional inspection if required by local codes and document all warranty information for future reference.
Tip: Take photos of connections for future maintenance records.
Got Questions?
Do I need a permit to replace a gas water heater?
In many areas, replacing a gas water heater requires a permit and inspection to verify venting and safe gas connections. Check with your local building department before starting.
Most regions require a permit and inspection for gas heater replacement. Check with your local building department.
Can I replace a gas water heater myself?
DIY replacement is possible in some jurisdictions for skilled homeowners, but many areas require a licensed gas fitter due to safety concerns. If you’re uncertain, hire a pro.
DIY is possible in some places, but many codes require a licensed professional for gas work.
What size should I install?
Size should match peak hot-water demand and be compatible with your home’s venting and gas supply. A professional can calculate the right First-Hour Rating (FHR) for your household.
Choose a size based on your household demand and venting capacity.
What about venting and safety features?
Ensure the venting is properly matched to the new unit and installed per manufacturer instructions. Include safety features like proper T&P relief valves and CO detectors in living areas.
Vent correctly and install safety features; detectors are essential.
Is there a typical cost range I should expect?
Replacement costs vary based on unit size, venting needs, and labor. Expect a broad range, with higher costs if venting or gas line work is needed. Get multiple estimates for comparison.
Costs vary; get several estimates and consider long-term energy savings.
What maintenance after replacement is recommended?
Schedule an annual inspection, flush the tank to remove sediment, test the T&P valve, and check gas connections for leaks. Regular maintenance improves safety and efficiency.
Annual checks keep it safe and efficient.
Watch Video
The Essentials
- Plan permits and code compliance before starting.
- Safety and venting are non-negotiable.
- Accurate sizing improves efficiency and hot water availability.
- Verify all gas and water connections for leaks with soapy water.
- Document installation steps for future maintenance.