How to Change a Water Heater: A Complete Guide
A comprehensive, step-by-step guide to replacing a water heater, including tanked vs tankless, sizing, safety permits, installation tips, and maintenance, with cost considerations from Heater Cost.

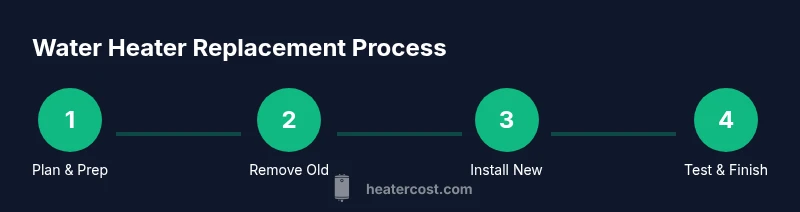
This quick guide explains how to change a water heater, including choosing tanked vs tankless, selecting the right size, and confirming venting and gas connections. According to Heater Cost, plan for safety, check local codes, and consider hiring a pro for gas venting. Gather tools and shut off utilities before you begin.
Why Replace Instead of Repair
A water heater is a central part of home comfort and safety. Over time, repairs become less reliable, and energy bills rise when an aging unit runs inefficiently. Replacing an older heater with a modern model can improve hot water reliability, cut energy use, and reduce the risk of leaks. When deciding whether to repair or replace, consider the unit's age, history of failures, energy costs, and the cost of parts. Heater Cost analysis shows that a thoughtful replacement can yield long-term value by increasing efficiency and reducing unexpected outages (Heater Cost Analysis, 2026). The Heater Cost team found that planning ahead often results in lower total ownership costs compared with ongoing repair cycles. This section helps you weigh the options and plan a safe, code-compliant replacement.
Choosing the Right Type: Tanked vs Tankless, Gas vs Electric, Sizing
Today’s water heaters come in several configurations. Tanked models store hot water in a reservoir, while tankless units heat on demand. Gas models typically offer faster recovery and lower operating costs in colder climates, while electric units are easier to install in tight spaces. When sizing, base decisions on household hot water usage, incoming water temperature, and heater efficiency. According to Heater Cost, selecting the right type and size can influence energy bills and comfort for years to come. This section breaks down the trade-offs and helps you pick a configuration that fits your home and budget.
Cost Considerations and Long-Term Savings
Initial purchase price is only part of the equation. Installation costs, venting or electrical work, and permits can add substantially to the total. Energy efficiency affects ongoing operating costs, and newer models often offer improved insulation and faster recovery. Heater Cost analysis shows that higher-efficiency replacements typically pay back over time through reduced energy use and fewer emergency repairs (Heater Cost Analysis, 2026). Plan for potential ancillary costs such as expansion tanks or new piping, and compare quotes from licensed professionals to balance upfront price with long-term value.
Safety, Permits, and Professional Installation
Replacing a water heater involves gas lines or electrical connections, venting, and thermal expansion considerations. Local codes often require permits and a licensed installer for gas and vent work. Always verify that the installer follows current code requirements, uses approved fittings, and conducts a pressure/vent test after installation. The Heater Cost team emphasizes safety and compliance as the top priorities when changing a water heater.
Maintenance After Replacement
A successful replacement includes a plan for ongoing maintenance. Schedule annual inspections, flush the tank or condenser as recommended, and monitor pressure relief devices for proper operation. Regular maintenance helps extend the life of your new unit and keeps performance consistent. Keep a maintenance log and set calendar reminders for filters, anode checks, and service visits.
Financing, Warranties, and Getting the Best Deal
Understand warranty terms and what they cover, including labor and parts. Compare financing options and rebates from manufacturers, utilities, and local programs. A well-planned purchase can balance upfront costs with long-term savings, especially when you factor in potential energy credits and service plans.
Tools & Materials
- Safety equipment (gloves, goggles)(Protective gear to handle sharp edges and spills)
- Adjustable wrench(For threaded connections and fittings)
- Pipe wrench(For holding and turning pipes)
- Channel-lock pliers(Grip hoses and fittings firmly)
- Screwdrivers (flathead and Phillips)(General disassembly and mounting)
- Teflon tape (PTFE) for water and gas connections(Seal threads on joints)
- Drain pan and hose(Catch water during draining)
- New water heater (with vent kit if gas)(Select size and type before starting)
- Vent kit and chimney connector (gas unit)(Required for vented gas models)
- Gas-rated pipe sealant or joint compound(Use only where code allows)
- Expansion tank (if required by system)(Install as needed by code)
- Electrical tester or multimeter (for electric units)(Safety check before handling wiring)
- Soap solution or leak detector(Check for leaks at all connections)
- Digital thermometer or thermostat tester(Verify temps after start-up)
Steps
Estimated time: 3-6 hours
- 1
Shut off water supply to the heater
Close the cold-water shutoff valve to the heater. Then open a hot water tap nearby to relieve pressure in the system. This reduces the risk of steam, splashing, or sudden water flow when disconnecting lines.
Tip: Have a bucket handy for any residual water and verify the valve is fully closed before proceeding. - 2
Power down utilities for safety
Turn off electricity at the breaker panel for electric heaters, or shut off the gas supply for natural gas units. If the unit is connected to a thermostat that’s programmable, note settings for later reprogramming.
Tip: Use a non-contact voltage tester to confirm power is off before touching wiring. - 3
Drain the tank completely
Attach a drain hose to the tank drain valve and direct it to a floor drain or bucket. Open the valve slowly to avoid splashing. Wait for the tank to drain fully before removing connections.
Tip: Keep towels handy and wear gloves to handle cold water and sharp edges. - 4
Disconnect inlet/outlet lines and venting
Carefully disconnect cold water supply, hot water outlet, and vent or gas lines. Cap off any open lines to prevent debris from entering. Label hoses if you plan to reuse them.
Tip: Take photos as you go to help reassembly. - 5
Remove the old heater and prepare space for the new unit
Slide the old heater out of its location or detach mounting hardware to free space. Clear a sturdy, level platform and ensure access to all connections for the new unit.
Tip: Check for corrosion or damage in the surrounding area and address before installing the new unit. - 6
Install the new water heater and connect lines
Position the new heater, connect the cold water inlet and hot water outlet, and attach venting or electrical connections as required. Use proper fittings and sealant, and ensure clearances meet code.
Tip: Always verify gas venting with a professional if you’re uncertain. - 7
Fill, test, and set the thermostat
Fill the tank with water, bleed air from lines, and check for leaks at every connection. Set the thermostat to a safe temperature and run a test cycle to confirm hot water delivery.
Tip: Monitor for leaks and listen for abnormal noises during the first run. - 8
Restore power or gas and perform final safety check
Turn on power or gas supply and operate the unit. Confirm pilot or electronic ignition functions properly and check for proper venting and exhaust.
Tip: If anything seems off, turn off the unit and call a licensed professional.
Got Questions?
How do I know if I should replace my water heater instead of repairing it?
If the unit is old, leaking, or requires frequent repairs, replacement is often more reliable and cost-effective in the long term. Consider energy efficiency gains and compatibility with your home’s hot-water needs.
If your heater is aging, leaking, or costing more in repairs, replacement is usually the smarter choice.
Do I need a permit to replace a water heater?
Many jurisdictions require permits for water heater replacement, especially for gas or vent work. Check with your local building department or a licensed installer.
Permits are commonly required for gas and vent work; check your local rules.
Can I install a tankless water heater myself?
Tankless installations involve electrical, gas, and venting considerations. It’s best to hire a licensed professional unless you have extensive training and local code authorization.
Tankless installs are complex; most homeowners should hire a pro.
What maintenance should follow a replacement?
Schedule annual inspections, flush protocols as recommended by the manufacturer, check the expansion tank and pressure relief valve, and keep documentation for warranties.
Keep up with annual checks and flushing as recommended.
What are the signs of a failing water heater?
Look for inconsistent hot water, unusual noises, rust in water, or visible leaks. These signs indicate an appliance nearing end of life or a need for repair.
If you notice rusty water, noises, or leaks, plan for service or replacement.
Should I consider energy efficiency when replacing?
Yes. Compare energy factors and efficiency ratings; newer models often save energy and reduce operating costs over time.
Energy-efficient models save energy and reduce costs over time.
Watch Video
The Essentials
- Plan replacements with code compliance in mind
- Choose tanked vs tankless based on usage and space
- Prioritize safety and professional help for gas work
- Factor long-term savings in energy efficiency
- Document maintenance for longevity