Replace Water Heater Tank: A Complete How-To Guide
Learn how to safely replace a water heater tank, estimate costs, and maximize longevity with step-by-step instructions and expert guidance from Heater Cost.

This guide shows you how to replace a water heater tank safely and efficiently, covering planning, sizing, required tools, and a clear installation sequence. Whether you’re DIY-minded or coordinating with a professional, you’ll learn the steps, safety checks, and common mistakes to avoid for reliable hot water. According to Heater Cost, selecting the right model and proper installation are key to long-term efficiency and peace of mind.
Why replace water heater tank might be necessary
There are several reasons homeowners decide to replace a water heater tank rather than keep repairing an aging unit. Rusty corrosion, chronic leaks, rising energy bills, and persistent hot-water shortages are common indicators that a replacement is more cost-effective in the long run. When the tank is approaching the end of its expected life, small issues can cascade into bigger failures, leaving you without hot water during peak seasons. Another consideration is safety: a failed tank can lead to floods, and in gas models, improper venting creates a risk of carbon monoxide buildup. According to Heater Cost, replacing a water heater tank offers the best balance of reliability, energy efficiency, and long-term value when the existing unit shows repeated faults, higher standby losses, or oversized repairs. This section will help you identify the signs that a replacement is warranted and distinguish them from routine maintenance tasks.
Assessing the right time to replace
Timing a replacement depends on several factors, including the tank’s age, the frequency of repairs, and the cost of maintaining an older unit. If the unit is past its expected life span for its fuel type, frequent leaks occur, or the energy bills trend upward after thermostat adjustments, it is worth exploring a replacement. Look for rust on the tank's exterior, a weakened anode rod, or sediment buildup that reduces efficiency. Also consider the availability of newer models with better insulation and lower standby losses. Heater Cost analysis shows that homeowners who plan ahead—measuring expected savings from improved efficiency and ensuring proper sizing—often experience less downtime and smoother transitions than those who replace reactively after a catastrophic failure. Collect your home’s hot-water demand data and compare it to the new model’s capacity to avoid undersizing or oversizing.
Replacement vs repair: making the call
Repairing a broken component can be cheaper in the short term, but repeated fixes for an aging tank may exceed replacement costs over time. A tank with multiple leaks, a corroded shell, or frequent valve failures is unlikely to recover reliability. Replacement offers the opportunity to choose a model with modern energy efficiency and the right capacity for your household’s usage. If your current heater is gas-fired, consider improved venting and a newer, safer combustion chamber design. Electric tanks also benefit from updated insulation and smoother temperature control. The decision should weigh the total cost of ownership, including installation, maintenance, and energy use, against the risk and inconvenience of ongoing repairs. The Heater Cost team recommends running a simple break-even calculation to estimate payback time, then choosing the option that minimizes downtime and maximizes comfort.
Planning your replacement: permits, energy, and sizing
Before you purchase a new tank, map out the critical steps: determine fuel type, sizing, and location, and check local codes for permits. A correctly sized tank delivers reliable hot water and efficient energy use. To determine capacity, consider your household size, peak hot-water usage, and simultaneous draw. A larger tank can prevent short bursts of cold water, but it consumes more energy and takes longer to heat water. When budgeting, remember that professional installation often includes protective features like pressure relief valves, anti-scald devices, expansion tanks, and proper venting for gas models. The Heater Cost analysis emphasizes aligning your decision with local regulations and ensuring that the installation meets safety requirements. Keep a clear project timeline and ensure access to the installation area for equipment and inspectors.
Sizing a new tank: how to choose capacity
Selecting the right capacity hinges on your household’s demand and the number of bathrooms, occupants, and typical bathing patterns. Start with a conservative calculation based on daily hot-water needs and peak usage. If your current tank runs dry during morning showers, you may want to target a higher capacity. Conversely, a very large tank can waste energy by maintaining unnecessary standby heat. In addition to capacity, evaluate energy efficiency ratings, standby loss, and warranty terms. For gas models, verify vent compatibility and input rating; for electric units, ensure your electrical system can handle the load. The key is balancing comfort with efficiency. Heater Cost's guidance suggests documenting your requirements, then conferring with a licensed plumber or installer to resize correctly. A mis-sized unit can negate the benefits of replacement.
Fuel type options: gas vs electric
Gas-fired tanks typically offer faster recovery and lower operating costs in many regions, but they require venting, gas supply connections, and a dedicated floor installation space. Electric tanks are easier to install in many homes, produce fewer emissions indoors, and often have simpler venting requirements, but may require service upgrades depending on existing electrical panels. When evaluating fuel type, consider fuel availability, installation complexity, and long-term energy costs. Efficiency improvements, insulation, and thermostat controls matter for both types. The Heater Cost team notes that the right choice depends on your home’s infrastructure, local energy prices, and how you use hot water. Consulting a licensed professional helps ensure you meet code during installation and achieve the predicted energy savings.
What to expect during installation
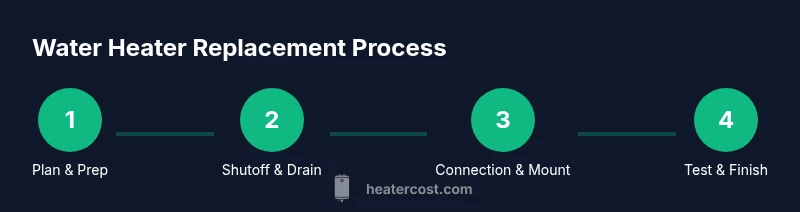
Though specifics vary by model and installer, the replacement typically follows a predictable sequence: safely shut off power and utility supplies, drain the old tank, disconnect connections, remove the unit, position the new tank, install venting or electrical connections, fill, and test for leaks and proper operation. Expect temporary interruptions to hot water during the process. A well-planned installation includes inspecting the venting system (for gas models), replacing an expansion tank if required, and calibrating the thermostat for comfort and safety. The process may require a permit in some jurisdictions, and a professional should verify that your system complies with local code. After completion, flush the system, inspect all fittings, and clean the work area.
Safety and code considerations
Replacing a water heater tank involves potentially hazardous work, including the handling of gas lines, electrical connections, and high-temperature water. Always shut off the appropriate power source and the gas or water supply before starting. If you are unsure about any step, hire a licensed plumber or HVAC technician. For gas models, proper venting and combustion air are essential to prevent carbon monoxide buildup. In many communities, a permit is required for replacement, and inspections confirm that the installation meets local codes. Keep a fire extinguisher accessible, and ensure that the work area is dry to avoid slips and electrical hazards. Safety should guide every decision from disconnect to commissioning.
Costs and budgeting strategies
While the exact price of replacing a water heater tank depends on location, fuel type, tank size, and installation complexity, you can plan for a broad budget range by separating unit cost from labor and permit fees. Getting multiple bids helps, and asking for a breakdown of included services clarifies the value. If you’re upgrading to a higher efficiency model, expect potential energy savings over time, which can offset upfront costs. Don’t forget about accessories such as expansion tanks, new venting components, and venting materials for gas models. The Heater Cost analysis cautions against cutting corners on quality or safety features to save a few dollars, since a poorly installed unit can cause leaks, poor performance, or safety hazards. Plan for a realistic timeline and avoid rushing through the replacement.
Maintenance after replacement to maximize longevity
To extend the life of your new tank, follow a routine maintenance plan. Schedule regular flushing to remove sediment, inspect and replace the anode rod as recommended, and test the pressure relief valve periodically. Verify that the thermostat is set to a safe and comfortable temperature, typically around 120 degrees Fahrenheit, and check for any signs of leaks around connections. If you installed an expansion tank, monitor its function and ensure it remains properly vented (for gas models). Resetting the system after power outages and understanding warranty coverage can also help you protect your investment. A proactive maintenance approach reduces the likelihood of expensive repairs and prolongs tank life, while maintaining consistent hot water performance.
Common mistakes to avoid
Common missteps include undersizing the new tank, skipping permits, neglecting venting requirements for gas units, and failing to perform a thorough leak test after commissioning. Another frequent error is applying incorrect sealing compounds or thread tape, which can lead to leaks or pressure problems. Not accounting for future hot-water demand or ignoring local codes can increase operating costs or create safety issues. Lastly, failing to plan for essential safety features, such as expansion tanks and anti-scald valves, reduces the system’s effectiveness and longevity. Take time to verify compatibility with your home’s electrical or gas infrastructure and consult a professional when in doubt.
Tools & Materials
- Safety gear (gloves, goggles)(Heat-resistant gloves recommended for handling hot water and metal components)
- Adjustable wrench(For connections on supply lines and drain valve)
- Pipe wrench (2–4 inch)(To grip larger fittings without slipping)
- Screwdrivers (flathead and Phillips)(For removing mounting screws and panels)
- Drain pan and towels(To catch water and prevent spills)
- Shut-off tools (gas shutoff key or water shut-off wrench)(Close main supply or gas valve before starting)
- New water heater tank(Ensure correct size and type (gas/electric) before purchase)
- Expansion tank (if required by code)(Helps manage pressure and codes)
Steps
Estimated time: 3-6 hours
- 1
Shut off utilities and prep
Turn off the electrical supply to the unit at the service panel or disconnect switch for electric models. Close the gas valve or main water supply as appropriate, and secure the area. Wait for the system to cool if hot water has been circulating.
Tip: Verify power is off with a non-contact tester before touching any wires. - 2
Drain the old tank
Attach a drain hose to the tank’s drain valve and run it to a drain or bucket. Open a hot water faucet elsewhere in the home to vent air and speed drainage. Allow the tank to empty completely before disconnecting fittings.
Tip: Keep a bucket under the drain for any residual water remaining in the tank. - 3
Disconnect existing connections
Carefully loosen and remove water supply lines, gas line (for gas models), and electrical connections. Label or photograph connections to aid reassembly. Be mindful of residual pressure and water temperature.
Tip: Prepare for water spray; have towels and a dust pan ready. - 4
Remove the old tank
With the connections detached, use proper lifting techniques and a helper if needed to remove the unit from its space. Clear the area for the new tank and inspect the venting path or electrical conduits.
Tip: Don’t rush the lift; tanks are heavy and awkward. - 5
Install the new tank
Place the new tank in position, connect venting (for gas), gas line or electrical connections, and water supply lines. Install the expansion tank if required by code, and ensure fittings are snug but not overtightened.
Tip: Check that venting and gas lines sit properly and are free of obstructions. - 6
Fill, test, and adjust
Open the main water supply to fill the tank. Bleed air from the system by opening a hot faucet until water flows steadily. Check for leaks, test the temperature setting, and restore power or gas supply.
Tip: Set the thermostat to a safe 120°F (49°C) to reduce scald risk.
Got Questions?
Do I need a permit to replace a water heater tank?
Permit requirements vary by city and country. In many places, replacement requires inspection and adherence to safety codes, especially for gas models. Check with your local building department to confirm. Hiring a licensed professional can simplify the permit process.
Permit requirements vary by location; check with your local building department or hire a licensed pro to handle permits.
Can I replace a water heater tank myself, or should I hire a pro?
If you have plumbing, gas, and electrical experience, you may replace a tank yourself. However, the project involves handling gas lines, venting, and high-temperature water, which carry safety risks. For most homeowners, hiring a licensed plumber or HVAC technician is recommended to ensure code compliance and safety.
This is a risky project for non-professionals; consider hiring a licensed pro to ensure safety and code compliance.
What is the typical lifespan of a water heater tank?
Most tanks last 8–12 years depending on usage, water quality, and maintenance. If you notice frequent leaks, sediment buildup, or loss of efficiency, it may be time to replace rather than repair.
Most tanks last about a decade; frequent issues suggest replacement is a better choice.
How long does a water heater replacement take?
A standard replacement typically takes a few hours for a trained professional. If permits or electrical work are required, it can extend the timeline by a day or two.
Expect a several-hour process, with potential extra time for permits or upgrades.
What maintenance helps extend the life after replacement?
Schedule annual flushing to remove sediment, inspect the anode rod, and test the pressure relief valve. Keep the thermostat at a safe setting and check for leaks around fittings.
Keep up with annual flushing and inspections to maximize longevity.
Watch Video
The Essentials
- Plan replacement before removing the old unit
- Size the new tank to match hot-water demand
- Obtain necessary permits and follow code requirements
- Test thoroughly for leaks and proper venting after installation