Why Is My Water Heater Not Working? A 2026 Troubleshooting Guide
Urgent troubleshooting guide to diagnose why your water heater isn’t working, with step-by-step checks, safety tips, and when to call a pro.

Why is my water heater not working? The most common causes are a tripped breaker, an off gas valve, or a failed thermostat or heating element. Begin with quick fixes: reset the circuit breaker, verify the gas supply, and check the thermostat setting. If no hot water remains, follow the diagnostic flow for safe, step-by-step troubleshooting.
Understanding Why Water Heaters Stop Working
When the hot water suddenly runs cold or disappears, it can feel urgent. If you’re asking why is my water heater not working, you’re not alone; many homeowners face this issue at the worst possible moment. According to Heater Cost analysis, the most common culprits are electrical or fuel-supply problems, faulty thermostats, or aging components. This section helps you identify the likely cause and decide whether to fix it yourself or call a pro. Start with core checks: confirm power to the unit, verify gas valves are open if you have a gas model, and inspect the thermostat setting. For electric models, test the reset button and verify the circuit breaker hasn’t tripped. For storage tanks, sediment buildup can reduce efficiency and eventually block hot water. Tankless systems can fail due to mineral buildup or sensor faults. Keep a simple symptom log to speed diagnosing with a technician.
Safety First: Immediate Steps to Take
Safety is non-negotiable when dealing with water heaters. If you smell gas, hear prolonged hissing, or notice scorch marks, leave the area immediately and call emergency services. For non-emergency scenarios, shut off power at the breaker before touching the unit, and if you have a gas model, ensure the gas supply is on only when you plan to inspect. Do not attempt hot-work or full disassembly without proper tools and guidance. Protective gloves and eye protection are prudent, and never remove access panels on a live system. The goal is to avoid electric shock, gas leaks, or scalding injuries while you diagnose the fault.
The Most Common Causes in 2026
The landscape of water heater problems has shifted with aging systems. Common issues include a tripped circuit breaker or blown fuse, a shut-off gas valve, a faulty thermostat, and heating element failure in electric units. Sediment buildup in traditional tanks is still a frequent culprit, especially in areas with hard water. Tankless models contend with mineral buildup and flow sensor faults. If you notice inconsistent hot water temperatures or reduced flow rates, these symptoms often point to one of the above causes. Heater Cost analysis shows that many homeowners resolve issues with simple fixes, but the decision to repair or replace hinges on the unit’s age and energy efficiency.
How to Read Your System: Gas vs Electric
Gas water heaters rely on an active gas supply and a standing pilot or electronic ignition. Electric models depend on a stable electrical supply and healthy heating elements. In both cases, your thermostat regulates temperature and can drift or misread, causing cold patches or scorching. Gas models have burners that can become clogged, while electric units rely on one or two elements that may burn out over time. Understanding these differences helps you target the right component during troubleshooting and reduces unnecessary guesswork.
Diagnostic Flow: A Practical Path to Diagnosis
This flow starts with the simplest checks and moves toward component testing. If the symptom is lack of hot water, first verify power and fuel supply, then inspect thermostat settings. If still unresolved, test the heating element or burner, and finally consider sediment buildup or leaks. Document each step with dates and observed signs to share with a professional. If you encounter a gas smell, water pooling near the heater, or sudden temperature swings, stop and contact a licensed technician immediately.
Step-by-Step Fixes for the Most Common Issues
Follow these steps in order to fix the most common faults safely. Step 1: Power off at the breaker and shut off the gas valve (if applicable) before any inspection. Step 2: Check the breaker, fuses, and reset buttons; reset the thermostat and ensure it is set to a safe range. Step 3: Inspect the gas supply line and venting for obstructions if you have a gas heater. Step 4: For electric units, test or replace heating elements and thermostat sensors. Step 5: If you have a storage tank, flush the tank to remove sediment. Step 6: Look for leaks around valves and fittings and tighten or replace as needed. Step 7: After reassembly, restore power and test hot water. If the issue persists, proceed to professional service.
Prevention and When to Call a Pro
Preventive maintenance reduces the chances of future outages. Schedule an annual check, drain the tank to remove sediment if you have a storage unit, and replace aging components before they fail. If your system is gas-powered, pay attention to pilot lights and venting, and never work on gas lines without a licensed professional. The Heater Cost team emphasizes that complex electrical or gas-related issues should be handled by trained technicians to avoid safety hazards and ensure code compliance.
Steps
Estimated time: 60-90 minutes
- 1
Power off and safety check
Shut off power at the circuit breaker and shut off gas supply if you have a gas model. Wait for the unit to cool and disconnect power before touching any components. This protects you from electric shock and gas leaks while you inspect.
Tip: Use a non-contact voltage tester to confirm no live current before touching wires. - 2
Verify power and fuel supply
Ensure the breaker is on, the fuse is intact, and the gas valve is fully open if applicable. Look for a reset button on electric models and press it after waiting 30 seconds. If you notice irregular burner flame or igniter problems, document it for a technician.
Tip: Take a photo of the control panel before resetting to reference settings later. - 3
Inspect thermostat and temperature settings
Check the thermostat setting; typically 120°F (49°C) is a good baseline. If the thermostat is digital, perform a factory reset if available. For stubborn readings, consider calibrating or replacing the thermostat sensor.
Tip: Avoid setting the temperature too high to prevent scalding hazards. - 4
Test heating elements or burners
For electric units, test each heating element with a multimeter and replace any that test open or shorted. For gas units, inspect the burner for clogs and clean carefully if you are experienced; never strike at gas burner components.
Tip: Only perform element tests with the power disconnected. - 5
Flush the tank (storage models)
Drain a storage tank to remove sediment buildup, then refill and bleed air from the lines. This helps restore efficiency and heating capacity. Use a hose to direct water to a safe location and avoid splashing.
Tip: If you notice metallic smell or heavy sediment, plan a professional flush with the right equipment. - 6
Check for leaks and fittings
Inspect inlet/outlet connections, relief valve, and drain valve for signs of leaks. Tighten fittings if safe, replace damaged valves, and ensure the temperature-and-pressure relief valve is functioning correctly.
Tip: A small drip can indicate a loose connection; never overtighten metal fittings. - 7
Restore power and test
Reconnect power or gas supply and turn the unit back on. Run hot water from several taps to verify consistent warm temperatures. If problems persist, record symptoms and call a pro.
Tip: Observe for any unusual noises or fluctuating temperatures during testing.
Diagnosis: Water heater not working
Possible Causes
- highPower issue (tripped breaker or blown fuse)
- highGas supply off or gas valve closed
- mediumThermostat miscalibration or failure
- mediumHeating element failure (electric) or burner issue (gas)
- lowSediment buildup in storage tank
- lowLeaks or valve/fittings problems
Fixes
- easyReset breaker, replace fuses, and restore electrical supply
- easyTurn on gas valve and verify gas flow to the unit
- easyAdjust thermostat to recommended range and test water temperature
- mediumTest and replace heating element or burner as needed
- mediumFlush tank to remove sediment and restore flow
- hardRepair or tighten leaks; replace hoses/valves if necessary
Got Questions?
Why is my water heater not working after a power outage?
Power outages can trip the circuit or reset digital controls. After a outage, reset the breaker and recheck the thermostat and elements. If problems persist, consult a professional.
Power outages can trip the breaker and reset controls; reset the breaker, recheck the thermostat and elements, and call a pro if needed.
Can I fix a gas water heater myself?
Gas repairs carry significant safety risks. If you suspect a gas issue, or if you smell gas, exit and contact a licensed professional. Simple checks can be done safely, but avoid intrusive gas work yourself.
Gas work is risky; if in doubt, call a licensed professional.
Why is there no hot water but cold water is available?
Possible causes include a tripped breaker, failed heating element or burner, thermostat missetting, or sediment buildup reducing heat transfer. Work through the diagnostic flow to isolate the cause.
No hot water usually means a power, element, or thermostat issue—work through the flow to find it.
What is the typical lifespan of a water heater?
Most residential water heaters last about 8-12 years depending on use and maintenance. If your unit is older or inefficient, replacement can be cost-effective in the long run.
Most heaters last 8 to 12 years; older units may be more expensive to run and could be worth replacing.
Should I flush my water heater and how often?
Flushing removes sediment that reduces efficiency. Do this annually for storage tanks or as recommended by your manufacturer. A professional flush is advised for tough deposits.
Yes, flush annually to keep efficiency up; call a pro for tough buildup.
Is it safe to drain a water heater myself?
Draining can be done safely with proper steps: turn off power, connect a hose, and drain to a safe location. If you're unsure, hire a licensed technician to avoid scald injuries or a flooded area.
It can be safe if you follow the steps, but if you're unsure, hire a pro.
Watch Video
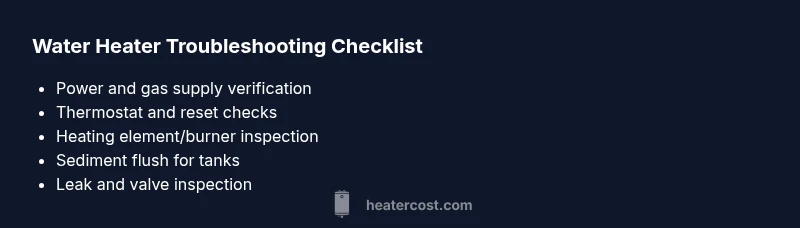
The Essentials
- Power and fuel checks first; most failures start there.
- Thermostat and heating elements are common failure points.
- Sediment and mineral buildup mimic several faults.
- Call a pro for gas, electrical, or unknown faults to ensure safety.