Water Heater Not Heating? A Practical Troubleshooting Guide
Comprehensive guide to diagnose and fix a water heater that won't heat, with step-by-step checks, safety tips, and maintenance ideas for homeowners and pros.

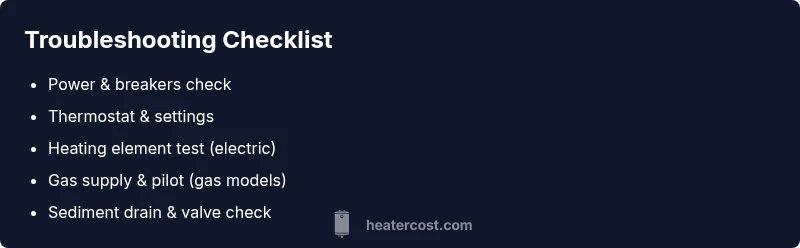
Most often, a water heater that won’t heat is due to power issues, a thermostat setting, or a failed heating element for electric models, or a gas supply/pilot issue for gas models. Quick fix: reset the breaker, verify the thermostat is set to 120°F (or the manufacturer’s recommended setting), and check for a blown fuse or tripped switch; if unresolved, call a pro.
Quick home checks for a water heater that does not heat
If the water heater does not heat, start with simple power and fuel checks before diving into parts. According to Heater Cost, most failures trace back to power, thermostat, or controllable components. A quick scan now can save a service call. Inspect the electrical supply and fuel availability, because a non-heating water heater often means the basic systems have tripped or shut down. In many homes, the phrase water heater does not heat appears in service requests, highlighting that homeowners want fast, safe answers.
- Check power: Is the breaker on? Is the GFCI tripped? Is there power to the outlet or disconnect? Reset breakers and reset GFCI outlets. If you observe frequent trips, there may be an overload or a faulty circuit.
- Inspect the thermostat: On electric models, confirm thermostat is set to a safe temperature (often 120°F). For gas models, ensure gas supply and pilot function are available, because a mis-set thermostat can cause the unit to heat insufficiently or not heat at all.
- Look for visible signs: corrosion, leaks, or scorching on electrical components; skip dangerous steps and call a pro if you are unsure.
This first set of checks addresses the most common causes of a non-heating water heater and is designed for quick, safe sanity checks.
Electric water heaters: thermostat, heating elements, and safety switches
When the water heater does not heat on electric models, the most common culprits are a failed heating element or a faulty thermostat. Start by turning off power at the circuit breaker to avoid shock, then test the thermostat with a multimeter and inspect the heating element for continuity. If there is no continuity, the element should be replaced. Thermostat failure can mimic a bad element, so verify setpoint accuracy and check for loose wiring. Age matters here; older units are more prone to element burnout and thermal cycling problems. Heater Cost’s analysis shows that many heating failures are linked to user-accessible components, not a full system replacement. For safety, never work on live circuits; if in doubt, call a licensed electrician.
- Check the breaker and any fuses: a tripped breaker or blown fuse is the easiest fix with an immediate impact.
- Test for element continuity: a lack of continuity means the element is burnt out and must be replaced.
- Verify thermostat setting and wiring: a mis-set thermostat or loose wire can prevent heating even if the element is fine.
Gas water heaters: pilot light, thermocouple, and gas control
For gas-fired units, the need to heat water may be blocked by fuel supply issues rather than the heating mechanism itself. A common cause is a pilot light that won’t stay lit or a faulty thermocouple. Start by confirming the gas valve is open and there is gas supply to the appliance. If the pilot ignites but goes out, inspect the thermocouple for a bent or dirty tip. Clean or reposition as needed, and replace if corrosion is present. If the thermostat or gas control valve is malfunctioning, the burner may not ignite properly. Do not attempt dangerous gas repairs yourself; contact a licensed plumber for stubborn problems or to replace worn components. Heater Cost notes that early intervention can prevent larger safety risks such as gas leaks or CO formation.
- Ensure the gas supply is on and the valve is fully open.
- Inspect the pilot and thermocouple: clean if dirty, replace if damaged.
- Check the burner for consistent ignition and flame quality.
Sediment buildup, valve issues, and temperature controls
Sediment in the tank can insulate water from the heating element or burner, reducing heat transfer and making the unit feel like it isn’t heating. Flushing the tank can restore heating capacity and extend the life of the unit. Check inlet and outlet temperature and ensure the temperature and pressure relief valve (TPR) is functioning; a faulty TPR won’t cause the unit to stop heating, but it is a critical safety feature to verify during maintenance. Water heater drain valves can accumulate minerals that affect flow and heating, particularly in hard-water regions. Regular flushing can stave off mineral buildup and improve efficiency. If the valve is leaking or stuck, professional service is recommended. Heater Cost’s guidance emphasizes routine maintenance to avoid abrupt failures and preserve energy efficiency.
- Flush the tank to remove sediment buildup.
- Inspect the TPR valve for proper operation.
- Check the cold-water inlet for flow restrictions and potential valve issues.
Electrical safety, grounding, and safe testing practices
Electrical issues pose the most immediate safety risk when diagnosing a water heater. Always disconnect power before inspecting any electrical connection. Use a non-contact voltage tester to confirm circuits are dead before touching wires. If you notice scorch marks, buzzing, or a burning smell, shut off power at the main disconnect and call a pro immediately. When dealing with gas, never bypass safety controls or tamper with the venting system. Homeowners should be especially careful about gas leaks or CO risk; if you suspect a leak or CO presence, evacuate and call emergency services. The Heater Cost team recommends scheduling annual safety checks for both electric and gas models.
- Always turn off power at the breaker before touching wiring.
- Use proper testing equipment and follow manufacturer instructions.
- If you feel unsure, stop and call a professional.
When to call a professional and warranty considerations
If basic checks fail to restore heat, and you feel uncertain about electrical or gas work, it’s time to call a professional. Replacing a heating element or thermostat on an electric unit and repairing gas controls require specialized tools and knowledge. Warranty status matters; many warranties cover specific components for a limited time, but improper maintenance or DIY repairs can void coverage. Heater Cost recommends documenting conditions and dates of service when you contact a pro, to help diagnose and keep your system covered under warranty when applicable. A professional assessment can also determine if a replacement unit is more cost-effective than continuing to repair.
- When in doubt, call a licensed technician.
- Check warranty coverage and document service history.
- Consider total cost of ownership and energy efficiency when deciding on a replacement.
Preventive maintenance to extend heat and reliability
Preventive maintenance is the best defense against a heater that does not heat. Schedule an annual service to inspect electrical connections, gas lines, venting, and the burner. Regular flushing to remove mineral buildup, inspecting the sacrificial anode rod (for tank systems), and testing the thermostat and safety devices can extend the life of the unit and preserve performance. For owners of older units, a cost-benefit analysis may indicate replacement could offer better long-term reliability and energy savings. Heater Cost suggests keeping a simple maintenance log, including dates of flushes, element replacements, and thermostat checks, to identify patterns that precede failures.
- Schedule yearly professional inspections.
- Flush and drain the tank regularly according to manufacturer guidelines.
- Replace aging components before failures occur.
Steps
Estimated time: 60-120 minutes
- 1
Power down and safety check
Turn off power at the breaker and verify there is no live voltage to the unit before touching any wiring. Use a non-contact tester to confirm dead lines. This prevents shock and injury as you begin diagnostics.
Tip: Always confirm power is off before removing panels. - 2
Check breaker/fuse and electrical supply
Reset any tripped breakers and inspect the disconnect. If the breaker trips again, there is likely an underlying fault in wiring or a short in the heater circuit.
Tip: Do not bypass a tripped breaker; investigate underlying causes. - 3
Test thermostat and wiring (electric models)
With power off, verify thermostat settings and test for continuity. Loose wires can mimic thermostat failure. Tighten connections and replace faulty components as needed.
Tip: Label wires before disconnecting to ensure correct reattachment. - 4
Inspect or replace heating element
Remove access panel and test the heating element with a multimeter. If no continuity is found, replace the element. Reassemble and restore power for a test run.
Tip: Be cautious of hot water and sharp edges inside the tank. - 5
Gas model checks: pilot and thermocouple
Ensure the gas valve is open and the pilot will ignite; inspect the thermocouple for corrosion or misalignment. Clean or replace as needed with professional help if ignition fails.
Tip: Never force the pilot; improper handling can cause gas leaks. - 6
Flush and inspect for sediment
Drain the tank to remove sediment that can hinder heat transfer. Inspect the inlet valve and ensure the TPR valve operates smoothly, replacing if needed.
Tip: Flushing should be done with the power off and with proper PPE. - 7
Decide on repair vs. replacement
If multiple components fail or the unit is aging, evaluate replacement versus repair. A licensed pro can provide an accurate cost-benefit analysis and discuss energy-efficiency upgrades.
Tip: A pro can confirm warranty coverage and long-term savings.
Diagnosis: Water heater does not heat
Possible Causes
- highPower issue (tripped breaker, blown fuse, disconnected supply)
- highThermostat mis-set or faulty thermostat
- mediumElectric heating element failure
- mediumGas supply problem or pilot/light issues (gas models)
- lowSediment buildup or valve issues
Fixes
- easyReset the circuit breaker or replace blown fuses; restore power to the unit
- easyConfirm thermostat setting (often 120°F) and test wiring connections; replace faulty thermostat if needed
- easyTest heating element for continuity and replace if no continuity
- mediumInspect gas valve, pilot light, and thermocouple; clean or replace faulty components (gas models)
- mediumFlush the tank and inspect valves; replace if leaking or stuck
Got Questions?
What does it mean when my water heater does not heat at all?
It usually points to power issues, thermostat mis-set, or a failed heating element in electric units, or gas supply/pilot problems in gas models. Start with power and thermostat checks, then move to element or gas components if needed.
Not heating often means a power, thermostat, or gas issue. Start with basic checks, then diagnose elements or gas parts if the problem persists.
Why is my electric water heater not heating properly?
Common causes are a burned-out heating element or a faulty thermostat. Check the circuit breaker, test element continuity, and verify the thermostat setting. Replace faulty parts as needed.
Electric heaters usually fail due to the heating element or thermostat. Check power, test the element, and verify the thermostat.
Can sediment buildup prevent heating or make noises?
Yes. Sediment acts as an insulating layer, reducing heat transfer. Flushing the tank clears buildup and can restore heating capacity. If noises persist after flushing, consult a pro.
Sediment can block heat transfer and cause noises. Flushing often fixes this; see a pro if it continues.
When should I replace a water heater that's not heating?
If repairs exceed a significant portion of replacement cost, or the unit is old and inefficient, replacement is often more economical and reliable. A professional can run a cost analysis.
Replacement is often wiser when repairs cost more than a new unit or the heater is old and inefficient.
Is it safe to work on a gas water heater myself?
Gas work carries fire and CO risk. If you smell gas, evacuate and call emergency services. For ignition or venting issues, contact a licensed plumber or HVAC technician.
Gas work should be handled by a professional due to safety risks.
How can I prevent future water heater problems?
Regular maintenance, flush schedules, and monitoring thermostat settings help prevent failures. Keep the area dry and ventilated, and address leaks promptly.
Do regular maintenance and monitor settings to prevent future failures.
Watch Video
The Essentials
- Check power and thermostat first when the water heater fails.
- Electric and gas models have distinct failure modes requiring different tests.
- Sediment and valve issues can degrade heating performance and should be flushed or replaced.
- Safety comes first—call a pro for gas work or uncertain diagnoses.
- Regular maintenance extends life and preserves efficiency.