Why Is My Water Heater Leaking From the Overflow Pipe
Uncover the causes, safe checks, and fixes for leaks from the water heater overflow pipe. This Heater Cost guide covers T&P valves, expansion tanks, and prevention to protect your home.

Most likely, water escaping from the overflow pipe means excessive tank pressure or temperature, often caused by a faulty pressure relief valve or an overfilled expansion tank. Quick fixes: lower the thermostat to 120°F, inspect the T&P relief valve (do not force it), and check for leaks at fittings. If leaks persist, shut off power and water and contact a plumber.
Understanding the Overflow Pipe and Why Leaks Happen
If you're wondering why is my water heater leaking from the overflow pipe, you're not alone. This tiny vent can leak for several reasons, often tied to pressure and temperature in the tank. According to Heater Cost, overflow leaks typically indicate a safety valve issue or an overfilled expansion tank. Understanding how the system works helps you prioritize safety and the right fixes. The overflow pipe is a safety vent connected to the temperature and pressure (T&P) relief valve. When either pressure or temperature exceed safe limits, water is diverted to the pipe to prevent tank rupture. In many homes, a gradual drip at the pipe is a sign you should act, but not panic. If you notice a sudden surge or warm water near electrical components, treat it as an urgent situation and shut off power and water until you assess.
Common Causes of Overflow Pipe Leaks
Overflow pipe leaks are rarely a mystery to homeowners who understand their water heater’s safety systems. Based on Heater Cost analysis, the most common causes include high incoming water pressure or an overheated tank, a faulty or stuck T&P relief valve, or a full/defective expansion tank that can’t cushion pressure changes. Loose or corroded fittings at the valve, drain, or pipe connections can also produce leaks. Sediment buildup at the bottom of the tank or in the valve cartridge can cause the valve to stick and vent intermittently. Recognizing these causes helps you target the right fix without unnecessary part replacements.
Quick Checks You Can Do Safely
You can perform several safety-conscious checks before calling a professional. Start by ensuring the area is dry and the power source is off (electric heater) or the gas supply is shut off (gas heater). Lower the thermostat to 120°F to reduce heating pressure. Inspect the T&P valve area for corrosion or a stuck lever—do not force the valve. Check surrounding fittings and drain valves for tightness and signs of corrosion. If you see water pooling, appreciate that it might be related to pressure rather than a raw pipe break, and proceed with careful diagnostics. As you test, document each observation so you can share it with a technician if needed.
How to Inspect and Test the T&P Valve
Testing the T&P valve should be done with extreme caution. First, turn off power and cold-water supply to the heater. Carefully lift the test lever on the valve to see if water releases through the discharge pipe; if it does, observe whether the flow stops after releasing. If the valve continues to leak after testing, it’s a sign the valve is failing and should be replaced. Do not hold the lever for longer than a brief moment, and keep hands and face away from the discharge path. If you’re uncomfortable, contact a licensed plumber—this test carries risk of scalding and system damage.
When to Call a Professional
If you notice a persistent leak after testing, or if you detect signs of a gas smell, electrical issues, or scorching near the unit, seek professional help immediately. A qualified plumber can replace the T&P valve, inspect the expansion tank’s air charge, and verify that the piping can safely handle vented water. Professional service is especially important if your unit is older or if you do not have the right tools to depressurize the system safely. The Heater Cost team recommends erring on the side of caution when dealing with hot water systems.
Preventing Future Overflow Leaks
Proactive maintenance reduces the likelihood of overflow leaks. Schedule annual inspections of the T&P valve and expansion tank, and check the hot water heater area for rust or leaks. Keep the area around the heater clear of clutter to prevent accidental damage when you’re inspecting. Regularly flushing the tank helps remove sediment that can affect valve performance. Consider upgrading to a properly sized expansion tank if your home experiences frequent pressure spikes, and verify your incoming water pressure stays within manufacturer recommendations. Consistent checks can save you from costly repairs caused by neglect.
What Not To Do
Avoid tampering with the T&P valve beyond basic testing. Don’t ignore a leaking valve or bypass safety devices. Don’t use tools that could damage the valve or piping, and never mix electrical work with water safety tasks. If you’re unsure, don’t push through the work—tampering with the safety system can cause serious injury or property damage. Rely on a licensed pro for replacements and complex diagnostics to ensure your heater remains safe and compliant.
Steps
Estimated time: 60-120 minutes
- 1
Power off and isolate
Shut off the power to the heater (electric) or set the gas supply to the pilot valve and fan controls. Close the cold-water inlet valve to stop new water from entering the tank. This step reduces risk while you inspect and work.
Tip: Ensure your hands are dry before touching any controls. - 2
Relieve pressure safely
Open a hot-water faucet somewhere in the home to allow air in and water out, then slowly open the drain valve at the bottom of the tank to depressurize. Do not rush; overheating can cause scalding and splashing.
Tip: Have a bucket ready and keep your face away from the discharge path. - 3
Inspect the T&P valve
Check for corrosion, dripping, or a stuck lever. Lightly operate the test lever to see if water releases. If it continues to drip after testing, the valve likely needs replacement.
Tip: Do not force the lever; listen for a hiss or smooth movement. - 4
Check expansion tank
Locate the expansion tank and verify its air cushion. A waterlogged tank cannot absorb pressure changes, causing leaks at the overflow pipe.
Tip: If you’re unsure how to check the air charge, this is a good point to call a pro. - 5
Lower the thermostat
Set the thermostat to 120°F to reduce heat production and pressure, then monitor for changes in the leak.
Tip: Avoid high temperatures for extended periods; high heat increases risk. - 6
Flush and inspect the tank
If you notice sediment, flush the tank according to manufacturer guidelines to improve valve operation and reduce mineral buildup.
Tip: Follow flushing instructions to avoid scalding and SWH leaks. - 7
Seal and reconnect
Tighten any loose fittings at the valve and drain line. Reconnect the water supply and restore power or gas following the manufacturer’s instructions.
Tip: Double-check that all connections are snug but not over-tightened. - 8
Assess and decide
If leakage persists after these steps, or if you’re unsure about the valve replacement, contact a licensed plumber for a definitive fix.
Tip: Document observations to help the technician diagnose faster.
Diagnosis: Water leaking from the overflow pipe on a water heater
Possible Causes
- highHigh tank pressure or temperature (often due to heating cycles)
- highFaulty or leaking T&P relief valve
- mediumFull or defective expansion tank
- lowLoose or corroded fittings near valve/drain
- lowSediment buildup causing valve sticking
Fixes
- easyTurn off power and cold-water supply; depressurize safely by opening a hot-water tap and the drain valve to relieve pressure
- mediumTest and replace the T&P relief valve if it leaks or fails the test
- mediumInspect expansion tank; replace if waterlogged or the air cushion is lost
- easyLower the thermostat to 120°F to reduce heating pressure
- mediumFlush sediment from the tank to improve valve operation and reduce buildup
Got Questions?
What causes water heater overflow pipe leaks?
Overflow leaks are usually tied to high pressure or temperature, a faulty relief valve, an expansion tank issue, or loose fittings. Regular checks help identify which part needs attention.
Overflow leaks usually come from pressure or valve issues. Regular checks help identify the faulty part.
Is it safe to touch the overflow valve?
You can gently test the valve with the lever if you follow safety steps, but never force the valve or bypass safety devices. If you’re unsure, call a pro.
You can test gently if you follow safety steps, but don’t force it. Call a pro if unsure.
Thermostat lowering helps?
Lowering the thermostat reduces heating load and pressure, which can reduce leaks from the overflow pipe in the short term. It is not a fix, but a safety measure.
Lowering the thermostat reduces pressure; it’s a safety step, not a permanent fix.
Expansion tank replacement necessary?
If the expansion tank is waterlogged or the air cushion is lost, replacement is typically required to restore pressure buffering.
If the expansion tank is waterlogged, you’ll usually need a replacement.
Leaks after testing valve?
If the valve leaks after testing, replacement is likely needed. A licensed plumber can ensure proper installation and safety compliance.
If it keeps leaking after testing, replace the valve with professional help.
When to call a professional?
Call a professional if you cannot stop the leak, smell gas, or see signs of electrical danger. Complex repairs require certified plumbing expertise.
Call a pro if you can’t stop the leak or if there’s gas or electrical risk.
Watch Video
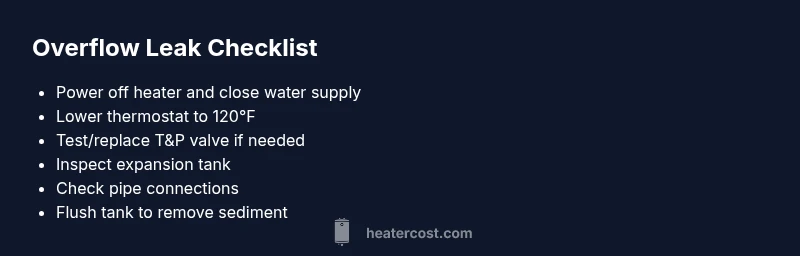
The Essentials
- Lower the thermostat to 120°F to reduce pressure
- Test or replace a faulty T&P valve promptly
- Inspect the expansion tank if leaks persist
- Call a professional for persistent leaks or safety concerns