Why Your Heater Isn't Working: Quick Troubleshoot Guide
Learn fast, safe steps to diagnose a non-working heater. This guide covers power, thermostat, fuel, safety devices, and when to call a pro to restore warmth quickly.

When a heater won’t run, start with simple checks: ensure power is on, set the thermostat correctly, and inspect the circuit breaker. If these basics fail, continue with safe, guided steps while avoiding risky actions. According to Heater Cost, most non-working heaters stem from power, thermostat, or fuel-supply issues that homeowners can diagnose safely at first.
Common Causes of a Non-Working Heater
According to Heater Cost, several common reasons can leave a home heater silent or weak. The most frequent culprits are power issues, thermostat problems, or interruptions in the fuel supply. Start by confirming basic power and controls before diving into more complex inspections. This early check saves time and helps you determine whether a quick fix or professional service is needed.
- Power issues: blown fuses, tripped breakers, or a disconnected outlet can prevent the unit from starting.
- Thermostat problems: mis-set temperature, dead batteries, or sensor faults can keep the system from engaging.
- Fuel or energy source: a closed gas valve, empty propane tank, or fuel line blockage can stop heat production.
- Safety interlocks: a tripped limit switch or blocked vents can cause a shutdown.
- Mechanical wear: a worn blower motor or failing igniter may prevent ignition.
If you find no simple fix, proceed to the guided flow in this article; safety should always come first.
Quick, Safe Fixes to Try First
Start with the simplest checks and escalate only as needed. These steps reduce risk and typically resolve minor issues.
- Verify power: confirm the unit is plugged in, the wall switch is on, and the circuit breaker hasn’t tripped.
- Check thermostat: ensure it’s set to heat and not left in eco or off mode; replace batteries if applicable.
- Reset the system: turn off, wait 60 seconds, and turn back on to reset electronics.
- Inspect air filters and vents: clogging reduces airflow and triggers safety shutoffs.
- Look for obvious gas or fuel issues: if you detect a gas smell, leave and call a professional.
If none of these restore heat, move to a more detailed diagnostics section.
Step-by-Step Power and Thermostat Checks
-
Power supply check: Ensure the heater is plugged in securely and the outlet powers other devices. If you’re using a hard-wired unit, verify the disconnect switch or breaker is ON. A simple test with a lamp can confirm outlet functionality.
-
Thermostat inspection: Confirm the thermostat is in the HEAT setting and the target temperature is above room temp. If the thermostat is physical, replace batteries if present and clean any dust from the sensor.
-
System reset: For many models, a two-minute reset can clear minor electronic glitches. Turn the unit OFF, wait 60–120 seconds, then turn it back ON and observe for heat output.
Tip: If your thermostat is programmable, review recent schedules that might override manual settings and temporarily disable energy-saving modes while testing.
Inspecting Fuel, Venting, and Safety Devices
Gas furnaces and certain heaters require fuel and proper venting. Start by ensuring the gas valve is OPEN and the gas line shows no leaks or odor (never ignore a gas smell). For gas models with a pilot light, confirm the pilot is lit or follow manufacturer guidance to relight safely.
Vent obstructions and blocked exhausts can trigger safety shutoffs. Check that flues, dampers, and vents are clear of debris and that outdoor vents aren’t blocked by snow or foliage. Safety devices like high-limit switches can trip if the unit overheats, so investigate why overheating occurred only after basic power and control checks are complete.
Electrical and Circuit Considerations
Even electric heaters rely on sound wiring and solid connections. Inspect the power cord for cuts or wear, and ensure the plug is fully seated. If you have a dedicated circuit, check for other high-demand appliances sharing the same circuit which could trip breakers when the heater calls for heat.
Examine fuses or breakers in the main panel. If a breaker trips repeatedly, someone may have a faulty device or a short in the heater wiring. Do not bypass safety mechanisms; repeated tripping is a sign to consult a licensed electrician or technician.
When to Call a Professional and What They Do
If basic power and thermostat checks don’t restore heat, it’s time to call a pro. A licensed technician will test electrical connections, gas valves, and ignition systems with diagnostic tools. They can safely identify faulty igniters, flame sensors, or safety switches and perform replacements or calibrations as needed.
Homeowners should expect a thorough safety assessment, including carbon monoxide considerations for gas systems. A professional will also verify venting integrity and ensure the unit complies with current codes. If you’re unsure about the risk, err on the side of caution and schedule a visit.
Preventive Maintenance to Reduce Future Breakdowns
Regular maintenance can dramatically reduce the likelihood of a non-working heater. Schedule seasonal inspections, replace air filters every 1–3 months depending on use and environment, and have a pro clean and tune the burner, igniter, and venting. Proper lubrication of moving parts can extend the life of blower motors and fans.
Heater Cost analysis shows that proactive maintenance minimizes costly emergency fixes and extends equipment longevity. Keeping a maintenance log helps homeowners anticipate service intervals and budget for replacements before failures occur.
DIY Cost Considerations and Next Steps
Understanding potential costs helps you decide when to DIY and when to hire a pro. Simple fixes like replacing a thermostat or resetting the system are low-cost and quick. More complex issues—such as igniter replacement or gas valve service—require professional expertise and may involve diagnostic fees, parts, and labor. Always prioritize safety and local codes when planning maintenance or repairs.
Final Quick Checklist Before Pro Help
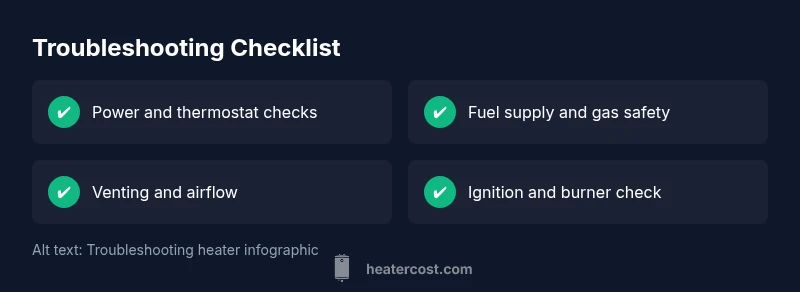
- Confirm power is stable and thermostat settings are correct.
- Check for obvious gas smells and ensure adequate ventilation.
- Inspect filters, vents, and obvious wiring for damage.
- Note any error codes or unusual noises to share with the technician.
- Schedule a professional inspection if issues persist after basic checks. The Heater Cost team recommends documenting maintenance to support warranties and future service decisions.
Steps
Estimated time: 60-90 minutes
- 1
Check power and outlet
Ensure the heater is plugged in and the outlet has power. Test with a lamp to confirm the outlet works. If the unit is hard-wired, verify the disconnect switch and any associated fuses are intact.
Tip: Always unplug before inspecting power connections; safety first. - 2
Verify thermostat settings
Make sure the thermostat is set to HEAT and above room temperature. If there are batteries in the thermostat, replace them and re-enter any schedules or temperature presets.
Tip: Disable energy-saving modes temporarily while testing heat output. - 3
Reset and test
Turn the unit off, wait 60–120 seconds, then turn it back on. Observe whether the system initiates a heat cycle or displays an error code.
Tip: Note error codes; they're helpful for diagnostics or when calling a pro. - 4
Inspect airflow and filters
Check for a clogged filter, closed vents, or obstructed intake/outlet paths. Restricted airflow can trigger safety shutoffs and prevent heat.
Tip: Replace filters per manufacturer guidelines to maintain airflow. - 5
Check gas valve and pilot
For gas models, confirm the gas valve is open and the pilot light is burning. Do not attempt relighting if you smell gas; exit and call a pro immediately.
Tip: Never bypass safety features; gas systems require professional handling. - 6
Inspect ignition and burner
A dirty or faulty igniter can prevent ignition. If you notice delayed ignition or unusual noises, plan a professional inspection.
Tip: Avoid touching hot surfaces; wait for components to cool before inspecting. - 7
Call a professional when needed
If the heater remains unresponsive after basic checks, schedule a licensed technician to perform a full diagnostic and safe repairs.
Tip: Ask about warranties and what parts are replaced during the service.
Diagnosis: Heater won't start or produce heat
Possible Causes
- highPower issue (no power to unit, tripped breaker, blown fuse)
- highThermostat malfunction or mis-set temperature
- mediumFuel supply problem (gas valve closed, empty tank)
- mediumIgnition or burner fault (igniter failure or dirty burner)
- lowSafety switch/limit switch trip
- lowVent or airflow restriction (blocked vent, dirty filter)
Fixes
- easyReset breaker or replace blown fuse; verify outlet power.
- easyVerify thermostat settings and replace batteries if applicable.
- easyOpen gas valve or confirm fuel supply; never use if gas smell is detected and leave the area.
- mediumInspect ignition/burner; replace faulty components by a professional.
- mediumCheck safety switches and ensure vents are clear; call a pro if unsure.
Got Questions?
Why won’t my heater turn on?
Common causes include a tripped breaker, thermostat mis-settings, or an empty fuel supply. Start with power and thermostat checks before moving to fuel or ignition issues.
Most heaters fail to start due to power or thermostat problems. Begin with basic checks and only then consider fuel or ignition faults.
My thermostat shows heat but there is no warmth. What should I check?
Verify the thermostat is calibrated, batteries are fresh, and the system isn’t stuck in an eco or cool setting. Check for airflow restrictions and ensure the furnace switch is ON.
If heat shows but no warmth, check settings, battery power, and airflow; adjust as needed.
Is it safe to relight a gas furnace pilot?
Only relight per manufacturer instructions. If you smell gas or can’t locate the pilot, leave the area and call a professional immediately.
Relighting a gas pilot should follow the manual; if in doubt or you smell gas, call a pro.
What should I do if the circuit breaker keeps tripping?
A repeated trip indicates an underlying electrical issue or overload. Disconnect other high-draw devices and consult a licensed electrician if trips continue.
If the breaker keeps tripping, stop using other high-demand devices and call a pro.
How often should I service my heater?
Most systems benefit from an annual professional inspection, plus seasonal checks of filters and vents by homeowners.
Annual professional service plus seasonal self-checks keeps things running smoothly.
Can I fix these issues myself?
Some basic maintenance is safe for homeowners, but complex issues—like gas work or wiring—should be handled by a licensed technician.
Basic checks are okay, but for dangerous tasks, call a pro.
The Essentials
- Check power and thermostat first
- Don't ignore gas smells or flame issues
- Call a licensed tech for gas/electrical concerns
- Maintain filters and vents to prevent shutdowns
- Document repairs for warranties and future maintenance