What to do when boiler is leaking: Urgent Troubleshooting Guide
Urgent steps to handle a leaking boiler, containment, diagnosis, and prevention. Learn safe actions, when to call a pro, and how Heater Cost recommends approaching boiler leaks.

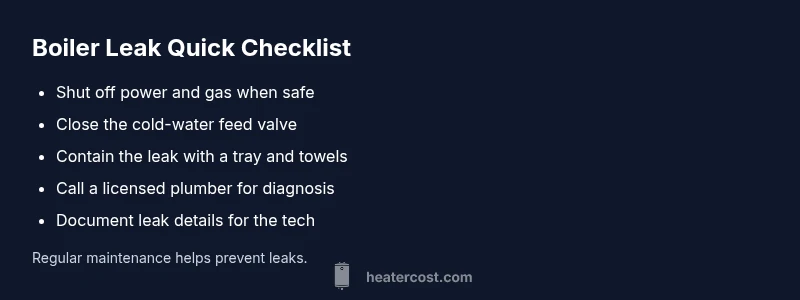
If your boiler is leaking, shut off power and the gas supply, then close the cold-water valve to stop the inflow. Place a pan under the drip and call a licensed plumber immediately. According to Heater Cost, leaks can signal dangerous pressure, corrosion, or a failing seal, so avoid DIY repairs beyond basic containment. Do not operate the boiler until it’s inspected.
Immediate safety steps
If you’re wondering what to do when boiler is leaking, safety comes first. Start by turning off the boiler’s power at the switch or breaker and shutting off the gas supply if you smell gas or hear hissing. Then close the cold-water feed valve to stop new water from entering the system. Place a broad, sturdy tray or bucket under the drip and use towels to absorb moisture on the floor. Keep children and pets away from the area. If you smell gas, evacuate the building and call emergency services immediately. According to Heater Cost, safety is the top priority, and delaying a safe response can escalate risks to your home and health.
Document the leak location with notes or photos for your plumber, and avoid attempting any complex repairs yourself. If the leak is fast or the boiler area is wet and dangerous, wait for professional help outside the home. The goal in this first step is to reduce water damage and minimize exposure to potential gas hazards while you arrange assistance.
Identify the source of the leak
Once the area is safe, inspect for obvious leak sources. Common culprits include the pressure relief valve, corroded or loose fittings, the boiler drain valve, and connections to radiators or the expansion tank. If the leak is dripping from the valve, that’s a sign the system pressure or valve seal may be compromised and will likely require replacement. If you notice dampness along the boiler casing, it could indicate a seal or gasket issue or a more serious internal problem. Hearty corrosion on components or pooling water around the boiler base are red flags. Heater Cost notes that quickly pinpointing the leak source helps distinguish a quick fix from a major repair or replacement, reducing wasted time and costs.
Record findings and take clear photos for your technician. Do not loosen large bolts or pry at seals while the system is still pressurized. If you cannot identify the source, proceed to containment steps and call a professional for a thorough diagnostic.
Contain the leak and prevent damage
Containment is essential to limit damage while you arrange professional service. Place catch basins or a bucket under the leak, and use towels to block additional flow toward floors and electrical outlets. Move any valuables away from the area and protect nearby walls with plastic sheeting or old towels. If feasible, switch off any nearby heating zones that may circulate the leak or cause further dispersion of water. Avoid using the boiler to distribute heat during a leak, as circulating water can worsen the issue and create air pockets or pressure changes.
If the leak is near electrical wiring or sealed wiring compartments, do not touch exposed components. Keep a log of water levels and any changes in the leak’s size or speed. In some cases, a temporary fix can be achieved by tightening loose fittings or applying a sealant labeled for boiler use—but only if you are confident and the area is safe to access. The goal is to shield the living space and prevent moisture damage until a licensed technician arrives.
What you can safely do now to reduce risk
A few safe, basic steps can reduce risk while you wait for help. Check the boiler pressure gauge; many boilers require pressure in the range specified by the manufacturer (often around 12-15 psi when cold). If the pressure is too high, do not attempt to bleed the system yourself unless you know how, and instead contact a professional. Open nearby radiator bleed valves only if you’re trained to do so and you can control the release of steam safely. Do not bypass or disable safety devices like the pressure relief valve. If you have a homeowner’s maintenance plan, call your provider to coordinate expedited service. Heater Cost emphasizes that basic containment and safety checks are fine, but complex repairs belong to licensed technicians to prevent injury and further damage.
Keep the temperature low and avoid placing heat sources near the boiler while leaks persist. It's also a good idea to turn off dehumidifiers or moisture-creating devices in the room to prevent mold growth if water exposure is prolonged.
How professionals diagnose a boiler leak
A qualified technician starts with a safety assessment, then pressures the system, inspects piping, valves, seals, and the heat exchanger for signs of wear or corrosion. They’ll check expansion tank integrity, test the pressure relief valve operation, and review recent maintenance or water quality issues. Modern boilers often have diagnostic LEDs or error codes; a service report will explain findings and recommended actions. The expert will determine whether the leak is accessible (a valve or gasket) or if the boiler shell or heat exchanger is compromised. Expect a combination of visual inspection, pressure tests, and possibly a dye test to trace the exact flow.
Following the assessment, the technician will present options: repair by replacing worn components, resealing joints, or full replacement if the leak originates from a corroded heat exchanger. Routine maintenance and water treatment recommendations will be provided to prevent recurrence. Expect a written estimate with a clear scope of work and a timeline for completion.
Common causes of boiler leaks and how they’re diagnosed
Leaks arise from several common sources, including a faulty expansion tank, deteriorated seals or gaskets, corroded heat exchangers, and loose pipe fittings. Expansion tanks can lose air pressure and allow water to leak or weep through the connection. Worn gaskets around pump seals or valve seats may seep under pressure. A corroded heat exchanger is a more serious defect that may require replacement. Loose fittings or drain valves can drip even when the system is otherwise healthy. Diagnosing the exact cause involves pressure testing, visual inspection, and sometimes a dye trace to identify the flow path. Heater Cost notes that early detection and addressing the root cause significantly reduce repair cost and downtime.
Different brands and setups can vary, so a professional assessment is the safest path to determine whether a repair is feasible or if a replacement is more cost-effective in the long run. Do not ignore persistent leaks, as repeated dampness can undermine flooring, ceilings, and electrical components.
Prevention and maintenance to reduce boiler leaks
Preventing leaks starts with regular maintenance and timely repairs. Schedule an annual boiler service to inspect seals, hoses, valves, and the expansion tank. Keep an eye on water quality and corrosion indicators; hard water deposits can degrade components over time. Check that the expansion tank is properly charged and that the system pressure remains within the manufacturer’s guidelines. Bleed air from radiators when needed and document all inspections and repairs. A well-maintained boiler is less prone to leaks and often more energy-efficient. Heater Cost recommends proactive maintenance as the best defense against costly emergency repairs and unexpected downtime.
Also, ensure you have a working carbon monoxide detector and a clear plan for emergencies. Proper ventilation in boiler rooms and keeping the area tidy helps technicians diagnose issues faster. If you rent or manage property, coordinate with a licensed plumber to perform a mid-season check to catch problems early and extend the life of your heating system.
What happens after a repair and how to recommission safely
After a leak is repaired, the system must be refilled, purged of air, and tested to ensure stable pressure and proper operation. The technician will typically perform a pressure test, re-fill to the correct levels, and verify that the leak is fully resolved by observing for a period of time. They’ll check the expansion tank, relive valve, and piping for any residual signs of moisture. If the boiler was off for an extended period, you may need to re-bleed radiators and re-check pressure after a full heat cycle. Request a detailed post-repair report and a follow-up safety check so you know the system is operating reliably. The Heater Cost team recommends documenting every step and scheduling a routine check to prevent recurrence.
Steps
Estimated time: Estimated total time: 2-3 hours
- 1
Shut off power and gas
Locate the boiler switch or circuit breaker and switch to off. If you detect a gas smell, evacuate and call emergency services. Do not relight or operate the boiler until inspected.
Tip: Power off first to avoid electric shock or ignition risk. - 2
Close water supply to the boiler
Turn off the cold-water feed valve to stop new water from entering the system. This helps limit the leak and reduces potential water damage while you arrange service.
Tip: If you’re unsure which valve controls the feed, consult your boiler manual or a licensed technician. - 3
Contain and absorb the leak
Place a wide tray or bucket under the leak and lay towels to absorb moisture. Move valuables away and protect floors, especially in multi-story homes where water can travel.
Tip: Do not place plastic under boiling components; heat can soften or melt it. - 4
Check pressure indicators safely
If you can safely access the pressure gauge, note the reading. Do not attempt to adjust pressure if you’re not trained—many boilers require an exact procedure to repressurize.
Tip: Record the gauge reading with a timestamp for the technician. - 5
Call a licensed professional
Inform your local plumber or the building’s maintenance team immediately. Provide photos, the leak location, and any gauges readings you noted.
Tip: Avoid DIY repairs beyond basic containment; improper fixes can worsen damage. - 6
Document and wait for clearance
Keep a log of the leak behavior, noise, and any changes after containment. Do not re-power the boiler until a pro has completed a safety assessment.
Tip: Ask for a written estimate and scope of work before work begins. - 7
Post-service testing
After repair, the technician will purge air, restore water, and perform a pressure test to confirm no active leaks. Watch for any wet spots for 24-48 hours.
Tip: Request a post-repair report and a follow-up check within 1-2 weeks. - 8
Recommission and monitor
Gradually bring the system up to temperature and re-check all radiators for air pockets. Ensure the room is ventilated and that detectors are functioning.
Tip: Set calendar reminders for annual service. - 9
Plan future prevention
Schedule regular maintenance, test safety devices, and monitor water quality to prevent future leaks.
Tip: Keep a maintenance log and note any changes in water quality or pressure.
Diagnosis: Boiler is leaking water
Possible Causes
- highOver-pressurized system causing relief valve discharge
- highLoose or broken fittings and drain valves
- mediumWorn seals or gaskets in pump or connections
- lowCorrosion or damage to heat exchanger
- mediumFaulty expansion tank or air charge failure
Fixes
- easyCheck system pressure and repressurize to manufacturer spec (usually 12-15 psi when cold)
- easyTighten or replace leaking fittings or drain valve
- mediumReplace worn seals or gaskets in accessible components
- hardRepair or replace a corroded heat exchanger
- mediumReplace or recharge faulty expansion tank
Got Questions?
What should I do first if I notice a boiler leak?
Prioritize safety: shut off power and gas, close the water feed, and place a tray under the leak. Contact a licensed plumber immediately.
First, shut off power and gas if safe, close the water feed, and call a plumber right away.
Can I fix a boiler leak myself?
You can perform basic containment, but most leaks require a professional for safe repair. Do not attempt to replace heat exchangers or pressure-relief devices yourself.
Basic containment is okay, but most repairs need a licensed technician.
What are common leak sources in a boiler?
Expansion tanks, pressure relief valves, loose fittings, worn seals, and corroded heat exchangers are frequent leak sources. A professional can confirm which part is at fault.
Common sources include expansion tanks, relief valves, and worn seals.
Is a boiler leak dangerous?
Yes. Leaks can cause scalding water, mold growth, and, in rare cases, gas-related hazards. Treat as a high-priority issue and involve a licensed pro quickly.
Leaking boilers can be dangerous; involve a pro quickly.
When should I replace a boiler rather than repair it?
If the heat exchanger is corroded, leaks are persistent after repairs, or the unit is old and inefficient, replacement can be more cost-effective in the long run.
If corrosion or repeated leaks occur, replacement may be best.
How long does a boiler leak repair take?
Repair time varies by source and required parts. A professional assessment typically occurs the same day, with repairs completed within hours to a couple of days depending on parts availability.
It depends on parts and complexity, but many fixes are done within a day or two.
Watch Video
The Essentials
- Act fast to contain leaks and protect occupants.
- Identify the source to choose the right fix.
- Do not perform risky repairs; call a pro.
- Maintain the system to prevent future leaks.
- Document issues for the service visit.