Water Heater Leaking: Troubleshooting & Repair Guide
Urgent troubleshooting for water heater leaking with safety steps, common causes, DIY fixes, and guidance on when to call a professional to prevent damage.

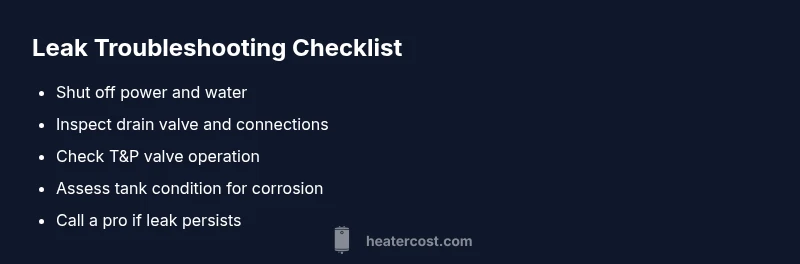
A water heater leaking is usually due to a bad valve, loose connections, or a corroded tank. Start by turning off the power (gas or electric) and shutting off the cold-water supply, then place a bucket under the drain valve and check for fresh leaks. If water continues to seep, contact a licensed plumber.
What water heater leaking indicates
According to Heater Cost, a water heater leaking is a warning sign that the system needs attention now to prevent water damage and wasted energy. Leaks can originate from fittings, valves, or the tank itself, and the safest response is to assess risk, shut off power and water, and inspect components before proceeding. This section will help you understand what a leak means, how to respond quickly to minimize damage, and what to expect from common fixes. Recognizing the difference between condensation and an active leak is crucial, as early action protects floors, cabinets, and drywall. Throughout this guide, you’ll see practical steps, cost-conscious guidance, and clear signals for when to call a professional to avoid risking personal safety or serious property damage.
Immediate safety steps to take
Time is critical when you notice a water heater leaking. Begin with the basics: identify whether you have a gas or electric unit, locate the main shutoff switch or breaker, and turn it off to stop the heat source. Simultaneously, close the cold-water supply valve on the inlet to halt incoming water. Relieve pressure by opening a hot water tap on a lower floor to let air in and drain a small amount of water (a cupful to a gallon) to make inspection easier. Place a bucket or towels under the area and keep children and pets away. Do not use the heater again until the leak is diagnosed; a persistent leak often signals a failed component or tank issue that requires professional attention. As you proceed, document any valve or pipe corrosion and take photos for your service visit. The Heater Cost team emphasizes quick action to protect your home and reduce potential damage.
Common causes of leaks
Leaks from a water heater are most often caused by three categories: fittings and valves, the tank itself, and plumbing connections. A loose or worn drain valve can drip or spray when opened; a damaged inlet/outlet connection may seep along the threaded joint; a faulty or mis-seated temperature/pressure (T&P) valve can discharge water because of excessive pressure or faulty calibration. Condensation around the tank can resemble a leak but typically occurs when humidity is high or the unit is cooling after heating. Corrosion inside older tanks is a leading cause of tank leaks, signaling impending failure. Based on Heater Cost Analysis, 2026, many leaks originate from valve issues and mineral buildup at the drain or relief valves rather than an immediate tank rupture; however, a tank with significant corrosion almost always requires replacement. Recognize the signs early: rust-colored water, continuous wetness after a cycle, or dampness on the floor that persists after you’ve shut off the unit.
How to diagnose without tools
Begin with non-contact inspection: visually examine the entire tank, the drain valve, and all connections for moisture. Check the drain valve for signs of active dripping and tighten only if you are confident the valve is meant to be closed. Inspect the T&P valve discharge line for dampness or active discharge, which can indicate over-pressurization or a faulty valve. Trace pipes behind the unit for tightness and look for mineral buildup at joints that may indicate a slow leak. If the unit is in a finished area, check for water staining on walls or floors, which helps pinpoint the source. Use a flashlight to inspect shadowed areas, and keep a log of where moisture appears across cycles. Remember: even a small, persistent drip can indicate a more serious underlying problem, so take notes and plan a professional assessment if you cannot locate a clear cause.
How to fix common causes (overview)
This section provides an overview of typical fixes for the most common leak sources. A leaking drain valve may be repaired by tightening or replacing the valve assembly. Leaks at fittings or piping often require tightening connections or replacing cracked piping. A faulty T&P valve is a safety-critical component; replace only with the correct valve and follow venting guidelines. If the tank shows significant corrosion, scaling, or pitting, replacement is usually the most economical and safe option. Note that some fixes require draining the tank, which means your water supply will be interrupted; plan accordingly and follow local codes. Always prioritize safety and warranty terms when deciding between DIY fixes and professional service.
When to DIY vs call a pro
Small, clearly localized leaks from a drain valve or a loose connection can sometimes be addressed by a confident DIY homeowner, but many situations demand professional supervision. If the leak persists after a simple valve adjustment, the tank is older than 10–15 years, or you notice rapid water loss or corrosion, contact a licensed plumber or a water heater technician immediately. If you have gas heating, or you’re unsure about gas safety, do not attempt DIY repairs—gas line work requires a licensed professional. The Heater Cost team recommends scheduling a professional inspection for any tank leak to prevent hidden damage and ensure code compliance. At all times, prioritize safety and avoid operating a unit with active leaks.
Prevention tips and maintenance routines
Preventing leaks starts with regular maintenance: flush the tank annually to remove mineral buildup, inspect the anode rod and replace it as needed, and check the T&P valve and discharge line for proper operation. Keep the surrounding area dry and well-ventilated to avoid moisture buildup that can mask leaks. Install or verify an expansion tank if you have frequent pressure fluctuations, and ensure all fittings are tight and sealed with the right thread sealant. A routine check for corrosion on the tank and valves, plus timely replacement of aging components, can extend the life of your water heater and reduce the risk of sudden leaks.
Steps
Estimated time: 30-60 minutes
- 1
Shut off power and cold-water supply
Locate the circuit breaker for electric units or the gas valve for gas units and switch to off. Turn off the cold-water supply to stop more water from entering the tank. This prevents further pressure and potential scalding. If safe, use a flashlight to check for active drips before proceeding.
Tip: Avoid touching hot surfaces; let the tank cool before handling components. - 2
Relieve pressure and drain a little
Open a hot water faucet on a lower floor to relieve system pressure. Use a bucket to capture a small amount of water from the drain valve if you need to observe the valve or piping. Draining a small amount reduces pressure and makes the inspection safer.
Tip: Do not drain the entire tank unless you plan a full replacement. - 3
Inspect drain valve and inlet/outlet connections
Check the drain valve for moisture when closed; tighten if you’re confident in valve operation. Inspect all threaded joints for signs of leakage; reseal with appropriate sealant if manufacturer guidelines permit. If corrosion is present at threads, plan valve replacement.
Tip: Never use excessive force on valves; overtightening can damage threads. - 4
Check the T&P valve and discharge line
Look for dampness at the discharge line or a discharge of water. If the valve leaks, it may be faulty or indicate overpressure. Do not plug or cap the valve; replace it with a correctly rated unit and ensure discharge piping terminates safely.
Tip: Only replace the valve if you are confident in venting and piping requirements. - 5
Assess tank condition and plan next steps
If you observe significant rust, pitting, or bulging in the tank, replacement is typically the safest option. Decide whether to repair/replace valves or entire unit based on age and warranty. Keep a professional on standby if the leak is not clearly resolved.
Tip: Document serial numbers and age for warranty and replacement planning. - 6
Test after fix or replacement
Restore power and water when the system is dry and secure. Turn on the unit and monitor for any continuing leaks for 24–48 hours. Check the discharge valve and joints periodically. If you notice any ongoing dampness, call a professional immediately.
Tip: Maintain a log of maintenance checks for future reference.
Diagnosis: Visible water pooling around the water heater or dampness on the floor
Possible Causes
- highLoose or corroded drain valve
- mediumTank corrosion leading to a leak in the tank
- mediumPressure relief valve discharge
- lowCracked or loose piping connections
Fixes
- easyTighten or replace the drain valve if it leaks when opened/closed
- mediumInspect T&P valve and discharge pipe; replace faulty valve with proper venting
- hardShut off power and water and schedule professional service if the tank shows corrosion
Got Questions?
Is a small drip from the drain valve normal?
A small, occasional drip from the drain valve may be normal after maintenance, but persistent dripping indicates a faulty valve or connection that needs replacement. If in doubt, inspect the valve and consider professional service.
A small drip after maintenance can happen, but persistent dripping usually means a faulty valve or connection and you should get it checked.
Can I fix a leaking water heater myself?
Basic fixes like tightening a loose drain valve can be DIY-friendly for some models. Most tank leaks, corrosion, or pressure valve failures require a licensed professional to ensure safety and code compliance.
Some valve tweaks are doable, but most leaks need a professional to ensure safety and code compliance.
How do I know if the tank needs replacement?
If the tank shows significant rust, bulging, or frequent leaks despite valve replacements, replacement is usually the safest option. Older units (beyond 10–15 years) are more prone to failure.
If the tank is heavily corroded or keeps leaking, replacement is wise, especially if the unit is old.
What safety risks come with water heater leaks?
Leaks can cause water damage, mold growth, and electrical or gas hazards. Leaking gas heaters also risk carbon monoxide exposure if not properly ventilated. Always shut off power and seek professional help for safety-critical issues.
Leaks can lead to water damage, mold, or dangerous gas exposure. Shut off power and call a pro for safety-critical issues.
How long does a water heater typically last?
Most storage-tank water heaters last about 8–12 years depending on usage, water quality, and maintenance. Regular flushing and anode rod replacement can extend life and reduce leakage risk.
Most tanks last around 8 to 12 years with good maintenance.
Watch Video
The Essentials
- Act fast to minimize damage from leaks.
- Identify if the leak is from valves, fittings, or the tank.
- DIY possible for small valve leaks; otherwise call a pro.
- Regular maintenance prevents future leaks.
- Replace aging tanks to avoid catastrophic failures.