What to Do If Your Hot Water Heater Is Leaking: Quick Guide to Safety and Fixes
Urgent guide to safely respond when your hot water heater leaks, including safety steps, quick fixes, and when to call a professional.

Power off the heater and isolate the water supply, then drain a portion of the tank to verify the leak and reduce pressure. If steam or hot water is spraying, evacuate the area and call a licensed plumber or your emergency service. For minor leaks around fittings, tighten connections only after shutting off power. This guide from Heater Cost helps you act fast.
Why Leaks Happen and Immediate Risks
Water heater leaks are more than a minor annoyance; they can cause water damage, mold growth, and electrical or gas hazards. The most common sources are loose or damaged fittings, such as the drain valve or inlet/outlet connections, and failing pressure relief mechanisms. According to Heater Cost, many leaks originate at fittings rather than the tank itself, but a corroded tank seam can fail without warning. Recognizing the source early helps you choose the safest response and minimize waste. In this guide, you’ll learn to assess risk, act quickly, and distinguish between simple fixes and situations that require professional help. Remember, a leak on a hot water heater is not just about water loss—it can affect energy efficiency, indoor air quality, and home safety. Use these steps to protect your home and avoid costly damage.
Immediate Safety Steps You Can Take Now
Safety is the top priority when a hot water heater leaks. First, determine whether you have an electric or gas-powered unit, then shut off power or gas accordingly. Next, close the cold-water supply valve to reduce pressure and stop more water from entering the tank. If possible, place a bucket or towels under the leak and use a drain pan to catch drips. Avoid contact with hot water or steam; wear gloves and safety glasses if you must handle anything near the valve. Do not attempt to drain a pressurized tank if you’re unsure of what you’re doing. If you smell gas or hear hissing from the gas line, evacuate immediately and call emergency services. These steps reduce the risk of burns, flooding, and electrical hazards while you decide on next steps.
How to Diagnose the Leak: Common Causes
A leak can come from multiple sources, and identifying the origin guides your next move. Start by visually inspecting for dripping around the drain valve, inlet/outlet fittings, and the T&P (temperature and pressure) relief valve. If water pools at the base, check whether the tank seam is leaking—a sign the unit may be nearing end of life. A loose drain valve is a frequent culprit and can often be fixed by tightening or replacing a washer. If the leak persists after tightening fittings, the problem may be a failed valve or a tank issue requiring professional replacement. As you diagnose, avoid forcing components that are stuck or damaged to prevent creating additional leaks.
Quick Fixes vs. When to Call a Pro
Minor leaks from fittings or the drain valve can sometimes be resolved on the spot: tighten connections with the system depressurized, reseal threads with plumber’s tape, or replace a faulty washer. Do not torque aggressively; misthreading can worsen leaks. If the T&P valve is leaking, it may indicate excessive pressure or a failing valve and should be inspected by a professional. A leak from the tank itself (seam or corroded surface) almost always means the unit needs replacement, especially if the unit is several years old. In any case, if you’re uncertain, or if the leak is spreading, contact a licensed plumber promptly. Heater Cost recommends erring on the side of safety and scheduling a professional assessment when a leak is involved.
Preventive Maintenance to Avoid Future Leaks
Routine maintenance dramatically reduces leak risk. Schedule an annual flush to remove mineral buildup, test the T&P valve to ensure it functions, and inspect connections for wear. Consider installing or inspecting an expansion tank if your home experiences high water pressure. Insulation around pipes can prevent condensation that resembles leaks. Professional installation and regular checks by a certified technician help extend the life of your heater and protect your investment. Small cracks and wear signs should never be ignored, as early action can prevent larger, costlier failures.
Steps
Estimated time: 30-60 minutes
- 1
Power off and secure the area
Identify whether you have an electric or gas heater. For electric models, switch off the circuit breaker; for gas models, turn the gas valve to OFF. This prevents shock, sparks, or burner ignition while you work. Then confirm you have stable footing and that children or pets are away from the area.
Tip: If you smell gas, evacuate immediately and call emergency services. - 2
Shut off the cold-water supply
Close the cold-water isolation valve to stop more water from entering the tank. This reduces pressure and minimizes further leakage during inspection. Place a bucket under the drain valve if you need to drain some water to inspect without creating a mess.
Tip: Only drain a small amount at a time to avoid a large splash or scalding risk. - 3
Drain a small amount and inspect
Attach a hose to the drain valve and drain a few gallons into a bucket or floor drain. While water is flowing, inspect the valve and surrounding fittings for drips to pinpoint the source. If the water is hot, wear gloves and keep hands away from heated surfaces.
Tip: Don’t open the drain valve fully if you’re unsure—just enough to observe leaks. - 4
Check the origin of the leak
Systematically check the drain valve, inlet/outlet connections, and the T&P valve. Use a flashlight and dry cloths to spot evidence of dripping. Note whether the leak stops after tightening or if water continues to flow, which suggests a more serious issue.
Tip: Document findings with a photo for reference when you call a pro. - 5
Decide on the next step
If the leak is at a valve or connection, you may be able to reseal or replace the valve after depressurizing. If the tank shows a visible leak or corrosion, plan for replacement. If in doubt, schedule a pro visit promptly to avoid water damage.
Tip: Avoid attempting to fix a tank leak yourself if the unit is old or heavily corroded. - 6
Call a licensed plumber
For tank leaks or complex valve replacements, contact a licensed plumber to perform a safe repair or recommend replacement. A pro can confirm if your unit needs a new expansion tank, valve, or full replacement and can complete the job with proper permits when required.
Tip: Ask for certification, warranty coverage, and a written estimate before work begins.
Diagnosis: Water is leaking from the hot water heater.
Possible Causes
- highLeaking or loose drain valve or inlet/outlet fittings
- mediumFaulty or releasing pressure/temperature relief valve
- lowTank seam corrosion or internal tank failure
- lowImproper installation or shifting of the unit
Fixes
- easyIf leak is at fittings, depressurize and tighten or reseal connections (use plumber's tape where appropriate)
- mediumReplace faulty relief or drain valve or reset the T&P valve by a professional
- hardIf the tank is leaking from the seam, replace the water heater; do not try to repair a corroded tank
- mediumIf installation is suspect, have a licensed plumber inspect and re-install as needed
Got Questions?
What should I do first if my water heater is leaking?
First, ensure safety by turning off electricity or gas and closing the cold-water supply. Then assess the source of the leak and determine if you can address a simple valve issue or need a professional replacement.
First, turn off power or gas, close the water, and assess the leak source to decide if you can fix a valve or need a professional replacement.
Can I fix a leaking water heater myself?
Some leaks from fittings or drain valves can be addressed by tightening or reseating components after depressurizing. Leaks from the tank require professional replacement. If unsure, consult a licensed plumber.
DIY fixes are limited to valve leaks; tank leaks require a pro. When in doubt, call a plumber.
Is a leaking water heater dangerous?
Yes, leaks can cause electrical hazards, mold growth, or scalding injuries. If you smell gas or hear hissing, evacuate and contact emergency services. Avoid standing water near electrical outlets.
Leaks can be dangerous due to electricity, mold, and burns. If you smell gas, leave immediately and call for help.
How long can I wait to replace a leaking water heater?
A leaking tank is typically a sign the unit is nearing end of life. Arrange a replacement as soon as possible to prevent further damage and ensure reliable hot water.
If the tank leaks, plan for replacement soon to avoid bigger problems.
What maintenance prevents leaks?
Annual flushing, testing the T&P valve, inspecting connections, and ensuring proper pressure reduce leak risk and extend heater life.
Do yearly flushes, test the relief valve, and check fittings to prevent leaks.
Watch Video
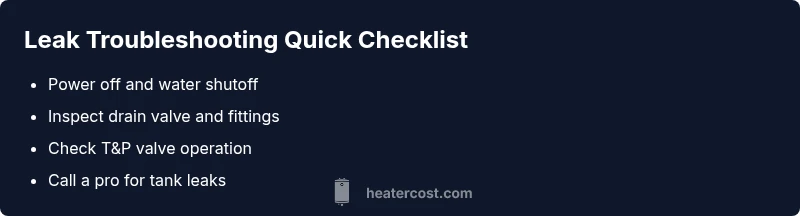
The Essentials
- Shut off power and water to stop the leak safely
- Identify whether the leak is at fittings or the tank
- Tighten or replace valves only when safe to do so
- Call a licensed plumber for tank leaks or complex repairs
- Regular maintenance reduces future leak risk