How to Stop a Heater From Leaking Water: A Practical Home Guide
Learn safe, actionable steps to stop a water heater leak, identify root causes, and prevent future damage. Expert guidance from Heater Cost helps homeowners, renters, and managers act confidently.

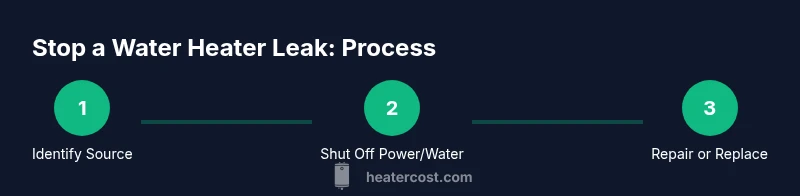
If your water heater is leaking, the first step is to identify the source, shut off the water supply, and assess potential safety risks. For most domestic leaks, you’ll address connections, drain valve, or the tank itself. This guide walks you through safe steps and when to call a pro.
Quick assessment: Is it a leak or condensation?
Most homeowners mistake condensation for a leak, especially on humid days or in damp basements. True leaks usually show steady flow or drips from fittings, valves, or the tank itself. A quick check: run a clean, dry cloth along visible joints to see active moisture, and compare with surrounding condensation on cold pipes. According to Heater Cost, misjudging these signs can lead to unnecessary repairs and unexpected water damage. If you notice frequent condensation after heavy use, keep an eye on temperatures and venting, but treat persistent drips as a leak until proven otherwise. Document where you see water and how quickly it appears—it helps guide the next steps and conversations with a pro.
Immediate safety actions you should take now
Safety first matters more than speed. If you smell gas, hear hissing, or see scorch marks near the heater, evacuate and call emergency services. For non-emergency leaks, shut off the cold-water supply valve to the heater and switch off the power (electric) or gas supply (gas-fired). Then, open a hot-water tap to relieve pressure and let remaining water drain slowly. Keep a bucket handy to catch drips. Do not attempt to repair electrical components while water is present; electricity and moisture are a dangerous combination. The Heater Cost team emphasizes that patients homeowners stay calm, isolate the threat, and prepare for a measured inspection.
How to locate the leak source
Locating the leak can be straightforward or tricky, depending on access. Start at the most likely culprits: connections on the cold-water inlet and hot-water outlet, the drain valve at the bottom, the pressure-relief valve (T&P valve), and the expansion tank (if installed). Look for damp rings around fittings and use a flashlight to inspect undersides and back panels. Clean and dry the area to spot fresh moisture. If your unit is in a tight space, gently feel along joints with a dry cloth to differentiate slow seepage from dripping. Recording exact locations helps you decide whether a quick tightening, a replacement part, or a professional service is needed. Heater Cost analysis suggests that most leaks originate at fittings rather than the tank, but every case requires careful confirmation.
Common leak sources and practical fixes
Loose or corroded connections are the most common leaks. Tightening with the correct tool can stop drips, but overtightening can crack fittings. The drain valve is another frequent culprit—valves can wear, leak past the threads, or fail to seal after draining. The T&P valve should never drip continuously; a steady leak may indicate excessive pressure or a failing valve. The expansion tank, if present, can develop leaks where the connection meets the main line. Finally, tank leaks indicate corrosion or a resulting crack—these leaks are usually not repairable and require replacement. For each source, note whether a simple tightening, a replacement valve, or a full unit replacement is warranted. The Heater Cost team reminds homeowners to address leaks early to minimize water damage and energy waste.
DIY fixes you can perform safely
Start with non-invasive fixes: ensure the power is off, then tighten loose fittings with the proper wrench size, using Teflon tape on threaded connections. If the drain valve leaks, replace it or reseal the threads using a valve sealant compatible with potable water. For a dripping T&P valve, gently inspect for obstructions in the discharge pipe and verify that the valve isn’t blocked. If the expansion tank shows signs of rust or moisture, it often needs replacement. Never attempt to open dangerous valves or replace the gas line without a professional. Basic repairs can reduce leaks, but persistent drips after fixes require professional assessment. The goal is to restore a clean, dry area while preserving safety.
Should you repair or replace the water heater?
The answer depends on the leak source and the age of the unit. If leaks originate from fittings or valves, repairs can extend life and delay replacement. Tank leaks or significant corrosion usually mean replacement is more cost-effective in the long run and reduces the risk of catastrophic water damage. Labor and parts costs vary with type (electric vs gas) and capacity, so weigh the investment against the heater’s remaining life, efficiency, and energy costs. Heater Cost recommends a cautious approach: repair for small, manageable leaks and replacement for recurrent or tank-related leaks, especially in older units.
Maintenance tips to prevent future leaks
Regular maintenance is your best defense against leaks. Schedule an annual inspection to check fittings, valves, and the T&P valve; flush the tank periodically to remove sediment that can contribute to corrosion and bottom-out leaks. Keep an eye on the expansion tank if you have one; ensure it’s properly charged and not waterlogged. Replace worn components such as gaskets and drain valves before they fail. Maintain proper clearance around the heater to avoid heat buildup and improve airflow. Document maintenance notes so you know when to schedule the next service. Consistent care reduces the chance of sudden failures and extends your heater’s life.
Tools, materials, and safety considerations
Before you begin, gather the essential tools: an adjustable wrench, a bucket, rags, a flashlight, Teflon tape, a replacement drain valve or fittings, a voltage tester, and a spare discharge pipe if needed. For gas heaters, never work on gas lines without a licensed professional. Safety first means turning off electrical power and the gas supply when performing inspections. Wear gloves and eye protection to guard against hot water and sharp edges. Always test after repairs by running water through a hot tap to detect any remaining leaks. If you smell gas, evacuate and call your utility provider immediately. The right tools save time and reduce the risk of injury.
Costs, insurance, and how to budget
Budgeting for a leak repair involves evaluating whether the source is a simple fix or a tank replacement. Simple tightening or valve replacement can be inexpensive, while tank replacement is a larger investment. Costs vary by unit type (electric vs gas) and installation complexity. Check with your homeowner’s policy or appliance insurance for coverage on water damage from leaks. If you rent, coordinate with your property manager to assess coverage and responsibilities. Planning ahead for maintenance and potential replacement can prevent surprise expenses and protect your home from water damage.
Final checks and safe re-pressurization
After completing fixes, slowly restore power and cold-water supply. Listen for dripping sounds and observe the drain valve for a period of time. Check the discharge pipe and T&P valve to ensure they are functioning correctly. Return any protective shields or panels, and monitor the area for several hours. If the leak reappears, stop and call a licensed plumber. Completing a careful re-check helps confirm that the repair took hold and reduces the risk of late-night emergencies.
Tools & Materials
- Adjustable wrench(Adjustable wrench with a wide jaw opening to fit various fittings)
- Pipe wrench(Bonus for stubborn fittings)
- Teflon tape (plumber’s tape)(Use on threaded connections to seal leaks)
- Bucket or shallow pan(To catch any leaking water)
- Rags or towels(Dry spills and wipe surfaces)
- Flashlight(Inspect in dark corners)
- Dish soap and water(For leak testing with soapy solution)
- Replacement drain valve or fittings(Only if you find a faulty part)
- Voltage tester(Ensure power is off when inspecting electric heater)
- Gas leak detector(If it's a gas-fired heater, check for gas smells)
Steps
Estimated time: 1-2 hours
- 1
Shut off power and water
Power off at the breaker for electric heaters or switch for gas; close the cold-water shutoff valve to stop inflow; open a hot water faucet to relieve pressure and drain some water. Place a bucket to catch drips and dry surfaces. This reduces shock risk and further water damage.
Tip: Always confirm power is off with a tester before touching electrical components. - 2
Locate the leak source
Inspect fittings at the cold-water inlet, hot-water outlet, drain valve, T&P valve, and expansion tank. Use a flashlight to check hidden areas and wipe surfaces dry to spot fresh moisture. Mark the exact location with a piece of tape for reference during repair.
Tip: If you can’t see moisture clearly, wait a few minutes and recheck after the area dries. - 3
Tighten or replace failed parts
If a fitting is loose, tighten carefully with the correct wrench size. If the drain valve leaks, replace or reseal with appropriate valve sealant. Do not overtighten, as metal threads can strip.
Tip: Use Teflon tape on threaded connections to ensure a good seal after tightening. - 4
Test the T&P valve and expansion tank
Gently operate the discharge valve to ensure it flows freely. Check the expansion tank for signs of moisture or corrosion and verify its connection is tight. If the valve discharges abnormally or the tank shows rust, plan for replacement.
Tip: Never block the discharge line; it must vent away from electrical components and living areas. - 5
Restore power and water
Turn the cold-water supply back on slowly, then restore power or gas to the unit. Monitor for several minutes to detect any new leaks. If the leak returns, shut off again and prepare for professional service.
Tip: Start with low water pressure when testing after repair to minimize stress on joints. - 6
Document and monitor
Note the source and fix performed, and observe the area for 24–48 hours. A persistent drip or faster moisture accumulation indicates a bigger issue that requires professional assistance.
Tip: Keep a log with dates and observations for future reference. - 7
Decide on repair vs. replacement
If the leak is tank-related or the unit is older, replacement may be more cost-effective in the long run. Compare repair costs with replacement options, energy efficiency, and expected lifespan. Seek a professional opinion if unsure.
Tip: Policy check: some leaks may be covered under warranty or homeowner’s insurance for water damage. - 8
Plan preventative maintenance
Create a maintenance routine: annual inspections, periodic flushing to remove sediment, and timely replacement of worn valves. Regular upkeep reduces the chance of future leaks and extends equipment life.
Tip: Set a calendar reminder to perform maintenance every year.
Got Questions?
What should I do first if I notice a leak?
Shut off the power and the cold-water supply, then inspect the leak to identify whether it’s a fitting, drain valve, or tank issue. If you smell gas or hear a hissing sound, evacuate and call emergency services. Document the location for reference.
Shut off power and water first, then locate the leak to decide your next move.
Can a leaking water heater be repaired without replacing the tank?
Many leaks from fittings or valves can be repaired without replacing the tank. If the tank itself shows corrosion or cracks, replacement is usually the safer and more cost-effective option in the long run.
Repairing fittings is common; tank leaks often mean replacement.
Is a leaking T&P valve a serious issue?
A dripping T&P valve can indicate excessive pressure or a faulty valve. It should be inspected promptly, and the valve replaced if it’s not functioning correctly to prevent dangerous pressure buildup.
A leaking pressure-relief valve usually needs attention soon.
What causes a water heater to leak from the drain valve?
A drain valve leak often results from a worn seal, damaged valve, or improper drainage after use. Replacing the valve or resealing with care typically resolves the issue.
Drain valve leaks can usually be fixed by replacing or resealing the valve.
When should I replace a water heater instead of repairing it?
If leaks originate from the tank itself, or if the unit is old and inefficient, replacement is usually recommended. Consider ongoing repair costs, energy efficiency, and expected remaining life when deciding.
Tank leaks or aging units often warrant replacement.
Are gas water heaters more dangerous if leaking?
Yes. Gas leaks combined with water exposure create serious safety risks. If you suspect a gas leak, leave the area and contact the gas utility immediately.
Gas leaks are dangerous; evacuate and call for help right away.
Watch Video
The Essentials
- Identify leak source before acting.
- Prioritize safety and power-off procedures.
- Tighten or replace common failing parts first.
- Decide between repair and replacement based on unit age and damage.
- Implement annual maintenance to prevent future leaks.