Water Heater Tank Leak: A Practical Troubleshooting Guide
Learn how to identify, diagnose, and fix a water heater tank leak safely. This Heater Cost guide covers common causes, immediate safety steps, and practical solutions to protect your home and budget.

Most water heater tank leaks originate from corrosion, a loose drain valve, or a faulty pressure-relief system. Quick fix: 1) shut off power and the cold-water supply, 2) place a bucket and drain a small amount to inspect the drain valve, 3) if the leak persists, shut off the water heater and call a licensed plumber.
What a Water Heater Tank Leak Means
Facing a water heater tank leak can be alarming for homeowners. According to Heater Cost, a water heater tank leak is usually a sign that a critical component is failing and deserves prompt attention. Addressing it early helps prevent more damage and reduces the risk of costly repairs. In most homes, leaks originate at the tank due to corrosion, at the drain valve, or from pressure-relief system discharge. Distinguishing between a minor valve drip and a serious tank failure is essential for choosing the right fix. This guide walks you through safe steps, diagnostic checks, and practical solutions to protect your home and budget.
The moment you notice moisture around the unit, act with purpose. A leak may start as a slow drip but can escalate quickly if left unchecked. Treat every sign of dampness as a potential failure that could affect electrical components, floors, or walls. By understanding the basics of what causes leaks, you can select the safest, most effective response and minimize downtime in your household.
Common Causes of a Water Heater Tank Leak
Leads to water around the base: corrosion is the most frequent culprit in older tanks. A loose, worn, or damaged drain valve can drip steadily or leak when you flush the tank. The temperature and pressure relief valve (TPRV) can discharge if the system is over-pressurized or if the valve is faulty. Sediment buildup can accelerate corrosion, especially in hard water areas. Loose fittings on inlet/outlet connections or expansion-tank issues can also leak water. Understanding these causes helps you triage quickly and decide whether a DIY fix or professional service is needed.
Safety First: Immediate Steps to Take
Before you touch anything, risk of electrical shock and scalding are real. First, turn off power to the water heater at the breaker or switch off the gas supply if you have a gas unit. Then shut off the cold-water supply to the heater. Place a bucket or towels to catch any remaining water. If you detect a gas smell or hear hissing, evacuate and call your gas provider or emergency services. Never work on a hot tank; let it cool for at least an hour. After you secure the area, evaluate whether the leak is from a valve or the tank itself. If there is any sign of a crack in the tank, assume the worst and plan for replacement rather than repair.
Quick Checks You Can Do Without Tools
- Look for dripping from the drain valve; inspect for tightness and wear. - Inspect the discharge line from the pressure relief valve; ensure it drains to a safe location. - Check nearby fittings on the hot and cold water lines for loose connections. - Listen for a steady seep at the tank seam, which indicates tank failure. - Check the expansion tank if your system includes one. These checks help you decide whether a simple tightening or a call to a pro is needed.
How We Diagnose a Leak: Signs, Tests, and Measurements
Professional diagnosis often starts with a visual inspection for stains and rust on the tank exterior and the drain valve. A damp testing approach involves briefly isolating sections of the system to see if moisture persists at specific joints. Pay attention to the rate of dripping: a steady, high-volume drip near the base usually points to tank corrosion, while a slow, intermittent drip near a valve often indicates a valve issue. Remember, if you smell gas or notice scorching heat, stop and call a professional immediately. Water leaks around electrical components demand urgent attention.
Step-by-Step Fixes for the Most Common Causes
- Tighten or replace a leaky drain valve. 2) Tighten loose fittings on inlet/outlet connections. 3) Replace a faulty pressure relief valve if discharge is excessive or irregular. 4) Address tank corrosion by replacing the entire unit if rust is extensive. 5) If sediment buildup caused the issue, perform a controlled drain and flush. 6) Consider adding an expansion tank if your system lacks one and pressure spikes are common. Each fix has its own safety requirements, so proceed with care.
Replacement vs Repair: When to Replace the Tank
A leaking tank is a serious warning sign. If the tank shows rust, bulging, or deep pitting, most plumbers will recommend replacement rather than a patch. A valve or fitting leak can often be repaired or tightened, but a corroded tank means reduced efficiency and reliability. Factor in the age of the unit, energy efficiency, and local fuel costs when deciding whether to repair or replace. Replacements offer reliability gains and potential energy savings in the long run.
Prevention and Maintenance to Avoid Future Leaks
Regular maintenance is your best defense against leaks. Schedule annual inspections of the pressure relief valve and expansion tank, drain the tank to remove sediment at least once a year, and check for mineral buildup that can accelerate corrosion. Keep the area around the water heater clear of clutter to help you spot leaks earlier. Install a drip pan with a secondary containment plan if the heater sits on a finished floor. Finally, address hard-water conditions with a proper water softening system if needed.
What to Expect: Timeframes and Next Steps
Fixing a drain-valve leak or tightening fittings can be completed in under an hour, while replacing a tank typically requires more time and a professional. If the unit is aging or corrosion is evident, plan for a replacement rather than a risky repair. In any case, document all work, update your home records, and schedule follow-up checks. Coordinating with a licensed plumber ensures you have appropriate permits, warranties, and safe disposal where applicable.
Steps
Estimated time: 60-120 minutes
- 1
Power down and protect the area
Turn off power at the breaker or switch off gas supply for gas models. Shut off the cold-water supply to stop inflow. Place towels or a bucket to catch residual water. Wait for the unit to cool if it has been running hot.
Tip: Wear non-slip shoes and safety glasses; electrical work near water is hazardous. - 2
Inspect the drain valve
Check if the drain valve is snug or cracked. If it's dripping, tighten gently with a valve wrench or replace the valve if worn. Be prepared for a larger drip when depressurizing the tank.
Tip: Only loosen or tighten the valve when the tank is cool. - 3
Check pressure relief valve and discharge line
Inspect the discharge line for kinks or blockages. If the valve discharges frequently, do not block it; this may indicate overpressure. If in doubt, consult a professional.
Tip: Never block the discharge outlet or direct water toward electrical components. - 4
Assess fittings and expansion tank
Tighten any loose fittings on the inlet/outlet lines. If you have an expansion tank, ensure it is properly sized and connected; replace if bulging or corroded.
Tip: Maintain clearances around the heater to observe leaks more easily. - 5
Decide on tank condition
If you see significant rust, deep pitting, or continuous leaks from the tank itself, a full replacement is likely the safer option.
Tip: Consider energy efficiency when choosing a new unit. - 6
Schedule professional service
If you cannot locate or safely stop the leak, or if you are unsure about electrical/gas connections, contact a licensed plumber immediately.
Tip: Professional service provides proper permits and warranties.
Diagnosis: Visible water pooling around the base of the water heater or dampness from the tank
Possible Causes
- highWorn or corroded tank causing pinhole leaks
- mediumLoose or faulty drain valve
- lowPressure relief valve discharge due to overpressure or faulty valve
- lowBad connections to inlet/outlet fittings or expansion tank issues
Fixes
- easyIf drain valve is leaking, tighten or replace valve with proper hardware; ensure power is off before maintenance
- mediumShut off power and water, drain some water to inspect tank for rust or cracks; call a pro for tank replacement if corrosion is heavy
- mediumReplace expansion tank or pressure relief valve if defective; seek professional help for proper sizing and installation
- hardFor any suspected gas connection, shut off gas supply and call a licensed plumber immediately
Got Questions?
What is the most common cause of a water heater tank leak?
The most common causes are tank corrosion or a failing drain valve. Valve leaks are often fixable, but tank corrosion usually requires replacement.
Most leaks come from corrosion or a faulty drain valve; valves can be repaired, but a corroded tank often means replacement.
Can a leaking water heater be repaired?
Valve leaks and loose fittings can often be repaired or tightened. If the tank shows rust or bulging, replacement is typically the safer option.
Valves and fittings can sometimes be repaired, but a corroded tank usually needs replacement.
When should I call a professional?
If you smell gas, see large amounts of water, or feel unsure about electrical or gas connections, call a licensed plumber immediately.
Call a pro if you smell gas or there’s significant leakage around the heater.
Is it safe to keep using a leaky water heater?
No. A leak can lead to electrical shock, flooding, and mold. Shut off power and water immediately and seek professional assessment.
No—shut it off and call a pro if there’s any leak.
How can I prevent future leaks?
Regular maintenance, valve checks, expansion-tank inspection, and flushing the tank yearly help prevent leaks and extend life.
Keep up with maintenance and checks to reduce future leaks.
What maintenance can extend tank life?
Annual flushes to remove sediment, test relief valves, and verify fittings can significantly extend the life of a tank.
Flush yearly and test valves to lengthen tank life.
Watch Video
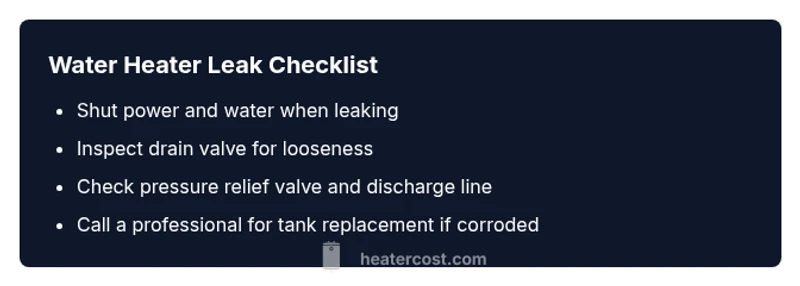
The Essentials
- Identify whether leak is from the valve or tank.
- Shut off power and water before inspecting.
- Call a licensed plumber for persistent leaks or tank replacement.
- Schedule regular maintenance to prevent future leaks.