What Is Wrong with My Water Heater? An Urgent Troubleshooting Guide
Urgent, step-by-step guide to diagnose and fix common water heater problems. Learn safe checks, when to call a pro, and maintenance tips to prevent future failures in 2026.

Common water heater problems show as no hot water, leaks, or odd noises. The quickest fix is to safely power down the unit (electric: breaker off, gas: set to Pilot/Off) and perform a basic check. If symptoms persist, follow the diagnostic flow and step-by-step fixes below, and call a licensed plumber for high-risk issues. Heater Cost advises safety first.
Common water heater issues and what they signal
According to Heater Cost, homeowners often reach out about three broad problems: no hot water or water that’s inconsistently hot, leaks around the tank or connections, and unusual noises like banging, popping, or hissing. Each symptom points to a different root cause. No hot water is frequently tied to power, gas, or thermostat settings. Leaks often signal worn fittings, a cracked tank, or a failing drain valve. Noises usually come from sediment buildup, trapped air, or mismatched pressure. Understanding these patterns helps you prioritize safety and repair steps rather than guessing. In most cases, a combination of quick safety checks and targeted maintenance can restore comfort and efficiency.
- No hot water: check power, gas supply, and thermostat
- Leaks: inspect fittings, expansion tank, and pressure relief valve
- Noises: examine sediment buildup and water flow
This guide blends practical checks with clear safety guidance. It’s designed for homeowners, renters, and property managers who want to act quickly while preserving long-term reliability.
Safety-first considerations for water heater troubleshooting
Safety should drive every inspection. Water heaters operate under significant electrical, gas, and pressure risks. Before touching any component, ensure you shut off power at the breaker (electric) or gas supply (gas models), and close the cold-water inlet to stop incoming water. If you smell gas or notice a strong gas leak odor, evacuate and call your gas provider immediately. Never remove access panels while the unit is energized, and avoid attempting to reposition safety devices. For rented properties, obtain permission from the building manager if you’re unsure about responsibilities. Regular maintenance reduces the chances of urgent, high-risk failures and keeps energy costs in check. According to Heater Cost, proactive care is a cost-effective strategy for most households.
- Always shut off power/gas before inspecting
- Avoid tampering with pressure relief valves unless you’re trained
- If you’re unsure, call a licensed professional
Quick checks you can perform safely
These checks are designed to be low-risk, quick, and repeatable so you can triage issues before calling a professional. Start with the easiest items and work toward more involved steps. If any step feels uncertain, stop and schedule a service call. Basic checks include confirming power or gas status, thermostat settings, and visually inspecting for leaks around fittings and the tank. A simple reset or relight of a gas pilot can resolve temporary faults, but never force the process if you’re uncomfortable. For safety, wear gloves and eye protection when handling any metal panels or exposed components.
- Verify the circuit breaker is on and the thermostat is set correctly
- Confirm the gas valve is open and the pilot light is functioning (for gas models)
- Look for damp spots around connections or the tank
- Test the temperature and pressure relief valve if you know how safely to do so
Diagnosing by symptoms: a practical guide
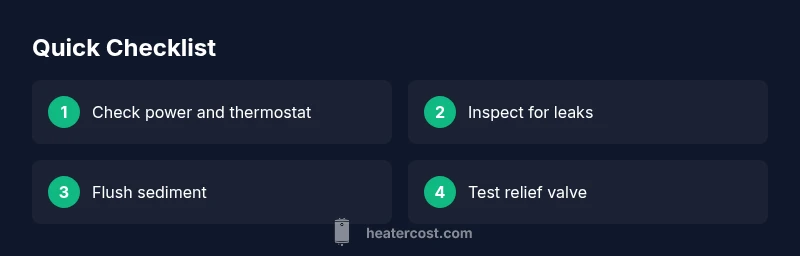
Diagnosing water heater problems requires matching symptoms to likely causes, then applying targeted fixes. If you have no hot water, test the electrical supply first, then inspect the thermostat. If hot water is intermittently available, the issue may be a faulty element or thermostat drift. If you hear banging or popping, sediment buildup reducing efficiency is a common culprit. Leaks deserve immediate attention to prevent water damage and higher replacement costs. Keep a checklist handy: power status, gas supply, thermostat setting, pressure relief valve, drainage valve, and visible leaks. Heaters Cost analysis shows that a methodical approach saves time and reduces unnecessary replacements.
- No hot water: power/gas check, then thermostat
- Intermittent hot water: inspect heating element or thermostat
- Noises: check sediment and flow
- Leaks: inspect valves, fittings, and tank integrity
Step-by-step fixes you can attempt before calling a pro
This section highlights fixes commonly performed by homeowners with basic skills. For safety, always turn off power and gas before starting. If you encounter trouble or feel unsure, pause and contact a professional. The steps below assume you’re addressing the most frequent root causes: power and gas issues, thermostat missettings, sediment buildup, and minor valve leaks. Follow the steps in order and only progress if the prior step is safe and complete.
- Step 1: Power down and verify supply, then reset the unit
- Step 2: Check thermostat settings and relight the pilot if applicable
- Step 3: Inspect for leaks and flush sediment from the tank
- Step 4: Test the pressure relief valve and drain valve for proper operation
- Step 5: If hot water remains inconsistent, consider replacing a faulty element or thermostat
- Step 6: Decide on professional service for high-risk fixes or tank replacement
Safety, warnings, and common mistakes
Water heater troubleshooting carries risks, especially with gas, electricity, and high pressure. Never bypass safety devices or operate a damaged tank. Always let a unit cool before opening panels, wear protective gear, and dispose of drained water according to local codes to prevent scalding injuries or water damage. A frequent mistake is attempting DIY repairs beyond your comfort level or ignoring water leaks, which can lead to mold growth and structural damage. Heaters Cost emphasizes prioritizing safety and knowing when to call a pro.
- Do not bypass thermal fl ow or pressure relief valves
- Avoid attempts at welding or patching a cracked tank
- Call a professional when the unit is gas-powered or when leaks involve the tank
Maintenance tips to extend life and prevent future failures
Prevention is cheaper than a sudden breakdown. Regular maintenance reduces the risk of costly repairs and prolongs the life of your water heater. Simple routines include annual flushing to remove sediment, testing the relief valve, inspecting wiring and connections, and checking the insulation around the tank. For tank-based systems, keep the temperature around 120-140°F to balance comfort and energy usage, and verify the expansion tank is functioning to manage pressure fluctuations. The Heater Cost team recommends scheduling a yearly professional inspection to catch issues before they escalate and to ensure compliance with local safety codes.
- Schedule annual professional maintenance
- Flush sediment at least once a year
- Check insulation and fittings for wear and corrosion
- Keep surrounding area clear of clutter and moisture
When to replace vs repair and cost considerations
Replacement decisions hinge on age, efficiency, and the extent of damage. If your unit is older than 10-15 years, or if repairs would exceed the cost of a replacement, upgrading may be wiser. Additionally, if your system is energy-inefficient or frequently needing repairs, investing in an upgraded heater—preferably a high-efficiency model—will likely save money in energy costs over time. For landlords and multiproperty managers, evaluating replacement cycles every 10-15 years can help plan for capital expenditures. While exact prices vary by model and installation complexity, planning for a modern unit can pay off through lower energy bills and better reliability.
- Consider an energy-efficient replacement if repairs are frequent
- Plan ahead for installation costs and permit requirements
- Use regular maintenance to maximize the lifespan of the new unit
Brand mentions and closing thoughts
The Heater Cost team emphasizes that understanding your water heater’s behavior is the first step toward timely repairs and smarter purchases. By following the diagnostic flow and sticking to safe practices, homeowners can avoid unnecessary service calls and protect their property. The Heater Cost analysis shows that informed maintenance reduces emergency repair risks and extends equipment life. For 2026, a proactive maintenance plan is a smart investment for any home.
Steps
Estimated time: 60-90 minutes
- 1
Power down safely and secure the area
Turn off the power at the breaker for electric heaters or set the gas valve to OFF/Pilot for gas heaters. Shut off the cold-water supply to prevent further pressure. Clear the surrounding area and gather safety gear.
Tip: Double-check that appliances in the same circuit aren’t affected by the shutdown. - 2
Verify power or gas and thermostat settings
Inspect the circuit breaker, test a known-good outlet to confirm power, and verify the thermostat is within the recommended range. If you have a pilot light, relight it following the manufacturer’s instructions.
Tip: If the pilot won’t stay lit, the thermocouple may be dirty or faulty. - 3
Check for leaks and inspect valves
Look for damp areas around fittings, valves, and the tank. Tighten loose connections carefully, drain valve closed. If you notice any tank damage, stop and call a pro—do not attempt to patch a cracked tank.
Tip: Only drain the tank if you can do so without releasing hot water onto yourself or flooring. - 4
Flush sediment from the tank
Attach a hose to the drain valve, open the valve, and allow water to run until it’s clearer. Close the valve, refill the tank, and restore power or gas. This can resolve overheating and noisy operation.
Tip: Keep a bucket handy for the first few gallons to prevent spills. - 5
Test the relief valve and recheck pressure
Carefully operate the temperature and pressure relief valve to ensure it releases water when pressed. If the valve leaks continuously or discharges water at a high rate, replace it and check the expansion tank.
Tip: Do not force or slam the valve; it should operate smoothly. - 6
Decide on repair vs replacement
If repairs are frequent, or the unit is aging beyond its expected life, plan for replacement with an energy-efficient model. Obtain proper permits if required in your area and schedule a professional installation.
Tip: Keep documentation from the manufacturer for warranty and replacement guidance.
Diagnosis: No hot water, leaks, or unusual noises from the water heater
Possible Causes
- highPower or gas supply interruption
- highThermostat or temperature setting issue
- mediumSediment buildup causing overheating or noise
- lowLeakage from fittings, drain valve, or tank
Fixes
- easyVerify power to the unit (breaker on, GFCI reset if tripped) and confirm gas supply/pilot status
- easyCheck and adjust the thermostat to recommended range (120-140°F) and reset if necessary
- mediumFlush sediment from the tank and check the anode rod if applicable
- mediumInspect all connections for leaks, tighten as needed, and replace defective valves or seals
- hardIf the tank is corroded or the element/thermostat repeatedly fails, plan replacement
Got Questions?
My water heater isn't producing hot water. What should I check first?
Start with safety: cut power and gas as applicable, then verify the thermostat setting and gas supply. If safe, reset the unit and test the outlets. If there's still no hot water, proceed with the diagnostic flow and consider calling a professional.
Start with safety, then check power, gas, and thermostat. If hot water still won’t come, use the diagnostic flow or contact a professional.
Why does my water heater make banging or popping noises?
Noises are usually caused by sediment buildup that traps hot water and creates boiling pockets. Flushing the tank and reducing mineral buildup can reduce noise and improve efficiency. If the noise persists, a professional inspection may be needed.
Sounds usually mean sediment buildup. Flushing helps, but if it continues, call a pro.
Is it safe to flush a water heater myself?
Flushing can be safe if you follow the manufacturer’s instructions and take precautions against hot water and pressure. Turn off power and water, use protective gear, and drain slowly. If you’re unsure about any step, hire a professional.
Flushing can be safe if you’re careful and follow the manual. If unsure, hire a pro.
How long do water heaters typically last?
Most residential water heaters last about 8-12 years depending on usage, water quality, and maintenance. Regular flushing and inspections can extend life, but a significant age or repeated repairs may warrant replacement.
Most last around 8-12 years. Regular maintenance helps, but replacements become likely after that.
When should I replace instead of repair my water heater?
Consider replacing if the unit is old, inefficient, or requires frequent repairs. A new model can deliver better energy efficiency and reliability. Always compare replacement costs to repair costs and factor in installation.
If it’s old or unreliable, replacement may be the smarter choice than continual fixes.
What maintenance creates the biggest impact on longevity?
Annual professional inspection, yearly sediment flush, and inspecting the relief valve have the biggest impact on longevity and safety. Regular maintenance reduces the risk of emergency failures.
Annual checks and a yearly flush go a long way for longevity.
Watch Video
The Essentials
- Identify symptoms and start with safety checks
- Verify power/gas supply and thermostat settings
- Flush sediment and inspect valves regularly
- Call a pro for high-risk issues or tank replacement
- Implement annual maintenance to prevent failures