Troubleshooting a Problem with Water Heater
Urgent, practical guidance to diagnose and fix a common water heater problem. Follow a proven step-by-step approach, safety tips, and know when to call a pro for reliable hot water restoration.

A common problem with water heaters is insufficient hot water or no hot water, often caused by a failing thermostat, sediment buildup, or a pilot light issue. Start with quick checks: verify power and circuit breaker, confirm thermostat setting, and inspect the drain valve and drain line for clarity. If unresolved, follow the step-by-step guide below.
Symptoms and Immediate Checks
According to Heater Cost, homeowners frequently report no hot water or inconsistent temperatures as the first sign of a problem with water heater systems. Start by confirming basic conditions: is the unit receiving power, is the thermostat set correctly, and is the cold water supply valve fully open? In many homes, a paused electrical circuit or a mis-set thermostat is enough to explain the issue, especially in older units. If the unit still doesn’t heat, listen for unusual banging sounds or detect a metallic smell, which may indicate sediment buildup or safety-related shutdowns. Quick, safe checks you can perform without disassembling major components include inspecting the power switch, circuit breaker, and the visible gas shutoff (for gas models).
Common Causes Behind No Hot Water or Inconsistent Heat
Water heater problems usually fall into a few broad categories. Sediment buildup can insulate the heating element, reducing efficiency and output. A faulty thermostat may fail to signal the burner or heater coil to operate at the right temperature. The heating element (electric models) or the gas burner (gas models) can wear out over time. A neglected expansion tank or a failing anode rod can lead to premature corrosion inside the tank and reduced hot-water capacity. Regular checks help, but many situations require measured tests to distinguish electrical, gas, or mechanical faults.
Safety First: When to Call a Professional
If you smell gas, hear gas-like hissing, notice a persistent flame abnormality, or see scorch marks, stop what you’re doing and evacuate if necessary. Gas-related issues and electrical faults present immediate safety risks and should be handled only by licensed professionals. If your unit is under warranty or requires significant disassembly (e.g., replacing the thermostat, burner assembly, or heating elements), contact a pro promptly. For renters and property managers, quickly isolating the issue and coordinating with a licensed technician can limit downtime and prevent further damage.
Quick Fixes You Can Try Today
- Check power: Confirm the breaker is on or the GFCI is reset. For electric models, verify the disconnect switch behind the unit is active. - Verify thermostat: Ensure the thermostat is set to a safe level (not too low) and test for accuracy with a multimeter if you have one. - Reset and relight: If your model includes a reset button, press it as directed by the manual, then relight the pilot if appropriate. - Drain and flush: If you notice sediment or water appears cloudy, follow the manual to safely drain and flush the tank to clear mineral buildup. - Inspect valves: Make sure the cold water supply valve and the pressure relief valve are unobstructed and not leaking.
Maintenance to Prevent Future Problems
Routine maintenance is your best defense against future water heater problems. Annually flush the tank to remove sediment, especially in hard water areas. Replace the anode rod every 3–5 years (or as recommended by the manufacturer) to slow corrosion. Check the expansion tank if your system has one, and inspect the venting and draft in gas models to ensure proper operation. Insulation around the tank and pipes reduces heat loss and improves efficiency. For rental properties, schedule a quarterly or biannual check with a licensed technician to stay ahead of issues.
Replacement Considerations: When to Replace a Water Heater
Age is a major factor in deciding replacement versus repair. Most conventional tank-style heaters last 8–12 years with proper maintenance; tanks nearing the end of their lifespan may show frequent leaks, reduced capacity, or rising energy bills. If repairs become recurrent or efficiency has dropped sharply, a new unit could offer long-term savings. For tankless versus tanked choices, consider your hot-water needs, space, and fuel type. In 2026, the Heater Cost team notes that upgrading to a more efficient model can yield notable energy savings, even if the upfront cost is higher.
Steps
Estimated time: 60-90 minutes
- 1
Power check and safety prep
Switch off power at the breaker and unplug the unit if accessible. For gas models, close the gas supply valve and ventilate the area. Confirm the area is safe before proceeding.
Tip: Always test for voltage with a non-contact tester before touching electrical connections. - 2
Thermostat verification
Set the thermostat to a safe, typical hot-water temperature (120–130°F). If you have an older dial, adjust and test after a cooling-off period.
Tip: Use manufacturer's instructions to avoid over-tightening or damaging the thermostat knob. - 3
Pilot light or gas check
For gas units, inspect the pilot light. If it’s out, follow the lighting procedure in the manual. If the flame is yellow or unstable, contact a pro.
Tip: Do not attempt to light gas appliances if you smell gas; evacuate and call your gas provider or emergency services. - 4
Sediment flush
Attach a garden hose to the drain valve, open the valve slowly, and let water run until it clears. Close the valve and refill the tank.
Tip: Do this with the water supply off and the drain valve properly secured to prevent leaks. - 5
Heating element/thermostat test
If you have electrical access, test the heating element with a multimeter and replace if readings are out of spec.
Tip: Power off again before removing access panels; keep the area dry to avoid shock. - 6
System restart and test
Restore power and allow the tank to reheat. Check hot-water output after a short wait and recheck for leaks at valves and fittings.
Tip: Record the temperature setting and hot-water performance for future reference.
Diagnosis: No hot water or significantly reduced hot water
Possible Causes
- highPower or electrical issue
- mediumSediment buildup inside the tank
- mediumThermostat or heating element failure
- lowGas supply or pilot light problem
Fixes
- easyReset circuit breaker or replace blown fuse; ensure the unit is properly wired
- mediumFlush the tank to remove mineral sediment and restore heating efficiency
- mediumTest and replace faulty thermostat or heating element as needed
- hardRelight pilot or repair gas supply with a professional if the pilot won’t stay lit
Got Questions?
What are the most common causes of a water heater not producing hot water?
The most frequent causes are sediment buildup, a faulty thermostat, and heating element issues. Gas models may have pilot light problems or gas supply interruptions. Electrical models can suffer from tripped breakers or blown fuses.
Most water heater problems come from sediment, thermostat or heating element issues, or gas/power interruptions.
Should I turn off power before inspecting a water heater?
Yes. Always turn off the power at the breaker and disconnect power if accessible before any inspection or valve adjustment to avoid shocks. For gas models, shut off the gas and ventilate the area if you suspect a leak.
Always power down first to stay safe before inspecting.
Can sediment buildup cause noises in the tank?
Yes, sediment can settle at the bottom of the tank and cause popping, rumbling, or banging noises as water heats. Flushing the tank can often relieve the noise and restore efficiency.
Sediment can cause popping noises; flushing helps.
When is it time to call a professional?
If you smell gas, suspect a gas leak, have a persistent ignition problem, or if electrical work is required beyond basic testing, contact a licensed plumber or gas technician. Complex issues may indicate a failing component that needs replacement.
Call a licensed pro for gas leaks or complex electrical fixes.
What maintenance prevents most water heater problems?
Annual flushing, checking the anode rod, inspecting valves and insulation, and testing the pressure relief valve can prevent many issues. Regular professional inspections are also beneficial for rental properties.
Regular flushing and component checks prevent many issues.
Is it cheaper to repair or replace a water heater?
Repairing can be economical for minor issues, but if the unit is near end of life or requires several major components, replacement may be more cost-effective in the long run. Consider energy efficiency benefits of newer models.
Repair if cheap and recent; replace if old or inefficient.
Watch Video
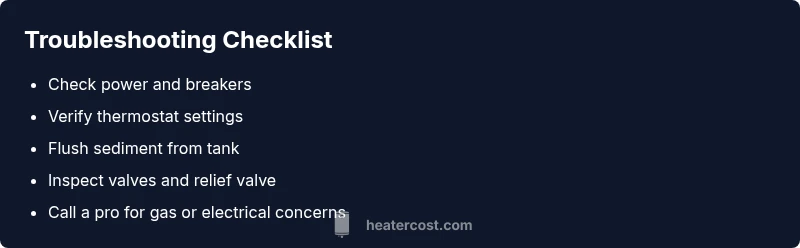
The Essentials
- Identify the symptom and check power first.
- Sediment, thermostat, and heating elements are the top culprits.
- Safety comes first; call a professional for gas or electrical hazards.
- Regular maintenance prevents most problems.