Water Heater Repair and Service: A Practical Guide
Learn how to diagnose, repair, and maintain your water heater. This Heater Cost guide covers common issues, safety tips, and maintenance routines to extend life.

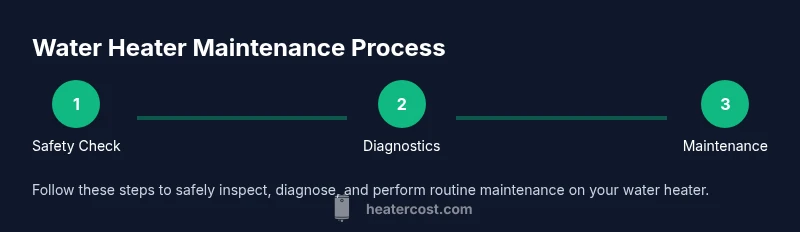
By following this guide, you’ll learn when your water heater needs service, perform safe basic troubleshooting, and decide when to call a pro. You’ll learn how to shut off power and water, inspect common failure points, and prepare for a service visit. This quick path helps homeowners prevent leaks and heat loss while saving money.
Why Water Heater Repair and Service Matters
Water heaters are essential for comfort and safety in modern homes. Regular repair and service help prevent dangerous failures, improve energy efficiency, and extend the life of your unit. From a safety perspective, serviced heaters reduce the risk of gas leaks and carbon monoxide exposure, while energy efficiency improves when components operate in their target ranges. According to Heater Cost, routine inspections and minor adjustments can lower energy waste over time. This guide explains the why, what, and how so homeowners can make informed decisions without overpaying for repairs. It also clarifies the line between DIY checks and professional service, and shows how preventive maintenance fits into a well-managed home budget.
Understanding the common failure modes helps you spot issues early rather than chasing symptoms. The goal of service is not just fixing a problem today but preventing future breakdowns, preserving warranty protections, and keeping your hot water reliable through seasonal changes.
Signs Your Water Heater Needs Repair
Unusual hot water behavior is the first red flag. If your shower alternates between hot and cold or you notice longer wait times for hot water, the heating system may be losing efficiency or suffering a component failure. Common signs include strange noises such as banging or popping from the tank, low hot water pressure, and water around the base of the unit, which could indicate a leak. Rust-colored water can signal corroded tank components or sediment buildup. If the thermostat is misreading, you may see water that is not as hot as you set it. For gas-fired models, a pilot light that won’t stay lit or a burner that produces a loud roaring flame can indicate venting problems or gas supply issues. Electric models may trip the circuit breaker or display error codes on the control panel. In any case, persistent issues warrant a professional assessment to avoid unsafe conditions and further damage.
Safety and Prep: Power, Gas, and Water Shutoffs
Before inspecting or attempting any repair, prioritize safety. For electric water heaters, shut off power at the service panel and verify there is no voltage present. For gas heaters, close the gas supply valve and follow any local codes. Turn off the cold-water supply to the tank to prevent new water from entering during a flush. If you notice dirt, rust, or a strong gas odor, pause work and contact a licensed professional. Always have a bucket, towels, and absorbent rags ready to manage minor leaks, and wear eye protection when working near heating elements or valves.
Basic Troubleshooting Steps You Can Try
This section provides safe, basic checks you can perform between professional visits. Remember: if you smell gas, hear gas escaping, or see a major leak, evacuate and call emergency services. For electric and gas models, follow the step-by-step guide to identify what you can fix safely and when to seek help. Use the tools listed in the next section and document any codes or sensations you notice to have a productive service call.
When to Call a Licensed Technician
There are tasks that require certified expertise, especially when dealing with gas lines, venting, electrical connections, or a leaking tank. Warranties can be voided if incorrect parts are installed or safety devices are bypassed. A licensed technician can perform a more thorough diagnosis, test gas tightness, verify venting integrity, and replace failing components according to local codes. If your unit is older or frequently malfunctions, a professional assessment can help you decide whether repair or replacement makes the most sense for safety and long-term costs.
Preventive Maintenance to Extend Lifespan
Routine maintenance improves reliability and efficiency. Schedule an annual check that includes inspecting the anode rod, draining the tank to remove sediment, inspecting the T&P valve, testing the thermostat, and checking for leaks around valves and fittings. A simple annual flush can reduce mineral buildup and preserve heating efficiency. If you live in hard water areas, consider installing a water-softening system or higher-capacity flush frequency. Keeping an organized maintenance log helps you track service history and maintain warranties.
Tools & Materials
- Adjustable wrench(Essential for loosening fittings)
- Flathead and Phillips screwdrivers(Various sizes for terminations and panels)
- Multimeter(For electrical checks on electric models)
- Bucket, towels, and rags(Catch and wipe up water spills)
- Garden hose(For draining and flushing the tank)
- Safety gloves and goggles(Protect hands and eyes from hot surfaces and chemicals)
- Vacuum or soft brush(Clean sediment from accessible areas)
- Ventilated area lights(Improve visibility in tight spaces)
Steps
Estimated time: 45-90 minutes
- 1
Turn Off Power and Water Supply
Begin by disabling power to the water heater at the main breaker panel (for electric units) or shutting off the gas supply valve (for gas units). Close the cold-water supply to the tank, which prevents more water from entering while you work. This step reduces the risk of electric shock, scalding, and gas leaks during inspection.
Tip: Verify power is off using a non-contact tester or multimeter before touching wires. - 2
Check Thermostat and Temperature Settings
Inspect the thermostat settings and verify they match your preferred hot water temperature (usually 120°F or 49°C). If you recently replaced parts or drained the tank, the thermostat might reset. Use a calibrated thermometer to confirm the actual water temperature after a test run.
Tip: Avoid settings above 120°F to reduce scald risk and energy use. - 3
Inspect the Temperature Pressure Relief Valve
Locate and inspect the TPR valve for signs of leakage or corrosion. If you hear water hissing or see steam, the valve may be stuck or worn. Carefully lift the test lever to ensure it moves freely, then lower it back. Do not force the valve open or remove it entirely.
Tip: Only perform the lever test gently; persistent leaks require professional service. - 4
Examine Heating Elements or Burner Assembly
For electric heaters, check heating elements and thermal cutoffs for signs of wear or open circuits. For gas models, inspect the burner and flame—yellow or soot indicates improper combustion and needs adjustment. Do not attempt to dismantle gas jets without proper training.
Tip: Use a multimeter to test element continuity on electric units. - 5
Flush and Drain the Tank
Connect a hose to the drain valve, place the other end in a safe location, and open the valve to flush out mineral sediment. Allow the tank to drain, then close the valve and refill with cold water. Re-ignite or re-light the unit after the tank is full and there is hot water flow.
Tip: Do not flush with the water heater full of hot water; allow the tank to cool first if possible. - 6
Restore Power and Test
Reconnect power or relight the pilot and burner as appropriate. Turn on the cold-water supply and allow the tank to reheat. Check for leaks around fittings, verify hot water delivery, and monitor for unusual noises.
Tip: Keep a log of temperature, cycle behavior, and any error codes to share with a pro.
Got Questions?
Can I perform water heater repairs myself?
Basic checks are possible, but major repairs should be handled by a licensed professional to ensure safety and warranty compliance.
You can do basic checks yourself, but major repairs should be done by a licensed professional.
How often should I flush the tank?
Most homes benefit from an annual flush; more frequent flushing may be needed in hard water areas.
Typically once a year, more often if your water is hard.
What safety precautions should I take before inspection?
Turn off power, shut off water, and avoid touching live electrical components. If in doubt, call a pro.
Turn off power and water before inspecting; avoid live components.
What are common signs of a failing thermostat?
Inconsistent temperatures, unexpected temperature swings, or water not reaching set heat levels indicate thermostat issues.
Look for inconsistent temps or failure to reach the set heat.
Is gas water heater repair dangerous?
Yes. Gas work requires licensed technicians due to carbon monoxide risk and gas line safety.
Gas repairs are dangerous and require a licensed pro.
When should I replace rather than repair?
If repairs are frequent or efficiency has declined, replacement may be more cost-effective and safer in the long term.
Consider replacement if repairs become frequent.
Watch Video
The Essentials
- Regular maintenance extends water heater life
- Know safe shutoffs and when to call a pro
- Sediment buildup harms efficiency, flush regularly
- Listen for warning signs early to prevent leaks
- Plan preventive maintenance as part of home budgeting