Fix Water Heater: A Complete Step-by-Step Home Guide
Learn how to safely diagnose and repair common water heater problems with a practical, step-by-step approach. This guide covers needed tools, safety, troubleshooting, and maintenance to extend heater life and save on energy costs.

By following this guide, you will learn how to diagnose and fix common water heater issues safely at home, from resetting thermostats to addressing leaks. Before you begin, gather basic tools and PPE, shut off power or gas, and understand when a professional is needed. According to Heater Cost, many fixes are cost-saving when done correctly, but safety comes first.
Why fix water heater matters
A functioning water heater is central to daily comfort and safety in any home. Common issues—cold showers, inconsistent temperatures, or puddles around the tank—aren't just nuisances; they can indicate worn components, energy waste, or even safety risks. Fixing a water heater not only restores reliable hot water, but also improves efficiency, reduces energy bills, and lowers the risk of major leaks. In this guide, you’ll learn how to diagnose the most common problems, perform safe basic repairs, and determine when it’s wiser to call a licensed technician. Throughout, prioritize safety and follow local codes. If you’re ever unsure, err on the side of caution and consult a pro. Small, timely fixes often prevent larger, more expensive failures later.
Common problems you may encounter
Water heaters fail for predictable reasons: thermostat miscalibration, sediment buildup, worn heating elements in electric models, or ignition/fuel supply issues in gas units. You might notice inconsistent water temperature, a drop in hot water supply, louder operation, or visible leaks. Leaks around fittings can be slow but progressive; over time they may corrode surrounding structures. Sediment buildup reduces heating efficiency and shortens tank life. If you discover rusty water, that could indicate internal corrosion. In many cases, addressing a faulty thermostat, replacing a heating element, or resealing threaded connections is enough to restore performance. When leaks are present, you’ll need to evaluate the source and the risk of tank damage. This section helps you prioritize likely causes so your diagnostic path is efficient.
Safety first: codes, gas, electricity, and water
Water heater work involves electricity, gas, and potentially high-temperature water. Always begin by turning off the power at the breaker or disconnecting the gas supply and isolating the water line. Use PPE—gloves and eye protection—and never bypass safety devices like the temperature and pressure (T&P) valve. If you suspect a gas leak, evacuate immediately and call the utility. Drainage and drainage pan adherence to local codes is essential to avoid water damage. Checking the electrical connections for any corrosion or loose wires should be done with the power isolated to prevent shock. If you’re unsure about gas or electrical work, do not proceed. Your safety and the home’s safety depend on following proper procedures and, when in doubt, engaging licensed professionals.
Repair vs replacement: making the call
Choosing between repair and replacement depends on the problem, the age and efficiency of the unit, and the cost of required parts. If the issue is a single failed component and the rest of the system remains sound, a targeted repair can be a smart, cost-effective choice. If your heater is repeatedly failing, or if energy bills are climbing despite fixes, it may be time to consider replacement with a modern, more efficient model. Compare potential repair costs with a rough estimate for a new unit, including installation. Also consider the long-term energy savings of newer equipment. A pro can help you decide by evaluating the tank’s condition, insulation, and the likelihood of future failures.
Tools and parts overview
Most fix water heater tasks require a core set of tools and parts that help you perform adjustments safely and accurately. Expect to work with wrenches of various sizes, screwdrivers, a multimeter for electrical checks, and a suitable drain hose for tank flushes. For gas models, a gas leak detector and proper ventilation are essential. For all models, have a bucket, towels, and rags handy to manage drips. When ordering replacement parts, match the make and model to ensure compatibility with your heater’s components. If a part seems corroded or difficult to access, pause and reassess—forcing a repair can risk further damage.
Diagnostics workflow: a practical approach
Begin with non-destructive checks that don’t require disassembly. Confirm power or gas isolation, verify thermostat settings, and inspect the T&P valve and drain lines for signs of leakage. Test the heating element (electric) or ignition system (gas) using appropriate meters and indicators. Check for sediment at the bottom of the tank by draining a small amount of water and inspecting the water clarity. If you find corrosion, unusual noises, or frequent tripping, document the symptoms and plan for targeted replacements. A methodical approach reduces guesswork and helps you decide whether the fix is straightforward or better handled by a professional.
Quick maintenance and safety checklist
To extend the life of your unit and prevent common failures, flush the tank annually or as recommended by the manufacturer, inspect the anode rod, and replace worn components before leaks develop. Keep the area around the heater clean and dry to avoid moisture-related hazards. Record maintenance dates and note any recurring issues to discuss with a pro. Regular checks on inlet/outlet connections help you catch small leaks early, protecting your home from costly water damage. Finally, maintain proper ventilation for gas units and avoid obstructing the venting path.
When to call a professional and cost considerations
If you encounter persistent leaks, uncertain electrical or gas work, or recurring failure after a basic repair, it’s wise to bring in a licensed technician. A professional can safely diagnose complex issues, verify code compliance, and advise on whether a replacement would deliver better long-term value. When budgeting, compare the cost of parts and labor for a repair against the price of a new unit and installation, taking into account potential energy efficiency improvements. The goal is to minimize risk and ensure reliable hot water, not to push a rushed decision.
Helpful external resources and references
For safety and standards, consult authoritative sources: the U.S. Department of Energy’s Energy Saver guide on water heating (https://www.energy.gov/energysaver/water-heating) for efficiency tips; OSHA’s safety guidelines for electrical work (https://www.osha.gov); and general standards and references from NIST (https://www.nist.gov). These resources help you understand best practices, code expectations, and safe handling when working on a water heater.
Tools & Materials
- Multimeter(For electrical tests on electric water heaters; verify voltage and continuity safely.)
- Non-contact voltage tester(Quickly confirm live circuits before touching components.)
- Adjustable wrench(Loosen/tighten fittings on water and gas connections.)
- Pipe wrench(Useful for stubborn pipe fittings and drain connections.)
- Screwdrivers (Phillips and flathead)(Open access panels and secure fasteners.)
- Teflon tape (PTFE) and pipe thread sealant(Seal threaded connections on water and gas lines.)
- Bucket and rags(Catch water and manage spills during draining and flushing.)
- Gloves and safety goggles(Protect hands and eyes from hot water and sharp edges.)
- Gas leak detector (or soapy solution)(Check for leaks in gas lines before and after work.)
- Drain hose(Attach to the tank drain for controlled flushing.)
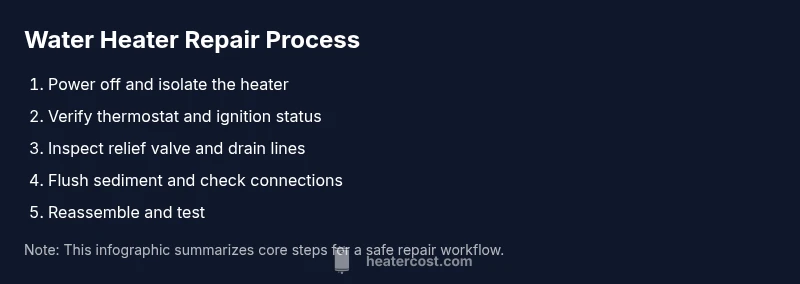
Steps
Estimated time: 1.5-3 hours
- 1
Power off and isolate the heater
Locate the disconnect switch for electric heaters or shut off the gas supply valve for gas models. Confirm there is no power to the unit using a non-contact tester. This step prevents shocks and accidental ignition during inspection.
Tip: Double-check that both the thermostat and circuit breakers/fuses are in the OFF position before touching any wiring. - 2
Verify thermostat settings
Set the thermostat to a safe temperature and test whether water reaches the expected heat level. If the water remains inconsistent, test or replace the thermostat sensor or calibration knob, following the manufacturer’s guidelines.
Tip: Take a photo of current wiring before removing any components to help with reassembly. - 3
Inspect heating elements or ignition system
Electric heaters use heating elements; gas units rely on the ignition system. Use a multimeter to test element continuity or ensure the igniter is clean and functional. Replace faulty components if you confirm the fault is isolated and accessible.
Tip: If you smell gas, do not test ignition—evacuate and call the utility immediately. - 4
Check the T&P valve and drain line
Look for corrosion, leaks, or a stuck valve. If the valve discharges water intermittently, it may be failing or undersized. Do not force the valve; replace with the exact model if needed and ensure the discharge pipe is correctly routed.
Tip: Always relieve pressure slowly by opening the drain valve after isolating the supply lines in a controlled manner. - 5
Flush sediment and inspect connections
Drain a portion of the tank to remove sediment; re-fill and re-test. Inspect all inlet/outlet connections for tightness and signs of leaks. Replace worn seals or gaskets as needed.
Tip: Use a bucket and towels to minimize mess; never force fittings beyond their intended torque. - 6
Reassemble and test
Re-seat the access panel, re-energize power or gas, and run hot water to confirm performance. Monitor for leaks and listen for unusual noises or smells. If the unit trips breakers or vents poorly, shut down and seek professional help.
Tip: Keep a log of your test results and notes about any recurring issues for future reference. - 7
Evaluate safety and code compliance
Verify that venting is clear, connections are secure, and there is no obvious sign of damage. Check that the installation conforms to local codes and manufacturer recommendations. Keep emergency numbers handy in case you encounter a problem.
Tip: If you’re uncertain about venting integrity or gas fittings, contact a licensed technician before proceeding. - 8
Decide on next steps
If fixes work reliably and the unit maintains safe water temperatures, monitor performance for a few days. If issues persist, plan for professional diagnostics or replacement. A proactive approach reduces the risk of a sudden failure.
Tip: Set a reminder for annual maintenance to extend the life of the heater.
Got Questions?
What are common signs that a water heater needs repair?
Common signs include cold water, fluctuating temperatures, leaks around the tank or fittings, unusual noises, and longer wait times for hot water. These symptoms indicate potential thermostat, element, or valve issues that warrant inspection.
Common signs are cold water, temperature swings, leaks, and unusual noises, signaling possible thermostat, element, or valve problems requiring inspection.
Is it safe to fix a water heater myself?
DIY fixes are possible for basic, non-safety-critical tasks when you have experience and follow safety guidelines. For gas, electrical, or complex plumbing issues, professional service is advised to ensure code compliance and safety.
DIY work is okay for simple tasks if you know what you’re doing. For gas or electrical issues, hire a professional to stay safe and compliant.
How long does a typical water heater repair take?
Repair time varies with the problem and model. Some fixes can be completed in under a couple of hours, while others may require more time or part replacements.
Repair time depends on the issue and model; some fixes take only a couple of hours, others longer.
When should I replace instead of repairing a water heater?
If the unit is frequently failing, shows extensive corrosion, or energy efficiency has declined significantly, replacement may offer better reliability and savings over time.
If failures are frequent or efficiency is poor, replacement might be the smarter long-term choice.
Do I need a permit to work on a water heater?
Permits depend on local codes. In many areas, licensed professionals handle permitting and inspections for new installations or major repairs.
Permits vary by location; many places require a licensed professional for inspections and permits.
What maintenance can prevent future problems?
Regularly flush the tank to remove sediment, inspect the anode rod, check connections, and test the T&P valve. Keeping up with maintenance reduces the likelihood of leaks and improves efficiency.
Flush the tank, inspect the anode rod, check connections, and test the safety valve to prevent future problems.
Are newer water heaters more energy-efficient?
New models often offer better energy efficiency and longer life. If your current unit is old or inefficient, upgrading can lead to energy savings and improved performance.
Newer models can save energy and improve performance, so upgrades may be worth considering.
What are signs of a dangerous gas water heater?
Gas heaters with gas smell, hissing, or persistent pilot problems may indicate leaks or faulty regulators. If you smell gas, evacuate and call emergency services.
Gas odors or leaks require immediate evacuation and professional attention.
Watch Video
The Essentials
- Identify safety first and shut off power/gas before work
- Diagnose thermostat and heating elements before replacing parts
- Flush sediment and inspect for leaks to prevent damage
- Know when to call a professional and consider efficiency gains