Instant Water Heater Repair: A Step-by-Step Homeowner Guide
A comprehensive, safety‑first guide to diagnosing and repairing instant water heaters. Learn common symptoms, tools, step-by-step DIY workflows, and when to call a pro, with maintenance tips to extend life and reduce future costs. Heaters, costs, and repairs explained by Heater Cost.

Learn how to diagnose and safely repair an instant water heater. This guide covers common symptoms, essential tools, and a practical, step-by-step process you can follow. You’ll decide whether a DIY fix is appropriate or if professional service is needed, and you’ll learn safety precautions, typical failure points, and how to test your system after repairs.
Understanding Instant Water Heater Basics
An instant water heater, often called a tankless or on‑demand unit, heats water as it flows through the system rather than keeping a tank of hot water. This design offers steady temperatures and reduced standby losses, but it also means failures can feel more abrupt. When you encounter a problem, start with the basics: confirm the unit is receiving power or gas, verify the water supply, and check for obvious signs of wear such as leaks or corroded fittings. For homeowners exploring "instant water heater repair", the first rule is to separate symptoms by system type (electric vs gas) and then drill down to components most likely to fail. In many cases, simple maintenance or a clogged inlet filter resolves the issue without a full replacement, saving time and money. This guide draws on Heater Cost analysis to help you approach repairs confidently while avoiding common pitfalls. Remember: if you’re unsure, prioritizing safety and professional help protects both you and your equipment.
Keywords to watch for: instant water heater repair, symptoms, maintenance, tankless heater, electrical safety, venting, gas safety, water pressure.
Safety First: Before You Start
Safety is the foundation of any do‑it‑yourself repair, especially with an instant water heater where electrical, gas, and water systems intersect. Before touching anything, shut off power at the breaker and close the main water valve to prevent shocks and flooding. If gas is involved, ensure the gas supply is fully controlled and that there’s adequate ventilation. Wear eye protection and gloves, and keep a bucket and towels handy for minor leaks. Never bypass safety devices or wiring protections; damaged insulation or burnt components can lead to fire or carbon monoxide risks. After turning off utilities, use a non‑contact voltage tester to confirm that circuits feeding the unit are dead. If you detect a foul gas smell, evacuate and call the utility or a licensed professional immediately. Conduct work only in a dry area with stable footing. This hands‑on exploration should feel deliberate, not rushed, and always backed by the manufacturer’s safety guidelines.
Note: When in doubt, pause and consult a professional. The goal is to reduce risk while identifying the root cause of the fault.
Symptoms and Diagnosis: What You're Seeing and What It Means
Understanding symptom patterns helps narrow down possible faults in an instant water heater. Common signs include no hot water, fluctuating temperatures, water that remains cold, or water that is too hot. Leaks, excessive noise, and error codes on the display are additional telltales that point to specific failures such as clogged filters, failed flow sensors, or a defective thermal sensor. For electric models, a tripped breaker, blown fuse, or a loose connection can interrupt heating. Gas models may show flame failure, improper ignition, or venting blockages. When diagnosing, separate electrical, gas, and water‑flow issues, then trace each path step by step. Make sure to document any error codes, as these guide your repair path and help determine whether a DIY fix is appropriate or if professional service is warranted. If your unit has an access panel, inspect wiring and terminals for corrosion or discoloration. Keep a log of symptoms to compare post‑repair results and verify repair effectiveness after testing with hot water.
Tools, Materials, and Preparation
Before you begin any repair, assemble a basic toolkit and the specific parts your unit may require. Essential items include a multimeter for electrical testing, a non‑contact voltage tester to verify power is off, and a screwdriver set with both Phillips and flathead drivers. Pliers or adjustable wrenches help with fittings, while Teflon tape ensures a secure seal on threaded connections. Have a bucket, towels, and rags ready for leaks and spills. Replacement parts should be model‑specific and correspond to the unit’s serial and part numbers; common components include heating elements, thermistors or thermostats, flow sensors, and ignition components for gas models. For water quality, keep spare inlet screens and filters; mineral buildup can cause recurring issues. If you suspect mineral buildup, include a descaling agent according to the manufacturer’s guidelines. Finally, ensure you have a reliable light source and a clean workspace to avoid misplacing screws or connectors.
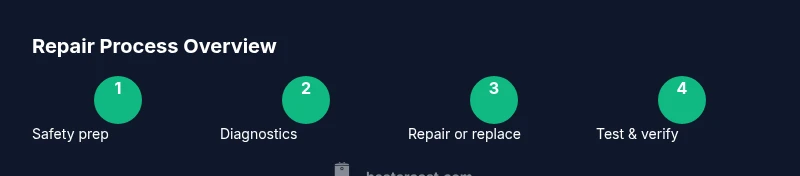
Step-by-Step Diagnostic and Repair Workflow
This section provides a structured workflow you can follow to perform a safe, thorough diagnosis and repair. Step 1: Shut off power and water, then verify de‑energization with a tester. Step 2: Inspect for visible damage, leaks, or corrosion and check error codes. Step 3: Test electrical connections and breakers; reseat or replace if loose. Step 4: For gas units, verify gas supply, igniter operation, and venting status. Step 5: Clean or replace inlet screens and filters to improve water flow. Step 6: Test the flow sensor and, for electric units, the heating element’s resistance with a multimeter. Step 7: Reassemble, restore power and water, and run hot water to confirm stable temperature. Step 8: Document results and monitor performance over a short period. Time estimates will vary by unit and problem complexity.
Common Fixes by System Type: Electric vs Gas
Electric instant water heaters commonly fail due to a faulty heating element, a defective thermostat, or calcified mineral buildup on heat exchangers. Solutions typically involve cleaning mineral deposits, testing element resistance, and replacing the heating element or sensor. Gas models often struggle with ignition, gas valve issues, vent obstructions, or flame failure. Fixes may include cleaning or replacing the igniter, clearing the burner, inspecting the vent system for blockages, and ensuring a proper gas supply and pressure. In both cases, verifying that safety devices and venting are intact is critical for safe operation and code compliance. Regular maintenance reduces the likelihood of sudden failures and extends the unit’s life.
When to Replace Components and When to Call a Pro
Not every failure is economical to repair. If multiple critical components fail or if replacement parts are expensive, many homeowners opt to replace the unit rather than repair, especially if efficiency and warranty considerations favor upgrading. If you encounter gas‑related problems, it’s prudent to contact a licensed technician due to combustion safety and ventilation requirements. For electrical issues beyond basic testing and reseating connections, a licensed electrician or a qualified service professional should handle panel work and sensor replacements to prevent risk of shock or fire. In all scenarios, balance the cost of parts and labor against the price of a new unit with the potential energy savings and warranty terms. A professional assessment can prevent costly mistakes and ensure ongoing safety.
Verdict and Long-Term Maintenance Plan
Verdict: For most households, start with basic maintenance and simple sensor or filter replacements before committing to major repairs. If the unit is older, or if more than one major component requires replacement, a professional assessment often reveals whether repair or replacement offers the best long‑term value. Maintenance should include regular descaling, filter checks, and annual inspections of venting and electrical connections. The Heater Cost approach emphasizes safety, reliability, and cost efficiency over time. By investing in routine maintenance, you protect your hot water supply and minimize unexpected outages. Regular checks also help you catch wear before it becomes a stubborn fault.
AUTHORITY SOURCES
• U.S. Department of Energy energy.gov on energy efficiency and maintenance for water heating systems: https://www.energy.gov/ • Consumer Product Safety Commission on electrical safety and appliance care: https://www.cpsc.gov/ • Institute of Heating and Ventilation Engineering educational materials: https://www.heating.org/
Heater Cost Verdict: The safest and most economical path is to pair routine maintenance with targeted DIY fixes for simple issues and to rely on a qualified pro for gas or high‑risk repairs. Upgrading to a newer, energy‑efficient model can also reduce long‑term costs and provide better reliability.
Tools & Materials
- Multimeter(to test electrical resistance and voltage)
- Non-contact voltage tester(to verify power is off before touching wires)
- Screwdriver set (Phillips and flathead)(for opening panels and terminal screws)
- Adjustable wrenches/pliers(for fittings and hose connections)
- Teflon tape(for threaded connections and leaks)
- Bucket, towels, rags(to manage spills and leaks)
- Replacement parts (as diagnosed): heating element, thermostat, igniter, flow sensor(only if testing shows a fault)
- Inlet screen/filters(spares for cleaning or replacement)
- Personal protective equipment (gloves, eyewear)(safety first)
Steps
Estimated time: 60-90 minutes
- 1
Shut off power and water
Turn off the circuit breaker feeding the unit and close the main water valve. Confirm there is no voltage at the unit with a non‑contact tester before you touch any components. This prevents shocks during inspection and repair.
Tip: Always verify power is off at the breaker panel before proceeding. - 2
Check for error codes and manuals
Look at the display for error codes or status lights. Refer to the manufacturer manual for code meanings. If you don’t have the manual, note the code and search the model number online for guidance.
Tip: Document codes to guide diagnosis and avoid guessing. - 3
Inspect electrical connections
Open the access panel and visually inspect for loose, burnt, or corroded wires. Reseat connectors gently and retest continuity with a multimeter if you’re comfortable. Do not replace parts based on appearance alone if resistance readings are within spec.
Tip: Loose connections are a common, fixable cause of intermittent heat. - 4
Evaluate gas supply and ignition (gas models)
Check that the gas valve is fully open and the igniter is sparking. If there’s no ignition or a gas odor, stop and contact a licensed professional. Do not attempt gas line work without proper licensing and safety measures.
Tip: Gas work is high risk; safety first. - 5
Clean or replace inlet screens and filters
Shut off water, disconnect the water line, and remove the screen. Clean mineral buildup and reinstall with care. Replace filters if you have spare parts on hand and if the unit design allows.
Tip: Clogged screens are a frequent but easy fix. - 6
Test flow sensor and heating element
For electric units, measure the heating element resistance with a multimeter and compare to the manufacturer spec. For flow sensors, ensure the sensor is detecting flow correctly; replace if it’s stuck.
Tip: Inaccurate flow sensing stops heat in many models. - 7
Reassemble, restore power and water, test
Reconnect any panels, restore power and water gradually, and run hot water to verify stability. Watch for leaks and monitor for error codes during the test period.
Tip: Run several tests to confirm consistency before normal use. - 8
Document results and plan next steps
Record what you did, what worked, and what didn’t. If issues persist or if the unit requires multiple major parts, seek professional evaluation to decide between repair or replacement.
Tip: A short post‑repair log helps future troubleshooting.
Got Questions?
What is an instant water heater?
An instant water heater heats water on demand, without a storage tank. It’s typically either electric or gas powered and requires proper venting for gas units. These units respond to flow demand and can save energy, but failures can appear suddenly when components wear or clog.
An instant water heater heats water on demand, without a tank; it can be electric or gas and needs proper venting for gas models.
Can I repair an electric instant water heater myself?
Yes for simple tasks like cleaning filters or replacing a faulty inlet screen. More complex repairs, especially involving heating elements or control boards, may require an electrician or technician. Always follow safety guidelines and disconnect power before any work.
You can do basic fixes like cleaning filters, but for major repairs, call a professional.
What causes no hot water in a tankless heater?
Common causes include power or gas supply issues, tripped breakers, clogged water inlets, faulty sensors, or a blocked vent on gas units. Diagnosing requires checking the power source, gas supply, and water flow path, then testing sensors and the heating element.
No hot water is often due to power, gas, or flow issues, plus clogged screens or sensors.
Is professional service required for gas units?
Gas units involve combustion safety, venting, and gas line integrity. If you suspect venting issues, flame failure, or gas smells, contact a licensed technician. Do not attempt gas line work without proper training.
Gas units require a licensed pro for safety and compliance.
How do I maintain my instant water heater to prevent problems?
Regular descaling, cleaning inlet screens, and annual inspections of venting and electrical connections help prevent failures. Follow manufacturer guidelines for flushing and cleaning, and schedule professional checkups if you notice recurring symptoms.
Keep the unit clean, flush minerals, and have annual checks to prevent problems.
What about warranties and safety when DIY repairing?
DIY repair can affect warranties; always check the manufacturer’s terms. If the repair involves gas or major electrical work, it’s prudent to involve a licensed professional to safeguard safety and compliance.
DIY could affect warranties; consult manufacturer terms and consider a pro for risky work.
Watch Video
The Essentials
- Safety first with shutoffs and PPE
- Differentiate electric vs gas issues for accurate fixes
- Clean filters and screens prevent many failures
- Call a pro for gas work or complex electrical repairs