Water Heater Repair: A Homeowner's Step-by-Step Guide
Learn how to diagnose common water heater problems, safely perform basic repairs, and extend the life of your unit. This educational guide covers signs of failure, safety precautions, DIY steps, and when to call a professional. Heater Cost provides practical guidance for homeowners.

By following these steps, you’ll identify and diagnose common water heater problems, perform safe inspections, and complete basic repairs or maintenance tasks. You’ll learn the signs of failure, essential tools, and troubleshooting tests, plus clear safety precautions. This guide, inspired by Heater Cost analyses, helps homeowners decide when repair is practical and when to call a licensed professional.
Common issues signaling water heater problems
Common signs that your water heater needs attention include insufficient hot water, fluctuating temperatures, and unusually long recovery times between uses. You may also notice rumbling or banging sounds from sediment, leaks around connections, rusty water, or higher energy bills. For gas heaters, a misbehaving pilot light or intermittent burner can point to problems with the gas control or venting. These symptoms often stem from mineral buildup, a failing thermostat, or a worn heating element. Regular maintenance helps catch these issues early, reducing the risk of sudden outages. The Heater Cost team emphasizes that early diagnosis saves energy and extends unit life, making routine checks an essential part of home maintenance.
Safety first: essential precautions before you begin
Before you touch any part of a water heater, ensure power is off, water is shut off, and any gas supply is isolated if you’re working on a gas unit. Wear safety goggles and gloves to protect against hot water and sharp edges. Do not attempt repairs if you smell gas, hear a gas leak, or see obvious corrosion around fittings. Keep a bucket, towel, and plastic hose ready for draining, and never work alone if you’re unsure. Following these precautions reduces the risk of burns, electrocution, or gas-related hazards. Heater Cost’s guidance underscores that safety is the foundation of any repair project and should precede diagnostic steps.
Basic diagnostic checks you can perform safely
Start with visible checks: confirm the power source and breaker status, verify the thermostat setting, and inspect pressure relief valve operation by lifting the lever slightly (with water off and the unit cooled). If safe, test the thermostat with a multimeter for continuity and check the heating element resistance on electric models. For gas heaters, verify the pilot assembly and thermocouple are clean and properly positioned. These non-invasive tests can reveal faults without disassembling critical components. Heater Cost analysis notes that many issues are resolved by simple fixes and routine maintenance rather than full replacement.
Inspecting the anode rod and replacing it if needed
The anode rod protects the tank from corrosion by attracting ions in the water. If the rod is significantly corroded (often gray, mushy, or covered in yellowish deposits), replacing it can dramatically extend tank life. To inspect, turn off power, drain a small amount of water, and remove the hex head cap from the top of the heater. If the rod shows heavy corrosion or is more than half consumed, replace with a new anode rod of the same diameter and length. This is a common maintenance item that can prevent leaks and prolong efficiency. Heater Cost’s guidance highlights anode rod replacement as a cost-effective step in routine maintenance.
Draining and flushing the tank to remove sediment
Sediment buildup reduces efficiency and shortens heater life. To flush, connect a hose to the drain valve, place the other end in a suitable drain, and carefully open the valve to release water while the hot water outlet is closed. Once the tank drains, briefly open the cold water supply to rinse the tank, then close the valve and refill. Allow the tank to fill, then drain again to remove settled sediment. This process should be done periodically or when sediment has visibly accumulated. Heaters with heavy mineral content benefit from more frequent flushing; consider annual flushing as part of a maintenance plan.
Inspecting valves, connections, and leaks
Check the cold-water inlet, hot-water outlet, and pressure relief valve for signs of wear, leaks, or corrosion. Tighten loose fittings with the appropriate wrench, but avoid overtightening, which can strip threads or crack fittings. If you notice persistent leaks, replace faulty valves or fittings rather than simply tightening them. Ensure the discharge tube from the pressure relief valve runs to a safe location and remains unobstructed. Regular inspection of these components can prevent water damage and preserve system efficiency.
Electrical and gas considerations when repairing
Electrical heaters require turning off the breaker and using a non-contact tester to verify no voltage before handling any wires. For electric models, test heating elements and thermostat continuity with a multimeter, and replace failed elements as needed. Gas-fired units require careful vetting of the gas supply, venting, and flame quality; never attempt to service gas components if you smell gas or detect poor combustion. If a repair involves gas lines or combustion safety, contact a licensed technician. Heater Cost emphasizes that unsafe repairs can create serious hazards and should be avoided.
When to repair vs replace and cost considerations
Repairing a water heater makes sense when the fault is isolated, the tank is in good condition, and parts are readily available. If the unit is old, the cost of parts and labor may exceed the value of replacement, or frequent failures suggest the tank’s life is near end. Consider energy efficiency, warranty status, and the environmental impact of continued operation. Heater Cost notes that evaluating long-term costs and reliability is key to a sound decision, rather than chasing quick fixes.
Maintenance routines to extend water heater life
A proactive maintenance plan includes regular flushing, periodic anode rod checks, thermostat testing, and valve inspections. Schedule annual or biannual inspections, depending on water quality and unit age. Keep the area around the heater clear for safe access, and replace worn insulation on pipes to reduce heat loss. Regular professional inspections can catch issues early, helping maintain consistent hot water and energy efficiency. The Heater Cost team recommends recording maintenance dates to track longevity and plan replacements before failures occur.
Tools & Materials
- Multimeter(Test thermostats, heating elements, and electrical connections)
- Adjustable wrench(To loosen and tighten fittings on valves)
- Phillips and flat-head screwdrivers(Remove panels and access screws)
- Bucket and drain hose(Drain tank during flushing)
- Teflon tape(Seal threaded connections)
- Rags or towels(Clean spills and wipe fittings)
- Gloves and safety goggles(Personal protection)
- Liquid drain cleaner or vinegar mix (optional)(For heavy mineral buildup before flushing)
- New anode rod (if replacing)(Compare model size and length before purchase)
- Valve replacement parts (if needed)(Only if current valves leak or fail)
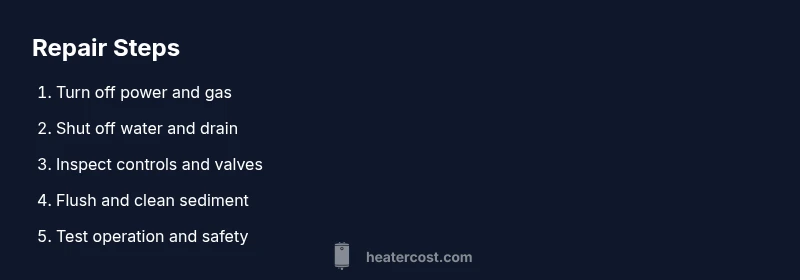
Steps
Estimated time: 2-4 hours
- 1
Turn off power and gas (if applicable)
Locate the service disconnect or breaker labeled for the water heater and switch it to OFF. If you have a gas heater, set the gas control valve to the OFF position and allow the unit to cool before touching components.
Tip: Always confirm lack of voltage with a tester before touching wires. - 2
Shut off the cold water supply
Close the cold-water shut-off valve to prevent new water from entering during inspection. This helps avoid accidental flooding while you work on the system.
Tip: Keep a bucket ready to catch any incidental leaks. - 3
Relieve pressure and drain a portion of the tank
Attach a drain hose to the tank's drain valve and drain a small amount of water to relieve pressure. This makes draining safe when flushing later.
Tip: Open a hot-water faucet nearby to vent air as you drain. - 4
Inspect thermostat and controls
With the unit off and cooled, access the thermostat and use a multimeter to check continuity. Verify the reset button if present, and replace a faulty thermostat or control module.
Tip: Document readings for future reference. - 5
Check and replace the anode rod if needed
Carefully remove the anode rod and inspect for heavy corrosion. Replace with a rod of the same size if there is significant wear to prevent tank corrosion.
Tip: Coat the new rod threads with Teflon tape before installation. - 6
Flush the tank to remove sediment
Force a flush by draining, then briefly refill and drain again. This helps remove mineral buildup that reduces efficiency and capacity.
Tip: Run the cold water inlet briefly to help loosen deposits. - 7
Check valves and connections
Tighten loose fittings and replace any faulty valves showing signs of leakage. Ensure the discharge tube for the pressure relief valve is correctly routed and unobstructed.
Tip: Avoid overtightening metal fittings. - 8
Restore power/gas and test operation
Reestablish power and gas and turn the thermostat to a safe setting. Observe for normal operation and leaks, and verify hot water delivery within a reasonable time.
Tip: Monitor for any unusual noises or smells during initial heat-up.
Got Questions?
What are the most common signs that a water heater needs repair?
Common signs include insufficient hot water, temperature fluctuations, rumbling sounds, leaks around the tank, and rusty water. Addressing sediment buildup and worn components early can prevent bigger failures.
Common signs include missing or fluctuating hot water, rumbling noises, leaks, and rusty water. Early maintenance can prevent bigger failures.
Is it safe to repair a water heater myself?
Basic maintenance and some minor fixes are manageable for confident DIY homeowners. Always follow safety guidelines, disconnect power, and avoid gas-related repairs unless you are trained. Complex gas or high-risk tasks should be handled by a licensed pro.
DIY is okay for basic maintenance with safety in mind. For gas or complex repairs, hire a licensed professional.
How do I know when it’s time to replace instead of repair?
If the unit is old, leaks are frequent, or repair costs approach a significant fraction of replacement price, replacement may be wiser. Consider efficiency gains from newer models and warranty terms.
If your heater is aging or repairs keep coming back, replacement can be more economical and reliable.
Can flushing extend the life of my water heater?
Yes. Flushing helps remove sediment, improving efficiency and hot water delivery. Regular flushing is a simple maintenance habit that can extend tank life.
Flushing helps keep your heater efficient and longer-lasting.
What maintenance should I perform annually?
Annual maintenance should include flushing the tank, inspecting the anode rod, checking valves and connections, and testing the thermostat. Keep safety checks as a constant practice.
Do a yearly flush, inspect the rod, and test controls for best results.
Who should I contact for a gas water heater repair?
For gas repairs or anything involving venting, gas lines, or ignition safety, hire a licensed professional. These tasks require specialized training and certification.
Gas repairs need a licensed technician for safety.
Watch Video
The Essentials
- Identify signs of failure early to prevent outages
- Prioritize safety and shutoffs before any work
- Anode rod and sediment are common culprits—check regularly
- Flush periodically to maintain efficiency and extend life
- Decide between repair and replacement by evaluating efficiency and age