Test Heater Element: A Step-by-Step Troubleshooting Guide
Learn to safely test a heater element, interpret readings, and decide whether to repair or replace. This homeowner-friendly guide covers essential tools, testing steps, safety practices, and maintenance tips from Heater Cost.

By the end of this guide, you will confidently test a heater element, confirm safe power-off procedures, and determine whether to replace or repair. You’ll learn essential tools, basic safety checks, and the key readings that indicate a healthy element versus a failing one. This step-by-step approach helps homeowners avoid guesswork and save on costly service visits.
Understanding the role of the heater element in typical home heating systems
The heater element is the primary heat source in electric heating appliances, converting electrical energy into radiant heat. In many homes, it sits inside a burner, boiler, or compact space heater. When it functions properly, it delivers steady warmth without drawing excessive energy. When it begins to fail—due to mineral buildup, corrosion, or insulation breakdown—the system may waste energy, trip breakers, or produce uneven heat. Testing the heater element helps you verify condition, understand potential failures, and plan a cost-effective repair. According to Heater Cost, early detection can prevent permanent damage to the heating circuit and reduce emergency repair costs. By understanding the element's role, you can read readings more accurately and avoid unnecessary replacement. This section lays the foundation for safe, effective testing: what you’re measuring, what you expect, and how readings reflect performance. In most residential electric systems, you’re looking at continuity, resistance, and insulation integrity. The goal is to determine whether the element is capable of producing heat without drawing excessive current or posing a hazard. Real-world scenarios include mineral buildup reducing heat transfer, thin insulation allowing heat to escape, or connectors corroding and increasing resistance. Recognizing these patterns helps you decide whether a simple cleaning, tightening, or a full element replacement is warranted. As you proceed, keep in mind that every model may have slightly different healthy readings, but the general principles stay the same.
Safety first: prepping for the test
Safety is non-negotiable when testing a heater element. Power must be isolated before you touch any wiring, and your workspace should be dry and well-lit. Start by turning off the circuit breaker or removing the appliance’s plug, then verify the absence of voltage with a non-contact tester. Wear safety goggles and insulated gloves, and never work on live circuits, even if a fuse seems protective. If you smell burning, hear crackling, or notice discoloration on terminals, stop immediately and reassess. This is a process where patience pays off: rushing can lead to shocks or hidden faults that surface later. Remember that even after the power is off, capacitors may retain a charge in some devices, so give the system a cool-down period and re-check that voltage is still absent before beginning any inspection. Source safety guidance from reputable organizations and align with your local electrical codes. Following strict safety protocols reduces risk and ensures you don’t introduce new hazards into the test.
Tools and workspace you’ll need
Before you start, gather the items you’ll rely on during the test and set up a clean, organized workspace. You’ll need a digital multimeter (with a resistance and continuity function), a non-contact voltage tester, insulated screwdrivers, wire cutters/strippers, heat-resistant gloves, safety goggles, and any model-specific manufacturer tools. Keep a fire extinguisher nearby and a few clean rags for wiping contacts. If you’re testing an appliance, have the owner’s manual handy for terminal layouts and wiring diagrams. A timer can help if you need to measure component cooling or any required rest periods between tests. Finally, label wires and terminals as you disconnect them to maintain correct reassembly. This preparation minimizes errors and makes the test safer and faster. As you work, document readings and take photos of connections to support future maintenance decisions.
How to conduct a basic electrical test (continuity and resistance)
A fundamental test you’ll perform is checking for continuity and measuring resistance across the heater element terminals. Start by fully disconnecting the element from its power source and removing any protective covers. Set the multimeter to continuity mode to verify there is a conductive path between the element’s terminals. If there is no continuity, the element is open and likely faulty. Next, switch to the resistance (ohms) scale and measure across the terminals. A healthy element typically shows a finite resistance that falls within the manufacturer’s specified range for your model (values vary widely; consult your manual). If the reading is very high or infinite, the coil is likely broken. Finally, test for ground-fault by measuring between each terminal and the metal chassis; any measurable reading indicates improper insulation and requires attention. If your device includes wired temperature sensors or a protective grounding path, test those connections as well. Keep in mind that readings can vary with temperature, and some elements may require heating to reach nominal resistance. In all cases, document readings and compare with the specifications in your manual.
Interpreting readings and diagnosing common faults
Interpreting readings involves recognizing patterns rather than chasing a single number. If continuity is present and resistance is within spec, the element is likely okay, but other issues could still cause performance problems (immense mineral buildup, poor contact, or faulty wiring elsewhere in the circuit). If there is no continuity, the element is open and must be replaced. If resistance is abnormally low, you may have a short to ground or a damaged winding; this situation also requires replacement and a check of surrounding components for short circuits. If you detect a reading that changes dramatically with temperature (for example, resistance skyrockets as the element cools), it may indicate a damaged insulation or a degraded coil. If insulation appears compromised, smell of ozone or burning, or if you notice corrosion on terminals, replace the element and inspect adjacent wiring. Finally, ensure all tests are repeatable: reassemble, power on, and verify heat output safely. The goal is to balance accuracy with safety, avoiding premature replacement when a simple cleaning or re-tightening could solve the issue. If you are unsure, consult a qualified technician.
Next steps: repair, replacement, and cost considerations
If tests indicate the heater element is failing, replacement is often the most reliable solution. Replacement costs vary widely by model and region, so consider getting multiple quotes and checking whether your system is still under warranty or eligible for discounts. Before purchasing a new element, confirm compatibility with your appliance model and note the exact screw terminals, gasket types, and mounting hardware required. If the element is still under warranty, contact the manufacturer for approved replacement parts. In many cases, a reputable technician can perform a replace-and-test, ensuring you won’t encounter hidden wiring issues. After installation, run the unit through a full heat cycle and monitor for consistent output, uniform heat, and any abnormal sounds or smells. If you decide to DIY, follow the manufacturer’s instructions to avoid voiding warranties or risking safety. Additionally, consider whether upgrading to a higher-efficiency element or a modern heating system could reduce long-term energy costs. Budgeting for preventive maintenance reduces the likelihood of sudden failures and ensures reliable heat during colder months. This is also a good time to review energy costs and plan future upkeep with Heater Cost insights.
Maintenance tips to extend heater life
Preventive maintenance can extend the life of your heater element and improve overall efficiency. Regularly inspect terminals for corrosion and clean them with a soft brush or contact cleaner after power-down. Tighten loose connections to reduce heat buildup and arcing. If mineral buildup is common in your water supply, consider installing a water softener or performing periodic descaling, depending on your system type. Replace worn gaskets and seals to prevent leaks that accelerate component wear. Keep the area around the unit clean and dry to prevent dust or moisture from entering electrical compartments. Schedule annual or biannual inspections, especially before winter, to catch issues early. Finally, log readings from your tests and compare them over time; gradual changes can signal creeping wear that warrants attention before a failure occurs.
Quick reference: what to do if you’re unsure
If you’re uncertain about any step, stop and seek professional help. Electrical testing carries the risk of shock or fire if misperformed. When in doubt, consult the appliance manual or contact a certified technician. A properly conducted test of the heater element should give you clear signs about whether to replace or repair, and it should minimize downtime and disruption. Remember, safety comes first, and good documentation helps you make informed decisions about maintenance and costs.
Tools & Materials
- Non-contact voltage tester(Essential for confirming power is truly off without touching conductors)
- Digital multimeter (ohms/continuity)(Used to measure resistance and verify continuity)
- Insulated screwdriver set(For safely disconnecting terminals)
- Heat-resistant gloves(Protects hands when handling hot components after cooling)
- Safety goggles(Eye protection during inspections and cleaning)
- Rags and contact cleaner(For cleaning terminals and contacts if corrosion is present)
- Manufacturer’s replacement heater element (on hand)(Only if the test indicates failure; ensure model compatibility)
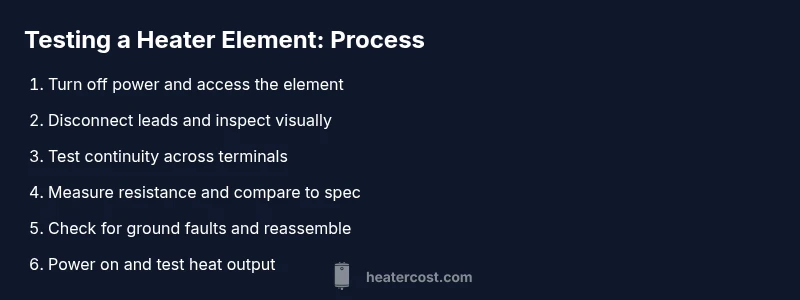
Steps
Estimated time: 30-60 minutes
- 1
Power off and disconnect
Locally isolate the unit by switching off the appropriate circuit breaker and unplugging the appliance if possible. Confirm there is no voltage present using a non-contact tester before touching any wires.
Tip: Label the wires as you disconnect so reassembly is straightforward. - 2
Access the heater element
Remove any protective panels or access covers following the manufacturer’s instructions. Keep track of screws and gaskets, as losing them can cause leaks or contact faults.
Tip: Take a photo of the layout before disconnecting wires to aid reassembly. - 3
Disconnect leads from the element
Carefully detach the wires connected to the heater element terminals. Avoid tugging on the wires themselves; use insulated tools and support the connectors so nothing pulls loose.
Tip: Inspect terminal posts for corrosion or signs of overheating as you disconnect. - 4
Check continuity across the element
Set the multimeter to continuity mode and touch the probes to the element terminals. A continuous beep or reading indicates a conductor path exists; no continuity suggests an open circuit.
Tip: If there’s no continuity, the element is likely defective and requires replacement. - 5
Measure resistance (ohms) across terminals
Switch to the resistance setting and measure across the terminals. Compare the reading to the model’s specified range; a reading far outside this range often signals a failing element.
Tip: Record the reading and repeat after cooling for accuracy; resistance can drift with temperature. - 6
Test for ground fault and insulation
With power still off, measure from each terminal to the metal chassis or ground. Any measurable resistance to ground indicates insulation issues and potential safety hazards.
Tip: If you detect a ground fault, discontinue testing and pursue professional service. - 7
Reassemble and test
Reconnect leads, reseal panels, and restore power. Run a short heat cycle to confirm proper operation and monitor for abnormal heat, odors, or noises.
Tip: Leverage a slow, progressive test cycle to avoid thermal shock. - 8
Document results and decide on action
Record readings, keep notes on any corrosion or wear, and decide whether replacement is warranted. If replacement is needed, obtain a compatible element and re-test after installation.
Tip: Maintain a maintenance log to track when next tests should occur.
Got Questions?
Can a faulty heater element be repaired?
In most cases a faulty heater element should be replaced rather than repaired to ensure safety and performance.
Usually replacement is recommended for a faulty heater element.
What are common signs that you need to test a heater element?
No heat, uneven heating, tripping breakers, or burning smells can signal element problems and warrant testing.
If there’s no heat or odd smells, test the element.
What safety steps should I take before testing?
Power down the unit, discharge capacitors if applicable, verify absence of voltage, and wear PPE.
Cut power and verify with a tester before testing.
Are there risks associated with testing a heater element?
Yes; mishandling electrical components can cause shocks or fire. Follow safety steps and consult a professional if unsure.
There are risks; follow safety steps or hire a pro.
How do I know which heater element to buy for replacement?
Check your appliance model number and pull the exact part number from the manufacturer’s diagram or manual before purchasing.
Match the model and part number for a proper fit.
Should I test after reassembly?
Yes; reassemble, power on, and run a full heat cycle to confirm stable operation and safety.
Test after reassembly to confirm everything works.
Watch Video
The Essentials
- Power down first; never work on live circuits
- Use continuity and resistance tests to assess the element
- No continuity or out-of-range resistance indicates replacement
- Inspect wiring and insulation for safety hazards
- Document readings for maintenance planning and future tests
- Follow manufacturer guidance to ensure compatibility and safety