How to Test a Heater: Safe, Step-by-Step Guide
Learn how to test a heater safely, diagnose common issues, and decide when to call a pro. This step-by-step guide covers electrical and gas systems, safety checks, and maintenance tips from Heater Cost.

Learn how to test a heater safely and reliably. This quick answer outlines key checks—thermostat accuracy, power supply, ignition or burner function, and basic safety checks—so you can spot obvious problems before calling a pro. According to Heater Cost, following these steps helps confirm proper operation and saves energy, reducing the chance of unexpected cold snaps.
Why Testing a Heater Matters
A reliable heater keeps your home comfortable while preserving energy and safety. Testing isn't only about making sure you feel warm—it's about verifying that the system responds correctly to thermostat calls, starts reliably, and maintains safe operating conditions. For gas-fired units, testing can help you spot carbon monoxide risks and improper combustion before they become dangerous. For electric heaters, it helps you check insulation, fan operation, and overheat protection before a fault causes a shutdown during a cold snap. The Heater Cost team emphasizes that small, routine checks can prevent expensive repairs and unexpected outages. In colder climates, even a brief failure can lead to frozen pipes or mold growth if heat is absent for extended periods. By understanding the test process, homeowners can decide when to fix components themselves and when to call a licensed technician. The goal is not to replace professional service with guesswork but to build early awareness so you know when a professional assessment is warranted. This article uses plain-language tests you can perform safely at home and explains how to interpret the results in the context of your heater type.
Safety First: Before You Begin
Safety is the top priority when testing any heating equipment. Start by turning off power at the breaker or unplugging the unit to avoid electric shock. If you have a gas-fired heater, ensure you have proper ventilation and a working carbon monoxide detector in the area. Wear eye protection and gloves as needed, and keep children and pets away during testing. Do not bypass safety devices or disable interlocks. If you smell gas, leave the area immediately and call your gas utility. Before you touch any wiring or components, use a non-contact voltage tester to confirm there is no live current. Finally, if your inspection reveals any damaged wiring, cracked heat exchanger, loose connections, or abnormal smells, stop the test and contact a licensed technician. These precautions reduce the risk of fire, electrical shock, and toxic exposure.
Tools and Setup
Collect the following tools and safety items before you start:
- non-contact voltage tester (essential) — verify power without contact.
- digital multimeter (essential) — measure voltage, resistance, and continuity.
- insulated screwdrivers (essential) — safely access terminals.
- flashlight or headlamp (essential) — see tight spaces.
- carbon monoxide detector (essential) — ensure ongoing safety.
- protective gloves and eye protection (recommended) — reduce injury risk.
- thermometer probe or surface thermometer (optional) — check output temperature.
- notebook or phone to record readings (recommended) — track trends.
Set up a clean area, clear access to the heater, and have a safe exit path in case of an unexpected reading.
Quick Diagnostic Overview by Type
Heaters come in several common configurations. The basic ideas below apply to most units:
- Electric space heaters: Check power cord integrity, plug connections, thermostat response, and fan operation. Confirm the unit triggers overheat protection when blocked.
- Gas furnaces and boilers: Verify that the igniter or pilot light operates, the flame is blue and steady, and the exhaust vent is clear. Use a CO detector and verify that safety shutoffs engage if pressures or temperatures rise unexpectedly.
- Hydronic systems and boilers: Listen for a steady pump hum and ensure circulating water heats spaces evenly without hot spots. Check expansion tank, pressure, and venting as part of a holistic test.
If readings are outside manufacturer specs, consult the manual or a professional.
Interpreting Results and Next Steps
Interpretation depends on the test type. If voltage readings are outside tolerance, or there is intermittent power, inspect wiring and outlets; replace damaged parts. A weak or inconsistent flame color indicates incomplete combustion or burner dirt; Clean burner ports if safe to do so and consider professional service for gas components. If CO levels rise or detectors alarm, evacuate immediately and call emergency services. For electric units, a tripped breaker or a high resistance reading on the motor winding suggests motor wear or overload. If any result is inconclusive, schedule a professional inspection to avoid false positives or overlooking a hidden fault. Documentation helps track changes over time and informs the next service visit.
Maintenance Tips to Extend Heater Life
Regular maintenance extends life and improves efficiency. Schedule annual professional checks for gas systems and semi-annual checks for electric ones. Clean air intakes, replace air filters, and ensure venting is clear. Keep the area around the heater free of clutter and dust. Use the results from your tests to target weak spots: thermostat calibration, dirty burners, worn ignition components. Document readings to monitor trends and alert you to gradual degradation.
How to Read Your Readings and Decide When to Call a Pro
Not every result requires a service call, but some do. If readings stay consistently out of spec across multiple checks, or if you notice persistent odors, strange noises, persistent pilot-light issues, or CO detector alarms, contact a licensed technician promptly. For electric heaters, a consistent loss of heat or frequent tripping is a red flag. For gas heaters, any sign of incomplete combustion, soot buildup, or yellowish flames should prompt professional evaluation. Keeping a simple log of readings, dates, and any symptoms helps you determine when the situation warrants professional intervention and what parts may need replacement in the near term.
Tools & Materials
- non-contact voltage tester(Used to verify power is off at outlets and terminals before touching any wires.)
- digital multimeter (DMM)(Measures voltage, resistance, and continuity for electrical checks.)
- insulated screwdrivers (set)(Safely access terminals without conducting stray current.)
- flashlight or headlamp(Illuminates tight spaces and helps you see burner ports and wiring connections.)
- carbon monoxide detector(Ensure ongoing CO safety during and after tests.)
- protective gloves and eye protection(Reduces injury risk when handling sharp components or hot surfaces.)
- thermometer probe or surface thermometer(Optional for checking surface or outlet temperatures and heat output.)
- notebook or digital log(Record readings to observe trends over time.)
Steps
Estimated time: Total time: 20-40 minutes
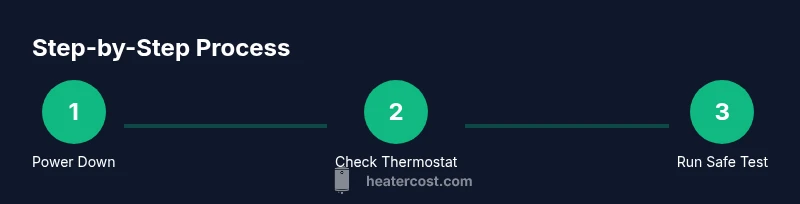
- 1
Power down and isolate
Turn off the power at the breaker or unplug the heater to prevent electric shock. Confirm no live voltage at accessible points using a non-contact tester. Isolating power reduces risk during inspection.
Tip: Keep a clear path to the exit in case you need to stop a test early. - 2
Check thermostat controls
Set the thermostat to a higher than room temperature and observe whether the heater responds promptly. If there is a delay or no response, inspect thermostat wiring and calibration. Do not bypass the thermostat to force operation.
Tip: Note the response time; a slow or absent response often points to control issues. - 3
Inspect electrical connections
With power still isolated, open access panels and check wire nuts and terminal screws for looseness or corrosion. Tighten connections to manufacturer torque specifications and look for damaged insulation. Loose wires are a common cause of overheating and intermittent operation.
Tip: Only tighten if you’re confident; otherwise consult a pro to avoid stripping screws or damaging components. - 4
Test ignition and safety devices (gas systems)
For gas units, verify the igniter or pilot light operates when called for heat. Check for a steady blue flame and listen for safe shutoffs. Use CO detectors to ensure air quality and never ignore detected alarms.
Tip: If you smell gas or detect a weak flame, cease testing and contact the utility or a professional immediately. - 5
Check ventilation and combustion air
Ensure vents and air intakes are clear and unobstructed. Blocked vents can cause backdraft, poor combustion, and CO buildup. This step is essential for safe gas-fired heaters and overall system health.
Tip: Clear any lint, dust, or debris and head outside to verify exhaust direction if possible. - 6
Run a controlled test cycle
Power the unit back on and run a short test cycle while monitoring for stable ignition, proper flame color (gas: blue; electric: smooth heat rise), and normal fan operation. Listen for abnormal noises or intermittent cycling, which can indicate worn parts.
Tip: Keep a log of readings and any audible cues to compare in future tests. - 7
Evaluate outputs and safety devices
Assess whether heat output matches expectations for the ambient temperature and system type. Confirm safety devices stay engaged (overheat protection, flame safeguard, CO alarm). If anything seems off, stop testing and arrange a professional inspection.
Tip: Document the results with photos or notes to share with a technician. - 8
Restore power and recheck
After the test, restore power and run a final check to ensure the unit remains stable. Reconfirm CO detectors are functioning and that no new faults appeared during the test.
Tip: If readings shift after cooling, re-test after a short wait to confirm stability.
Got Questions?
Can I test a gas furnace by myself?
You can perform basic safety checks on a gas furnace, but any inspection that involves combustion, gas lines, or CO risks should be done by a licensed technician. Follow manufacturer guidelines and do not bypass safety features.
You can check safety basics, but avoid inspecting gas lines or combustion components yourself; call a pro for those steps.
What should I do if the heater won't start after testing?
If the heater won’t start, verify power, thermostat settings, and safety interlocks. If power is present but ignition or flame is absent, this could indicate a faulty control board, dirty burners, or worn ignition; schedule professional service.
Check power and thermostat first; if ignition still won’t start, contact a technician.
Is a noisy heater a safety risk?
Unusual noises can indicate loose components, worn bearings, or combustion irregularities. While not always dangerous, noisy operation warrants inspection to prevent bigger failures.
Yes—unusual noises mean you should inspect or call a pro to avoid bigger problems.
How often should I test a heater?
Test your heater at least once per heating season and immediately after any service work. For gas systems, periodic CO detector checks are essential year-round.
Test once a season and after service; keep CO detectors current.
Do I need to service after a failed test?
Yes. A failing test usually indicates an underlying issue. Schedule a professional inspection to diagnose and repair safely and correctly.
Yes—book a professional inspection to fix the underlying issue.
What should I do if CO detector alarms during testing?
If CO alarms during testing, evacuate immediately and call emergency services. Do not restart the heater until a licensed technician confirms it’s safe.
Evacuate and call for help; don’t restart until a pro checks it.
Can I perform these tests on any heater model?
Tests should follow the manufacturer’s manual for your specific model. The general safety and diagnostic principles apply, but avoid disassembly beyond what the manual allows.
Follow your model’s manual for specifics; general safety rules still apply.
Watch Video
The Essentials
- Test safely first to prevent shocks and exposure.
- Different heater types require distinct checks and readings.
- Document results for trend analysis and future service.
- Call a professional if readings are out of spec or alarms trigger.