Replace Water Heater Pressure Valve: A Step-by-Step Guide
Learn how to safely replace a faulty water heater pressure relief valve with a practical, step-by-step approach. This guide covers tools, safety, valve selection, and post-install testing to protect your home from pressure-related hazards.

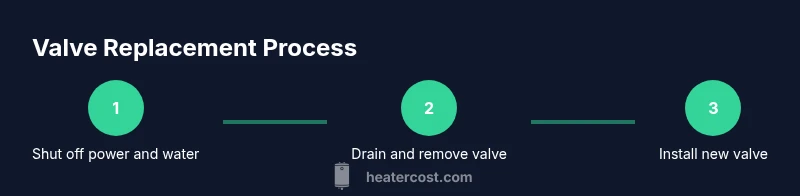
You can safely replace a water heater pressure valve by shutting off power and water, draining the tank, removing the old valve, and installing a new one with the proper seal. This task requires a replacement valve, an adjustable wrench, thread sealant or Teflon tape, a bucket, and towels. Plan for about 60-90 minutes and test for leaks afterward.
Understanding the need to replace water heater pressure valve
The pressure relief valve, often called the T&P valve, protects your home from dangerous pressure buildup inside the tank. If the valve leaks, sticks, or fails to open, it can lead to water damage or more serious failures. Knowing when to replace water heater pressure valve is crucial for safe operation and long-term reliability. Regular inspection and timely replacement reduce the risk of scalding injuries and costly repairs. This guide emphasizes practical, do-it-yourself steps while prioritizing safety and correct valve sizing.
When to replace vs repair
A pressure relief valve should be replaced rather than repaired if you notice persistent leaks from the valve stem, signs of corrosion on the valve body, frequent discharge, or if the valve handle cannot be fully closed. Some symptoms, like a slow drip when the tank is under normal pressure, may indicate seating issues or a failing seat; these are often resolved by replacement. Do not attempt to repair a valve that appears damaged or corroded; replacing with a certified valve is the safest option. In general, replacement is the most reliable path for homeowners and reduces risk of unpredictable discharge.
Safety and prerequisites before you begin
Before any work, ensure you have a clear plan and the right safety gear. Turn off the power source to electric heaters at the breaker, or shut off the gas supply to gas models. Close the cold-water supply valve to stop inflow, and place a bucket and towels to catch any residual water. Allow the tank to cool if it has recently heated; hot water can cause scalding. Ventilate the area and keep children and pets away. Following these prerequisites reduces the risk of burns, electric shock, and water damage.
Choosing the right valve: compatibility and ratings
Select a replacement valve that matches your heater’s connection size and temperature/pressure ratings. Most residential systems use a 3/4 inch valve with a relief temperature around 210°F and a relief pressure of 150 psi, but check your unit’s label or manual to confirm. When in doubt, take the old valve to a hardware store to ensure you buy the correct model. Using the wrong valve can lead to improper relief and potential hazards.
Preparing the work area and shutting off utilities
Clear a path around the water heater and gather all tools and the new valve. Place a drain pan or tray beneath the drain valve, and set up a hose to direct water away from electrical outlets or living spaces. If your home uses a gas heater, ensure the gas supply is safely isolated and that you can relight the pilot later. Having everything ready prevents delays and minimizes the risk of accidental spills during the replacement process.
Step-by-step replacement overview (high-level) and testing approach
Replacing a water heater pressure valve involves: (1) safely isolating energy and water, (2) draining the tank below the valve, (3) removing the old valve, (4) applying thread sealant to the replacement’s threads, (5) installing the new valve and reconnecting the discharge pipe, (6) refilling the tank, restoring power or gas, and (7) testing for leaks with the discharge line open. After mounting, slowly re-pressurize the system and observe for leaks during a full fill. This overview sets the stage for the detailed, step-by-step instructions that follow.
Post-replacement testing and maintenance tips
Once the tank is full, test the new valve by briefly lifting the test lever to ensure it opens and reseats correctly. Check the discharge pipe for tight connections and leaks at all joints. Monitor the valve over the next few days for any signs of leaking or corrosion. As part of regular maintenance, inspect the valve annually and replace it if you notice any signs of wear or leakage.
Authority sources and further reading
For safety guidelines and best practices, consult authoritative resources from government and university sources. These references help validate the replacement procedure and emphasize safe handling of hot water systems:
- https://www.energy.gov/energysaver/water-heating
- https://www.energy.gov/eere/buildings/articles/water-heater-safety
- https://www.osha.gov/
Tools & Materials
- Replacement pressure relief valve (T&P valve) with correct size(Confirm 3/4 inch connection (common) and rating suitable for your tank)
- Adjustable wrench(Or two adjustable pliers if necessary)
- Thread sealant or Teflon tape(Use a small amount on valve threads only)
- Bucket(To catch water when relieving pressure and draining)
- Towels or rags(Keep the area dry to prevent slips and protect flooring)
- Safety goggles(Eye protection recommended for splashes)
Steps
Estimated time: 45-90 minutes
- 1
Shut off power and water
Turn off the electrical supply at the breaker (for electric heaters) or set the gas control to off (for gas heaters). Close the cold-water supply valve to stop inflow. This limits pressure and reduces scald risk while you work.
Tip: Verify power is off with a non-contact tester before touching electrical components. - 2
Drain enough water to below the valve
Attach a hose to the drain valve and direct water into a floor drain or bucket. Open the drain valve slowly while the cold-water supply remains closed to lower the tank pressure and prevent spills when removing the old valve.
Tip: Open a hot-water faucet elsewhere to vent air and speed drainage. - 3
Remove the old valve
Using the adjustable wrench, loosen and remove the old pressure relief valve. Have the bucket ready to catch any residual water that may escape. Inspect the threaded fitting for scale or damage.
Tip: If the valve is stubborn, apply steady, even pressure and avoid over-tightening later. - 4
Prepare the replacement valve
Wrap the valve threads with a small amount of Teflon tape or apply a light coat of thread sealant as recommended by the valve manufacturer. Do not over-tape; excess tape can shear and cause leaks.
Tip: Ensure you’re applying tape in the direction of the valve’s thread direction. - 5
Install the new valve
Screw the new valve hand-tight first, then snug with the wrench. Reconnect the discharge pipe, ensuring a secure, downward slope to a safe drain. Wipe away any excess water or sealant.
Tip: Avoid cross-threading by starting the valve straight and turning gently. - 6
Restore water and power, and test
Open the cold-water supply to refilling the tank. As the tank fills, briefly open the valve to ensure quick venting, then close. Restore power or gas once full and check the valve and discharge line for leaks.
Tip: Do not rush the refill; ensure the tank is fully pressurized before testing releases.
Got Questions?
Do I need to drain the entire tank to replace the valve?
No. You typically drain enough water to below the valve to prevent spills and allow removal. A partial drain is sufficient if you can access the valve safely.
Drain enough water to below the valve to access it safely.
Can I replace the valve myself or should I hire a plumber?
If you have basic plumbing experience, you can replace the valve yourself using the right tools. If you’re unsure about shutting off utilities or drain procedures, hire a licensed plumber.
You can DIY if you’re comfortable with basic plumbing and safety steps; otherwise, hire a pro.
What size valve do I need?
Most residential tanks use a 3/4 inch valve. Check your tank label or the existing valve to confirm the size and rating before purchasing.
Most tanks use a 3/4 inch valve; verify size on the label or old valve.
How do I test the new valve after installation?
Refill the tank slowly, then lift the test lever on the valve to ensure it opens and reseats properly without leaking. Watch for drips at joints and the discharge pipe.
Refill slowly and test the lever to confirm proper operation.
What safety precautions should I take?
Wear eye protection, work with a partner if possible, and ensure the area is dry. Avoid working on a hot surface and turn off power/gas before touching electrical or gas components.
Wear eye protection and ensure the area is dry; shut off power or gas before starting.
How often should I inspect the valve?
Inspect annually as part of routine water heater maintenance. Check for leaks, corrosion, or stiff operation and replace if any issues are observed.
Inspect annually and replace if you notice leaks or corrosion.
Watch Video
The Essentials
- Shut off energy and water before starting
- Choose the correct valve size and rating
- Seal threads properly to prevent leaks
- Test the new valve thoroughly after refilling
- Document maintenance for future safety