How to Drain a Water Heater Without a Valve: A Safe Guide
Learn how to drain a water heater without a valve safely and effectively. This guide covers essential shutoff steps, safety warnings, and practical homeowner alternatives for emergency situations and routine maintenance.

You can drain a water heater without a valve, but only with caution and the right steps. This quick guide shows how to shut off power or gas, relieve pressure, and direct water safely. According to Heater Cost, the safest path is to fix or replace the valve rather than forcing drainage; improper attempts can cause scalding or flooding.
Why draining a water heater without a valve is risky
In normal operation, the drain valve on a water heater is the controlled exit point for water when maintenance or sediment flushing is needed. When you attempt to drain without a functional valve, you remove a key control that keeps the flow predictable and safe. The result can be a rapid jet of scalding water, especially if the backups in the hot water line are released while the tank is still hot. In addition, water pressure in the house and the tank’s own pressure can combine to create sudden surges that may strain connections, hoses, and floor surfaces. Without the valve, you may also introduce air into the line, which causes air locks and incomplete drainage. Sediment that settles at the bottom of the tank may not be flushed effectively, reducing heating efficiency and potentially shortening the heater’s life. For homeowners and managers examining long-term maintenance costs, a missing or malfunctioning drain valve increases the odds of unexpected repairs. This is why a valve issue is generally treated as a repair priority rather than a reason to improvise drainage.
How the drain system works and why a valve matters
A typical residential water heater uses a bottom drain valve to release water on demand for maintenance tasks or sediment removal. The valve provides a controlled path for water to exit the tank and keeps pressure from spiking as the tank empties. The temperature and pressure relief (T&P) valve is a separate safety device that protects against overpressure, but it is not designed to serve as a primary drain. If you lack a proper drain valve, you lose the ability to regulate flow and stop the water quickly. Draining through any other opening, such as crooked fittings or the T&P valve itself, can cause leaks or scalding and often violates the manufacturer’s instructions. Understanding these roles helps homeowners evaluate safer options, like valve replacement, rather than forcing drainage through a nonstandard route. In the Heater Cost analysis, valves are highlighted as a common failure point, reinforcing the value of timely repair rather than risky improvisation.
Safer alternatives if the valve is missing or stuck
If the drain valve is missing or jammed, the safest course of action is to avoid forcing drainage and seek professional help. You can prepare for a valve replacement by turning off power (or fuel) and the cold-water supply, then scheduling a service call with a licensed plumber. Some homeowners may be able to install a temporary replacement drain valve kit, but this should only be attempted if you have the correct parts and tools and follow the manufacturer’s guidelines. Never substitute an improvised outlet or use the T&P relief valve as a primary drainage route, as it can lead to leaks, scalding, and system damage. The priority is safety and proper valve repair to enable controlled draining in the future.
How to drain water heater without valve: cautions and safeguards
Drainage without a valve is not a standard or recommended practice. If you ever reach a situation where the valve is unusable, prioritize safety first: shut off the power or gas supply, close the cold-water feed, and do not attempt to force water out through unconventional paths. If you must proceed due to an emergency (e.g., a severe leak), contact a licensed professional and avoid scenarios that could endanger you or the home. This section emphasizes that valve repair or replacement is the best long-term solution, and attempting improvised drainage can void warranties and invite costly damage. According to Heater Cost, the safest path is to address the valve issue rather than improvising drainage.
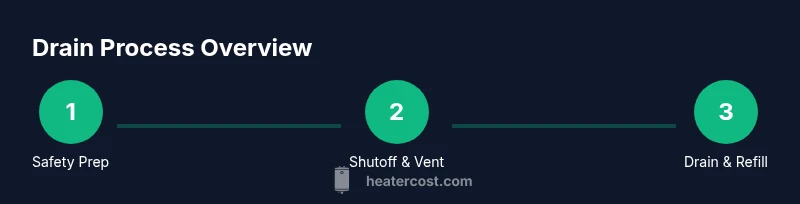
Step-by-step plan for drainage (overview) vs. valve-free situations
When a valve is functional, follow the standard, manufacturer-approved steps for draining and flushing sediment. If the valve is unavailable or nonfunctional, use this overview only as a prompt to seek professional help and to prepare for a valve replacement. The goal is to minimize risk while planning a proper repair so future maintenance is safe and reliable.
After draining: refilling and safety checks
Once drainage is complete, you must refill the tank with cold water before restoring power or gas. Slowly open the cold-water supply to allow air to escape and watch for leaks around the drain connection. After the tank is full, restore power or relight the gas and verify that the heater operates normally. Check for any leaks around the drain valve, fittings, and the T&P relief valve. If you notice persistent leaks or unusual noises, shut down the heater again and consult a professional. Proper refilling and initial testing are critical for safety and efficiency.
Common mistakes to avoid
- Draining with unresolved valve issues without professional help. This increases the risk of scalding and water damage.
- Forcing a drain connection or using nonstandard outlets. This can void warranties and create leaks.
- Skipping the safety checks after refilling. Always test hot-water delivery and temperature to prevent scald injuries.
- Ignoring sediment buildup. Regular flushing with a proper valve extends heater life and improves efficiency.
- Rushing the process. Draining, refilling, and testing should be deliberate and methodical to avoid mistakes.
Maintenance and prevention: avoid future valve failures
Schedule periodic inspections of the drain valve and related fittings as part of regular water heater maintenance. Replace worn gaskets or seals at the first sign of leakage, and keep a spare drain valve kit on hand for minor repairs. Regular flushing to remove sediment helps prevent corrosion and keeps the valve operative longer. Investing in preventive maintenance reduces emergency repairs and extends the life of your heater.
Tools & Materials
- Safety gear (gloves and eye protection)(waterproof gloves, safety glasses or face shield)
- Cold water shutoff valve(turn off the cold-water supply to the tank)
- Drain hose(rigid or flexible hose long enough to reach a safe drain area)
- Bucket or drain pan(to catch and control wastewater)
- Adjustable wrench(for loosening or resealing connections if needed)
- Rags or towels(to clean up spills and wipe surfaces)
- Teflon tape(for resealing threaded connections after valve work)
Steps
Estimated time: 60-120 minutes
- 1
Power/Gas shutoff and safety prep
Power off the electric supply at the breaker or switch off the gas supply to the water heater. This reduces the risk of electrical shock and gas-related hazards while you work. Also set up a clear work area with towels and a bucket, and wear safety gear.
Tip: Double-check the power switch or breaker is off before touching any electrical components. - 2
Close the cold-water supply
Locate and fully close the cold-water supply valve feeding the tank. This stops new water from entering the tank and helps control the drainage process when you have a working valve.
Tip: A fully closed valve reduces the chance of a sudden water surge during draining. - 3
Open a hot water faucet to vent air
Open a nearby hot water tap to allow air to escape. This prevents a vacuum and helps water drain smoothly when you eventually connect a drain line.
Tip: Let air escape steadily; do not force water out with excessive force. - 4
Attach drain hose and position end safely
Connect the drain hose to the drain valve or outlet and run the other end to a suitable drainage location. Ensure the connection is snug to prevent leaks and spills.
Tip: Use a hose clamp if available to secure the connection; aim the water away from electrical outlets. - 5
Slowly open the drain valve
If the valve is functional, open it gradually to control the flow and prevent a torrent of water from causing damage. Monitor for leaks around the valve and hose.
Tip: Do not stand directly in the path of hot water; keep a safe distance as water begins to drain. - 6
If the valve is nonfunctional, stop and call a pro
If the drain valve is missing or stubborn, do not attempt risky improvised drainage. Stop the process, stabilize the area, and arrange for valve replacement by a licensed plumber.
Tip: Document valve condition and prepare for replacement to avoid repeated emergencies. - 7
Fully drain and inspect, then refill slowly
When drainage is complete or replacement is ready, slowly refill the tank with cold water. Watch for leaks and bleed air by keeping the hot-water faucet open until steady flow returns.
Tip: Refill slowly to minimize pressure surges and avoid scalding. - 8
Restore power/gas and test
Once the tank is full, restore power and relight the gas valve if needed. Run hot water from taps to ensure proper heat and temperature without leaks.
Tip: Test at multiple fixtures to confirm consistent hot water and check for leaks at the drain valve.
Got Questions?
Is it safe to drain a water heater without a valve?
No—draining without a functional valve is risky due to uncontrolled water flow, scalding risk, and potential leaks. Seek professional help and aim to repair or replace the valve before draining.
Draining without a valve is risky and not recommended; seek professional help and fix the valve first.
What should I do if the drain valve is stuck or missing?
Do not force drainage. Shut off power and water, then contact a licensed plumber for valve replacement and safe drainage options.
If the valve is stuck or missing, don't drain; turn off power and water and call a professional.
Can I drain only part of the tank to flush sediment?
Yes, a partial drain can flush loose sediment when a valve is functioning. It’s safer to drain gradually and refil slowly.
Partial drainage can help flush sediment if the valve works, but do it slowly.
Will draining affect hot water supply or efficiency?
Draining temporarily reduces hot water supply; refilling and reheating will restore supply. Regular flushing can improve efficiency and extend heater life.
Draining reduces hot water temporarily, but refilling brings it back; regular flushing helps efficiency.
What is the safest long-term fix for a failed drain valve?
Replace the drain valve with a compatible unit and inspect the connection for leaks. This is best done by a professional to ensure proper sealing.
Replace the drain valve and check for leaks; a professional can ensure proper sealing.
Watch Video
The Essentials
- shut off power/gas before work
- avoid draining without a proper valve
- valve replacement is safer than improvisation
- vent air to prevent pressure buildup
- test and inspect after refilling