Tank Water Heater Replacement: A Practical Home Guide
Learn how to replace a tank water heater safely, from planning and permits to installation and testing. Heater Cost provides step-by-step guidance, cost ranges, and maintenance tips for homeowners.

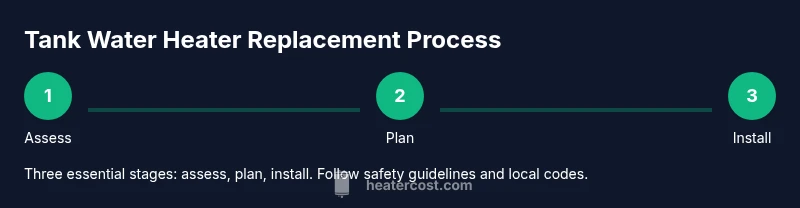
With this guide, you will understand the full process of tank water heater replacement and what to plan before starting. You will learn to assess your old unit, determine whether to DIY or hire a pro, gather essential tools, and follow a safe replacement sequence from shutoff to test run.
Assessing Your Current System
Before you replace a tank water heater, take a thorough look at the existing setup. Note the unit’s location, fuel source, and venting configuration, as well as the surrounding clearances. Ask yourself whether the current space accommodates a larger or more efficient model if your family’s hot water needs have changed. According to Heater Cost, a careful assessment helps homeowners avoid common installation pitfalls, such as improper venting or cramped spaces that could compromise access for maintenance or future repairs. In this section you’ll learn how to identify the key factors that influence your replacement choice, including capacity requirements, energy source (gas or electric), and the accessibility of electrical or gas shutoffs. By understanding these elements, you’ll set realistic expectations for cost, time, and disruption to daily life. This is also the moment to consider the impact of water hardness on tank longevity and the potential need for a new expansion tank or sediment filtration. A well-documented assessment puts you in a stronger position to compare models and select a replacement that fits your home and budget.
According to Heater Cost, beginning with a clear, documented assessment reduces the risk of buying a unit that’s undersized or ill-suited to your home’s plumbing and energy needs. This approach also makes it easier to communicate with installers if you choose professional support.
When you document the old system, capture photos of plumbing connections, venting paths, and space constraints. Keep a simple checklist handy so you can track what’s working and what needs upgrading.
Tools & Materials
- Adjustable wrench(For loosening joints on water and gas lines)
- Pipe wrench(Needed for larger fittings and drain connections)
- Screwdrivers (flathead and Phillips)(For mounting hardware and panels)
- Channel-lock pliers(Grip and twist fittings securely)
- PEX/CPVC pipe cutter(Cut and fit supply lines cleanly)
- Teflon tape and pipe dope(Seal threaded connections to prevent leaks)
- Pipe thread sealant suitable for gas/water lines(Ensure gas and water connections are gas-safe and watertight)
- Rubber gaskets and replacement shutoff valves(Replace old shutoffs if corroded or stiff)
- Expansion tank (if required by plumbing code)(Prevent backpressure and noise from expansion)
- Pipe insulation and heat tape (where applicable)(Improve energy efficiency and protect pipes)
- Voltage tester or multimeter(Verify power is truly off before touching electrical components)
- Gas leak detector or soapy water solution(Check for leaks after connections are made)
- New water heater unit (tank)(Select the correct capacity and fuel type for your home)
- Drain pan and rags(Contain spills and protect flooring)
- Roof or venting supplies (as needed)(Ensure proper venting if you’re replacing a gas unit)
Steps
Estimated time: 4-6 hours
- 1
Shut off power and fuel
Locate the electrical breaker for an electric heater or the gas shutoff valve for a gas heater. Turn off power at the breaker and close the gas supply valve. This step is critical for preventing electrical shock or gas leaks during removal and installation.
Tip: If you’re unsure about the correct shutoff, contact a licensed professional before proceeding. - 2
Drain the existing tank
Attach a hose to the drain valve and run it to a safe drain. Open the valve slowly to avoid a surge, and open a hot water faucet somewhere in the house to relieve pressure. Draining helps reduce the weight and makes removal easier.
Tip: Do not open both the drain valve and cold water inlet at the same time; let air replace water gradually to avoid a vacuum. - 3
Disconnect water and gas lines
Carefully disconnect the cold supply line and the hot outlet from the old tank. If you’re replacing a gas heater, detach the gas line and cap it to prevent leaks. Label connections if you’re reusing existing piping.
Tip: Use two wrenches to avoid twisting fittings and damaging threads. - 4
Remove the old tank
With the lines detached, slide the old tank away from the wall and remove it from the space. Transport carefully to avoid damaging surrounding surfaces. Clean the area to prepare for the new unit.
Tip: Have a helper assist with the heavy lifting to reduce the risk of injury. - 5
Prepare the installation area
Check the wall studs, mounting brackets, and vent path. Install new fittings or replace shutoffs if necessary. Ensure the space allows for proper clearance for service and venting.
Tip: Install an expansion tank if required by your local code or system design. - 6
Install the new tank
Position the new water heater, connect the cold inlet and hot outlet, and reattach the gas line or electrical connections as appropriate. Fit the venting according to code if this is a gas unit.
Tip: Apply Teflon tape or thread sealant to each threaded connection, and torque fittings to manufacturer specs. - 7
Fill and purge the system
Open the cold water valve and fill the tank. Once filled, open hot water taps to vent air from the lines. Check that all connections are dry and free of leaks before restoring power or gas.
Tip: Keep a bucket handy for any remaining water and ensure the pressure release valve remains unblocked. - 8
Restore power/gas and test
Turn the power back on at the breaker or reconnect the gas line and ignite the burner if needed. Monitor operation for a few cycles, check for leaks, and set the thermostat to a safe, efficient temperature.
Tip: Test at multiple fixtures and measure system performance to ensure consistent hot water delivery.
Got Questions?
What is the typical time frame for replacing a tank water heater?
Most replacements take several hours, depending on space, access, and whether gas lines require additional work. If a permit is needed or if gas venting must be configured, the process can extend further. Plan for a half-day to a full day and arrange access accordingly.
Most replacements take several hours. If permits or gas venting are involved, plan for a full day and coordinate access with others at home.
What is the typical cost range for replacing a tank water heater?
Costs vary by unit size, fuel type, labor, and regional rates. A reasonable estimate should include the price of the new tank plus labor if you hire a professional. Always request a formal quote and check whether permits are included.
Costs differ by size, fuel, and labor. Get a detailed quote that includes the unit price and any permit fees.
Do I need a permit for a tank water heater replacement?
Permits depend on local codes and the scope of work. Gas or venting changes often require permits. Check with your city or county building department before starting.
Permits depend on local rules. Gas vent changes usually require one, so verify with your local building department.
Can I replace a gas water heater myself?
Replacing a gas water heater involves gas lines, venting, and combustion safety. If you are not fully qualified, hiring a licensed plumber or gas technician is strongly recommended to avoid carbon monoxide risks.
Gas heater replacement involves risks. If you're not qualified, hire a licensed pro to handle gas and vent work.
How should I dispose of the old tank?
Most municipalities offer recycling for old water heaters. Drain and transport the tank to a proper recycling or disposal facility, following local guidelines for hazardous materials and household waste.
Take the old tank to a recycling facility per local rules. Drain it completely first.
What maintenance should I perform after replacement?
Flush the tank annually, inspect the temperature and pressure relief valve, and check fittings for leaks. Consider a regular professional inspection every few years to extend the life of the unit.
Flush yearly, check the relief valve, and look for leaks. Schedule periodic professional inspections.
Watch Video
The Essentials
- Plan before you cut or drain to avoid surprises
- Choose the right unit for your home’s fuel type and water needs
- Safety and code compliance come first
- Test thoroughly after installation to confirm leaks and performance