Repair Car Heater: Step-by-Step DIY Guide
Learn to diagnose, replace components, and restore warm air in your vehicle with practical, safe steps. This comprehensive guide covers common heater problems, tool lists, step-by-step procedures, maintenance tips, and expert guidance to help homeowners, renters, and fleet managers save on heating repairs.

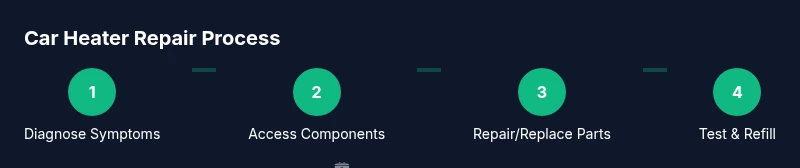
According to Heater Cost, you can restore warm air in your vehicle by diagnosing the heater system, identifying faulty components, and following a careful step-by-step repair plan. This guide outlines safe DIY checks, common failure points, and practical options—from simple fuse or blend door fixes to more involved core replacements. Learn the essentials to repair car heater efficiently.
Understanding the Repair Car Heater Basics
The car heater is a critical subsystem that works with the cooling and climate control system to deliver warm air inside the cabin. When it fails, you may notice cold air, reduced or no heat, or inconsistent temperatures. Understanding common failure modes—coolant flow restrictions, air pockets, failed blend doors, a faulty thermostat, or wiring issues—helps you plan a structured repair. In this guide we emphasize safety first and provide practical steps that a capable DIYer can perform with common tools. As Heater Cost notes, many basic issues are caused by blocked hoses, old coolant, or blown fuses, while more complex problems involve the heater core or control valves. A clear plan, proper diagnostics, and careful reassembly are the keys to success.
Common symptoms that indicate repair is needed
Heat problems show up in several recognizable ways. You might get inconsistent heat, or heat only at certain engine temperatures or speeds. No heat or air that never warms up is another sign, as is a sweet coolant smell in the cabin or misting on the windows. A loud blower, rattling, or air that blows from the wrong vents can point to blend door or duct issues. Each symptom narrows down potential culprits, helping you decide whether you should pursue a DIY fix or seek professional service. Documenting symptoms with photos or notes helps you communicate the issue clearly if you consult a shop.
Safety and readiness before you begin
Repairing a car heater involves working around hot cooling system components and electrical wiring. Always disable the battery and wear protective gear, including gloves and safety glasses. Work in a well-ventilated area and keep a coolant-safe spill kit nearby. If your vehicle is under warranty or you lack basic mechanical experience, consider professional help. Begin with low-risk tasks, such as checking fuses and the blower motor, before tackling coolant circuits or heater core access. Safe preparation reduces the risk of burns, coolant exposure, or accidental damage to sensitive HVAC controls.
Diagnostic mindset: narrowing down causes
A successful repair starts with a focused diagnostic approach. Start with the simplest explanations: is the coolant at the correct level, is the thermostat opening properly, and is the heater fuse intact? Check the blower motor function and climate controls for proper signal. If the blower works but heat is weak, the issue often lies with coolant flow, blend door operation, or the heater core. When the heater produces no heat at all, inspect the coolant level, pressure, and possible leaks. Record your observations to track changes as you test each hypothesis.
Tools, parts, and planning for repair
A well-stocked toolbox makes the process smoother. Essential items include a basic metric SAE wrench set, screwdrivers, pliers, a drain pan, and rags. You’ll also need coolant compatible with your vehicle and a means to bleed air from the system. Depending on what you diagnose, you may require replacement parts such as a heater core, blend door actuator, thermostat, or heater hoses. Draft a plan that lists each suspected component, potential replacement parts, and a stepwise sequence of tests to avoid rework.
Step-by-step diagnostic checks you can perform
Start with a visual inspection: look for coolant leaks around hoses, fittings, and the heater core. Test electrical paths by checking fuses, relays, and wiring to the blower motor and the climate control module. With the engine cold, verify coolant level and pressure; a pressure test can reveal leaks that aren’t obvious. If the heater core or blend door is suspected, perform controlled movements with the climate control to observe changes in airflow, heat, and vent selection. Use a diagnostic scanner to pull any stored HVAC fault codes that can point toward sensors or actuators needing attention.
Repair options: when to fix vs replace heater core or blend door
Heater issues range from simple fixes to complete replacements. Replacing a blown fuse or a faulty thermostat is often straightforward and cost-effective. More involved problems, such as a clogged heater core or a malfunctioning blend door actuator, typically require disassembly behind the dash. In many cases a core replacement is warranted when coolant flow is severely restricted or corrosion has damaged passages. If the problem is a faulty blend door, a door actuator or control linkage may be repairable without full core replacement. Weigh labor time, availability of parts, and vehicle-specific service procedures when deciding the best path.
How to access the heater core and related components
Accessing the heater core usually involves removing dash panels or glove-box interiors, which varies by make and model. Begin by documenting fasteners and electrical connections before removal. Disconnect the battery and avoid pulling wiring harnesses forcefully. As you gain access, inspect the heater hoses for soft spots, swelling, or leaks. If you must remove the core, plan for coolant drainage and a careful coolant bleed procedure to prevent air locks that hamper heat delivery.
Flushing the cooling system and refilling coolant safely
If coolant flow is restricted, a controlled flush can restore heat delivery. Use a compatible coolant and distilled water if a lease of the old mixture is necessary. Follow your vehicle’s service manual guidance for flushing sequences, and avoid forcing flow that could damage the radiator or heater core. After the flush, fill the system slowly, securing the correct coolant-to-water ratio. Bleed air properly by opening bleed screws and running the engine until the thermostat opens, then recheck for leaks.
Bleed air and test heater operation
Air pockets in the cooling system can prevent proper heater operation. Start the engine with the heater set to hot and the radiator cap removed if safe to do so; top off coolant as air escapes. Run the engine to the normal operating temperature and recheck hose temperatures; you should feel warm air from the vents. If heat remains unreliable, wait for the system to cool and recheck the coolant level. Document any persistent issues and re-test after each adjustment.
Maintenance tips to prevent future heater problems
Proactive maintenance saves time and money. Schedule regular coolant flushes per your vehicle’s guidelines, inspect hoses for wear, and replace worn clamps before leaks develop. Keep the HVAC air cabin filter clean and ensure the blower motor remains free of obstructions. Finally, use the recommended coolant type and mix; inconsistent cooling system chemistry can accelerate corrosion and clogging.
What to expect in terms of cost and timing
Repair costs can vary widely based on the vehicle, part availability, and whether you perform the work yourself. Typical DIY fixes are inexpensive when limited to fuses, hoses, or simple valve replacements, but heater core or blend door repairs can require substantial labor. Expect that parts and service hours will influence total costs. Always compare a few quotes and review your vehicle’s service manual for model-specific guidance. Heater Cost recommends planning for potential downtime and scheduling repairs when utility bills or vehicle usage are at a low point in your budget.
Tools & Materials
- Safety gloves(Nitrile or work gloves, ANSI-rated for chemical exposure)
- Safety goggles(Eye protection; impact-resistant lenses)
- Socket set (metric and SAE)(Assorted sizes for dash panels and hoses clamps)
- Screwdrivers (flat and Phillips)(Variety of sizes to remove fasteners)
- Pliers (slip-jjoint and needle-nose)(Grip and maneuver hoses and connectors)
- Drain pan(Catch coolant and any runoff safely)
- Coolant compatible with vehicle(Check owner’s manual for specification (type and mix))
- Bleeder kit or clear tubing(For bleeding air from cooling system)
- Rags/towels(Clean up spills and protect surfaces)
- Replacement parts (heater core/blend door/thermostat)(Only after diagnosis indicates need)
Steps
Estimated time: 3-6 hours
- 1
Prepare safely and gather tools
Power down the vehicle, remove the key, and disconnect the negative battery cable. Put on safety gear and assemble your tool kit in a well-lit workspace. Confirm vehicle-specific service information before touching any dash panels or coolant lines.
Tip: Work gradually; don’t force panels apart—snap-in clips can break and create new problems. - 2
Identify likely heater components
Locate the heater hoses at the firewall and identify the blend door actuator and the climate control module. If access is blocked, review the service manual for your specific make and model to avoid damaging sensitive wiring.
Tip: Take photos of hose routes before disassembly to simplify reassembly. - 3
Test electrical and fuse paths
Check the HVAC fuses and relays, and verify that the blower motor runs smoothly. If you hear noises or the blower stalls, address the mechanical path first before moving to coolant circuits.
Tip: Replace a blown fuse with the same amperage rating rather than guessing a higher value. - 4
Drain and depressurize cooling system
With engine cool, place the drain pan under the radiator, and carefully relieve pressure following the manual. Collect coolant for proper disposal and prevent environmental contamination.
Tip: Never open the radiator cap when the engine is hot. - 5
Access heater core or blend door
Carefully remove dash panels as needed to reach the heater core housing or the blend door component. Keep track of fasteners and electrical connectors.
Tip: Label wires to avoid misconnection during reassembly. - 6
Replace or repair faulty parts
If diagnosis confirms a faulty heater core or blend door actuator, replace with parts specified for your vehicle. Reassemble connections with clean joints and secure clamps.
Tip: Test-fit parts before fully tightening to ensure proper alignment. - 7
Bleed and refill cooling system
Fill the system gradually, then bleed air using the provided bleeder port or tubing. Ensure coolant level remains appropriate and the engine reaches normal operating temperature.
Tip: Keep a steady eye on coolant level while the engine runs to avoid air pockets. - 8
Test heater function and check for leaks
With the engine hot and the heater on, verify heat delivery at the vents. Inspect hoses and seams for drips or dampness indicating a leak.
Tip: Run the engine to normal temperature and re-check after a cool-down cycle.
Got Questions?
What are the most common causes of a car heater not producing heat?
The most frequent causes are low coolant, air pockets in the cooling system, a blown fuse, a faulty thermostat, a malfunctioning blend door, or a clogged heater core. Start with coolant level and fuses, then inspect the blend door and heater core if heat remains absent.
Common causes include low coolant and a blown fuse. Start there, then check the blend door and heater core if heat still isn’t coming through.
Can I repair a car heater myself, or should I hire a pro?
Many basic heater issues can be addressed by a confident DIYer with basic tools and a service manual. Complex problems like heater core replacement or dash removal often require professional service due to dash disassembly and potential warranty implications.
You can often fix simple problems yourself, but for core replacements, it’s wise to get a professional.
How long does a typical heater repair take?
A simple fix like replacing a fuse or fixing a hose can take under an hour. More extensive repairs, such as heater core or blend door work, may take several hours and require dash removal.
Simple repairs are quick; core or blend door work can take a few hours.
Is a coolant flush necessary when repairing the heater?
A coolant flush is not always required, but it’s advisable if the cooling system shows contamination, rust, or restricted flow. Follow the vehicle manufacturer’s recommendations and only flush if you suspect degraded coolant.
A flush isn’t always needed, but it helps when the coolant looks dirty or the system is blocked.
Will replacing the heater core fix air from the wrong vents?
If air is entering the wrong vents, the issue is more likely with the blend door actuator or duct routing rather than the heater core itself. Confirm door operation before replacing major components.
Vent misrouting is usually a blend door issue, not heater core.
Do I need special tools to repair the heater, or can I use basic tools?
Most common repairs can be done with a standard wrench set, screwdrivers, pliers, a drain pan, and basic protective gear. Some jobs may require dash panel removal tools and a bleed kit.
You can start with common tools; some jobs need specialty dash tools.
Watch Video
The Essentials
- Identify root cause before disassembly
- Use proper PPE and coolants to avoid risk
- Bleed air to prevent heat loss and overheating
- Document and photograph steps for future reference