How to Fix Car Heater: A Practical Step-by-Step Guide
Learn how to diagnose and fix car heater problems, from thermostat issues to blend-door faults. This Heater Cost guide covers safe DIY steps, essential tools, and cost-aware recommendations to restore cabin warmth.

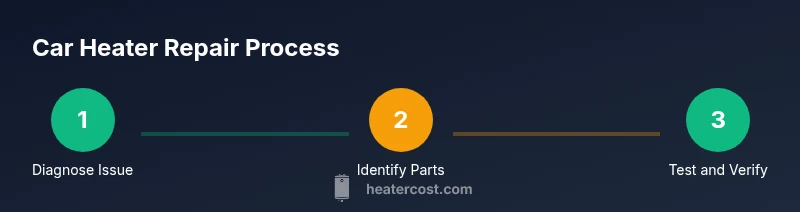
Learn how to diagnose and fix common car heater problems, from a stuck blend door to a failing thermostat. This quick guide covers safety basics, essential tools, and a practical, step-by-step approach you can use at home or with a trusted mechanic. By the end, you'll understand typical failure points, cost ranges, and maintenance tips to keep your cabin warm.
How to fix heater in car: an overview
Your car heater is a small but crucial subsystem of the vehicle’s cooling and climate control network. It relies on engine coolant circulating through a heater core, with a blower delivering warm air into the cabin. The thermostat, blend door, and various valves determine how much heat reaches the vents. When heat is weak or intermittent, the root causes often involve coolant flow, air pockets, or a faulty control actuator. According to Heater Cost, the most common problems involve coolant flow issues and defective blend doors. Understanding how these parts interact helps you diagnose without unnecessary parts purchases. This guide aims to demystify the process, offer practical DIY steps when feasible, and explain when professional help is the smarter, safer route.
Common failure points you should know
No heat can come from several failure points. The thermostat can fail closed, preventing coolant from reaching the heater core. The blend door actuator can jam, muting hot air. Leaks in hoses or the heater core drop coolant and reduce heat. A weak or failed blower motor reduces air volume, making heat feel insufficient even if the system is hot. Electrical fuses and relays can stop the blower or climate control from engaging. Clogged heater cores from rust or debris slow coolant flow, reducing heat at the vents. In some vehicles, a faulty heater control valve restricts flow to the heater core. Recognizing these points makes diagnosis faster and keeps you from buying parts you don’t need. Based on Heater Cost research, many failures are related to coolant flow or air temp mixing rather than a single bad part.
Safe diagnosing steps you can take today
Begin with safety. Ensure the engine is cool before opening any coolant lines. Inspect fuses for the HVAC blower and climate control, replacing any blown fuses. Check the coolant level in the reservoir and radiator for signs of coolant loss or contamination. Start the engine and set the heat to maximum; feel for consistently warm air and listen for the blower’s sound. If you hear air rushing but no heat, the issue may be air trapped in the cooling system or a stuck blend door. Use an infrared thermometer to compare inlet and outlet temperatures once the engine reaches operating temperature. If you smell coolant or spot dampness, you may have a leak that needs attention. These checks are non-invasive, cost-effective, and can save time before deeper work.
Step-by-step DIY fixes for the most common issues
This section outlines practical fixes for frequently observed problems. Before you begin, disconnect the battery and work in a well-ventilated area. If the blower is weak, inspect the blower motor and resistor; replace if necessary. If heat is inconsistent, inspect the heater core hoses for cold spots and confirm coolant flow. If there is a coolant leak, locate and repair the source; replace gaskets and hoses as needed. If the blend door is stuck, replace the actuator and recalibrate air mixing. For some models, dash removal is required to access components—plan accordingly. After any fix, reassemble, refill coolant, and run the system to verify heat output at idle and under driving conditions. Safety note: avoid dash modifications unless you have service manuals and proper tooling.
Tools, parts, and safety considerations
To tackle most fixes, you’ll want a basic repair kit and some specific parts. Tools and safety gear: safety gloves, eye protection, and a sturdy work surface; a standard tool set (screwdrivers, pliers, sockets); an infrared thermometer or temperature gun for quick checks; a digital multimeter if you’re chasing electrical faults. Replacement parts you may need include a thermostat, blend door actuator, heater hoses, clamps, and an appropriate coolant type for your vehicle. Always verify compatibility with your make and model. Safety first: never open hot coolant lines; use a catch tray and dispose of coolant properly.
When to replace vs repair
Not all heater issues are economical to repair. Simple fixes—like replacing a blown fuse or faulty blower motor—can be cost-effective and quick. More complex problems, such as a leaking heater core or a malfunctioning blend door assembly, often require professional service or even dashboard removal. Consider vehicle age, part availability, and the potential for additional related failures when deciding. If the heater core is leaking or multiple leaks exist, replacement is usually the safer option. Heater Cost analysis shows that accurate diagnosis and timely maintenance save money over time; plan for both parts and labor when budgeting for this work.
Maintenance tips to prevent heater problems
Preventative care is cheaper than repair. Regular coolant flushes and using the correct coolant type keep the heater core and cooling system clean and efficient. Periodically inspect hoses for signs of wear, bulges, or leaks, and listen for unusual blower noises that may indicate a failing motor or faulty wiring. Perform a quick HVAC system check during routine maintenance, and clean the HVAC vents to maintain air quality and flow. By staying proactive, you minimize emergency repairs and prolong the system’s life. The Heater Cost team emphasizes proactive checks and dry-run tests to keep warmth reliable.
Cost considerations and budgeting for car heater repairs
Repair costs vary with the issue and vehicle. DIY fixes for thermostat or actuator replacements can cost a few tens to a few hundred dollars, depending on parts and tools you already own. Professional service for larger issues like a heater core leak or dash removal can be significantly more expensive due to labor. The key is accurate diagnosis, avoiding unnecessary parts, and planning for potential dash work if needed. Heater Cost analysis shows that careful triage and early intervention save money in the long run; budget for both parts and labor and set aside a contingency for complex repairs.
Final checks and validation
Finish by testing the heat at idle and under driving conditions, ensuring even cabin warmth and no lingering leaks. Refill coolant if necessary and bleed the cooling system to remove air pockets. Document what was replaced and test again after a short drive to confirm stability. The Heater Cost team recommends keeping a repair log and scheduling a quick HVAC check annually to maintain warmth reliability. This final validation helps ensure comfort and reduces the chance of a return visit for the same issue.
Tools & Materials
- Safety gear (gloves, eye protection)(ANSI-rated gloves and eye protection before starting any work.)
- Basic hand tools (screwdrivers, pliers, sockets)(A standard toolkit with metric and SAE sizes.)
- Infrared thermometer or temp gun(Useful for quick checks on heater core inlet/outlet temps.)
- Multimeter(For diagnosing electrical faults in harnesses and relays.)
- Thermostat(Replacement if you confirm thermostat failure.)
- Blend door actuator(Replacement if the door is stuck or not moving smoothly.)
- Heater hoses and clamps(Stocked hoses for leak repairs; ensure proper size.)
- Coolant(Use vehicle-specific coolant and proper mix.)
- Service manual or vehicle-specific guide(Helpful to locate parts and procedure.)
Steps
Estimated time: Estimated total time: 2-4 hours
- 1
Disconnect battery and prep workspace
Begin by turning off the engine and disconnecting the negative battery terminal to avoid electrical shorts. Clear the work area and gather the tools you’ll need. This initial step reduces the risk of shock or accidental starts while you work near electrical components.
Tip: Double-check that the engine is cool and that no capacitors or relays can energize unexpectedly. - 2
Check fuses and HVAC relays
Locate the HVAC fuse and relay for the blower and climate control. Replace any blown fuses and test relays with a known-good unit if available. Faulty fuses or relays can prevent the blower from delivering heat even when the core is warm.
Tip: If the fuse keeps blowing, there may be a short or overcurrent draw; stop and reassess to avoid further damage. - 3
Test the blower motor operation
Turn on the heat and observe whether air is flowing at normal speed. If the blower is weak or absent, test the motor and resistor. Replacing a faulty blower motor or resistor can restore heat without touching the HVAC box.
Tip: Measure voltage at the blower connector to confirm power delivery. - 4
Inspect coolant level and look for leaks
Check the coolant reservoir and radiator for adequate levels and signs of leaks. A low coolant level can reduce heat and cause overheating issues in the heater core. Look for dampness or stains under hoses and the heater core area.
Tip: If you see a leak, identify the source before continuing to avoid air pockets in the system. - 5
Assess heater hoses for flow and temperature
With the engine warm, feel the heater hoses for hot coolant flow. If one hose remains cool, there may be flow restriction or a failed valve. This check helps distinguish between core and valve issues.
Tip: Be careful; hoses can be hot and pressurized when the engine is running. - 6
Test the thermostat operation
Verify the engine reaches operating temperature and stays there. If the gauge barely moves or stays cold, the thermostat may be stuck open. Replace the thermostat if you confirm failure.
Tip: Never run the engine without a properly seated thermostat; it can cause overheating. - 7
Check the blend door actuator and air-mixing control
Access the blend door or actuator to ensure it moves freely and responds to climate control commands. A sticking door can prevent hot air from reaching the cabin, even if the core is hot.
Tip: Calibrate the system after replacement by cycling the climate controls from cold to hot several times. - 8
Bleed the cooling system and refill coolant
If you performed work on hoses or the heater core, bleed air from the cooling system per the service manual and refill coolant to the correct level. Air pockets reduce heater performance.
Tip: Use the correct coolant type and follow the recommended air-bleed procedure for your vehicle. - 9
Test heat output and finalize
Reconnect the battery, start the engine, and operate the climate control to confirm heat delivery. Test in both idle and driving conditions to ensure consistent warmth and no leaks.
Tip: Keep a log of parts replaced and drive a short test route to verify reliability.
Got Questions?
What are the most common car heater problems?
The most frequent issues are a thermostat that won’t open, a stuck or faulty blend door actuator, leaks in hoses or the heater core, and a weak blower motor. Electrical faults in the HVAC controls can also prevent heat delivery.
Common problems include a thermostat that won’t open, a stuck blend door, leaks, or a weak blower motor.
Can I fix a car heater myself?
Many basic issues, like blown fuses, faulty blower motors, or air in the cooling system, can be addressed with basic tools. More complex repairs, such as heater core replacement or dash work, typically require professional service.
You can often fix simple issues, but complex repairs may need a pro.
How do I know if the heater core is leaking?
Signs of a leaking heater core include a sweet coolant smell inside the cabin, damp carpet near the firewall, and visible coolant leaks under the dash. Pressure testing can confirm leaks.
Look for a coolant smell inside, damp carpets, or visible leaks to identify a heater core issue.
What maintenance can prevent heater problems?
Regular coolant changes with the correct specification, checking hoses for wear, and inspecting the blend door and actuators during routine service can prevent many heater problems.
Regular coolant changes and inspections help prevent heater issues.
How long does it take to fix a heater?
Simple fixes like fuses or blower replacement can take a couple of hours, while heater core issues or dash work may require a full day or more depending on access and vehicle design.
Most simple fixes take a few hours; more complex jobs can take longer.
Are there safety concerns with heater repairs?
Always disconnect the battery before electrical work, avoid hot coolant exposure, and use proper PPE. If you’re not confident with dash work, consult a professional.
Safety first: disconnect power, avoid hot coolant, and know when to call a pro.
Watch Video
The Essentials
- Identify the root cause first (thermostat, blend door, or coolant flow).
- Check fuses and blower operation before deeper diagnostics.
- Bleed air and refill coolant after any hose or core work.
- DIY fixes can save money, but complex issues may require a pro.
- Keep a repair log and schedule preventive HVAC checks.