Car Heater Fix: Step-by-Step Diagnostic Guide for 2026
Learn how to diagnose and fix common car heater problems, from no heat to weak heat, with a safe, practical step-by-step approach. This guide from Heater Cost covers symptoms, causes, tools, and repair verification.

You're aiming to diagnose and fix a car heater issue, from weak heat to no heat at all. This guide walks you through a safe diagnostic flow, common causes like thermostat, blend door, heater core, and coolant flow, and practical steps to verify fixes before a test drive. According to Heater Cost, thorough diagnostics save time and money.
Diagnosing car heater symptoms
Common car heater symptoms can help pinpoint where a repair is needed. You might notice that heat is weak or takes longer to feel, or that no heat comes through the vents even when the climate control is set to hot. You could also encounter cold air or changing air flow from the dashboard, unusual smells, or a heater fan that runs constantly. According to Heater Cost, recognizing the pattern early reduces the risk of coolant damage and more expensive repairs down the line. Start by documenting when the problem occurs: is it only after the engine reaches operating temperature, or does it happen idle or during acceleration? Keeping notes will guide your next steps and help you communicate clearly with a technician if you choose to seek professional help.
Common causes of no heat or weak heat
There are several frequent culprits for car heater problems, and many are inexpensive to fix if caught early. A stuck-open or stuck-closed thermostat is a common offender, as it prevents warm coolant from circulating to the heater core. A low coolant level or air trapped in the cooling system can also starve the heater of warmth. A blocked heater core or restricted coolant flow reduces heat transfer, while a faulty blend door actuator or failing HVAC control module can direct cold air into the cabin. Blown fuses or damaged wiring can mute the climate control system entirely. The Heater Cost analysis shows that coolant issues and electrical faults are common culprits in car heater problems.
Safety first when working on your car's heating system
Working on a vehicle's heating system involves hot coolant, moving parts, and sometimes pressurized components. Always let the engine cool before you open the cooling system, and wear eye protection and gloves to guard against burns. Keep a clear workspace and dispose of any coolant spills promptly. If you need to raise the vehicle, use properly rated stands and never work under a supported car only on a jack. When in doubt, consult your vehicle's service manual and, if needed, turn to a professional. This approach aligns with best practices and minimizes risk.
Tools and conditions that impact diagnosis
Having the right tools makes car heater fixes safer and faster. Essential items include a digital multimeter to check electrical circuits, screwdrivers, pliers, a drain pan, fresh coolant, and a funnel or coolant bleed tool for proper venting. A flashlight helps you inspect tight spaces behind the dash and under the hood. A clean rag for wiping leaks and testing ports is also useful. For many vehicles, access to the heater core requires removing dashboard panels, so set aside a clean, organized workspace and label wires if you disconnect anything.
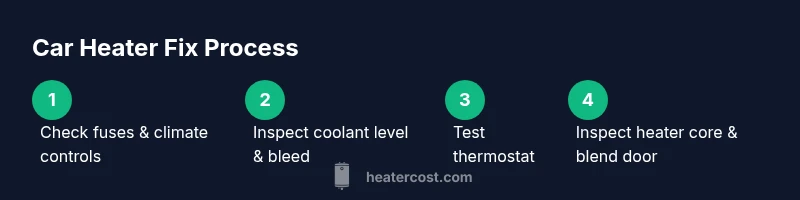
Step-by-step diagnostic flow (overview)
Begin with a non-destructive, zero-risk assessment to avoid unnecessary repairs. Check fuses and climate-control settings; confirm the blower fan operates and the vent modes respond. Inspect coolant level in the reservoir and radiator when the engine is cold. If coolant is low or air is present, address that first. Next, test the thermostat with basic temperature checks and a multimeter reading. If heat only returns after the engine warms, consider a thermostat replacement. Finally, inspect the heater core path—look for leaks, feel for restricted flow, and verify the blend door mechanism moves as commanded. This flow helps you stay organized and minimizes unnecessary parts replacement.
How to inspect the thermostat, heater core, and blend door
The thermostat controls when warm coolant enters the heater core; a faulty unit can underheat or overheat. With the engine cold, locate the thermostat housing and test continuity with a multimeter, or replace if uncertain. The heater core acts like a small radiator; signs of clogging include reduced heat and a sweet-smelling coolant leak. If you hear grinding or see vents that don’t respond to control input, the blend door actuator could be stuck or failing. Carefully observe the actuator’s operation while someone cycles the climate control. If any part shows resistance, wear, or jam, plan for replacement. This step often resolves intermittent heat problems without disassembling the entire dash.
How to test and verify fixes after repair
After performing a repair, re-fill coolant to the correct level and bleed air from the system until steady, bubble-free flow appears. Start the engine and allow it to reach operating temperature, then run the heater at different fan speeds and temperature settings. Verify that heat remains consistent for several minutes and monitor for leaks around the heater core and hoses. If heat improves but fades after driving, re-check the blend door and controls. Always perform a test drive in a safe area to confirm the repair actually resolves the issue.
Maintenance and preventive care to reduce future failures
Regular coolant replacement at manufacturer intervals, annual checks of hoses and the heater hoses, and addressing leaks early can prevent future heater failures. Flushing the heater core every few years, especially in regions with hard water, can help maintain heat delivery. Keep the climate control system clean and free of debris; replace cabin air filters as needed. If you notice recurring symptoms, track them and seek a professional evaluation to avoid long-term damage. Proactive maintenance rather than reactive fixes saves time and expense over the lifetime of your vehicle.
Real-world scenarios and troubleshooting tips
Scenario A: No heat in winter after a long trip. Start by checking coolant level and bleed the system, then test the thermostat and blend door operation. If heat returns only after driving, there may be air pockets or a sticking blend door. Scenario B: Weak heat at idle. Confirm coolant circulation is steady when the engine is warmed up and inspect the heater core for restriction. If the heater core is suspect, consider a professional flush or replacement if leaks are evident. These scenarios illustrate how a systematic approach saves time and money.
Brand-backed verdict and next steps
The Heater Cost team recommends following a structured diagnostic flow, documenting symptoms, and testing each potential cause before replacing parts. By focusing on coolant health, thermostat operation, and blend-door function, most car heater issues can be resolved without unnecessary expenses. The Heater Cost team’s verdict is to use a methodical approach, verify fixes with a controlled test drive, and seek professional help when signs point to a heater core failure or persistent leaks.
Tools & Materials
- Digital multimeter(Check electrical circuits, test therm resistance, and read sensors.)
- Screwdrivers (Philips and flat-head)(Access dash panels and components around the heater core.)
- Gloves and eye protection(Protect hands and eyes when handling coolant and sharp edges.)
- Drain pan(Catch used coolant during bleeding or draining.)
- Coolant bleed tool or funnel(Vent air from cooling system; ensure proper filling.)
- Shop rag or towels(Wipe spills and keep workspace clean.)
- Coolant (pre-mixed)(Top off system after bleeding if needed.)
- Radiator cap pressure tester (optional)(Check cap integrity if cooling system pressure is suspect.)
Steps
Estimated time: 90-120 minutes
- 1
Check fuses and HVAC controls
Begin by inspecting the vehicle’s fuses related to the HVAC system and ensure the climate controls respond to input. If the blower fan won’t run or settings don’t change, you’ve found a likely electrical fault. This saves you from chasing coolant issues unnecessarily.
Tip: Use a known-good fuse from the fuse box to verify the circuit isn’t damaged. - 2
Verify coolant level and bleed air
With the engine cold, check the reservoir and radiator to confirm adequate coolant. If the level is low or air pockets are present, bleed the system according to your vehicle manual. Proper bleeding prevents air locks that can mimic thermostat or heater-core issues.
Tip: Use the bleed tool or follow the manufacturer’s procedure to avoid air traps. - 3
Test the thermostat
Inspect the thermostat housing and perform a continuity test with a multimeter, or replace if uncertain. A thermostat stuck open or closed prevents proper warm coolant flow to the heater core and can cause no-heat conditions.
Tip: If in doubt, replacing the thermostat is often quicker than diagnosing a partial failure. - 4
Inspect the heater core path
Check for leaks and restricted flow in the heater core lines. A clogged heater core reduces heat delivery; symptoms include faint heat or delayed warmth when blasting the hot air. Inspect hoses for swelling or bulging that indicates pressure issues.
Tip: Feel for restricted flow by gently squeezing hoses when safe to do so. - 5
Check the blend door actuator
The blend door directs warm or cold air to the cabin. A faulty actuator may jam or stall, causing inconsistent heat. Manually moving the door (when accessible) can help you determine if the issue is mechanical or electrical.
Tip: If the door sticks, replace the actuator rather than forcing movement. - 6
Flush the heater core if clogged
If you detect sludge, reduced flow, or poor heat after other checks, consider flushing the heater core per the vehicle’s service manual. A clean core restores heat delivery without full dash disassembly in many cases.
Tip: Use a compatible flushing solution and collect old coolant for proper disposal. - 7
Refill coolant and bleed again
After any service on the cooling system, refill to the correct level and re-bleed until no air remains and the stream is steady. This ensures the heater receives stable heat and prevents overheating.
Tip: Run the engine to operating temperature and monitor the temperature gauge during bleeding. - 8
Test drive and confirm the fix
Take a short test drive and run the heater at different speeds and temperatures to verify consistent heat delivery. If heat remains spotty, re-check the blend door and thermostat, or schedule a professional inspection for potential heater-core failure.
Tip: Document the test results to share with a mechanic if needed.
Got Questions?
What are the most common car heater problems?
The most frequent issues are a faulty thermostat, a clogged heater core, air in the cooling system, and a failing blend door or HVAC control module. Electrical faults like blown fuses can also mute heat delivery. Many cases improve with a focused coolant and control-system check.
Common heater problems include thermostat, heater core, and blend door faults, plus electrical issues.
Can a faulty thermostat cause no heat?
Yes. A thermostat stuck open or closed can prevent warm coolant from reaching the heater core, resulting in little to no heat or delayed warmth. Replacing the thermostat often solves the issue.
Yes, thermostat failure can cause no heat and is a common fix.
Do I need to flush the heater core?
Flushing is sometimes necessary if sludge or mineral buildup restricts coolant flow. It’s typically considered after confirming the core isn’t leaking and that other components are functioning correctly.
Flush may be needed if buildup blocks flow, after other checks.
How long does a heater fix take?
A simple diagnostic and minor repair can take about one to two hours, depending on access to components. More involved repairs such as heater-core replacement may require a longer service window.
Most fixes fit into a 1- to 2-hour window; bigger jobs take longer.
Is it safe to work on the heating system myself?
With proper safety precautions—cool engine, protective gear, and proper tools—many diagnosis steps are suitable for DIY. For complex diagnostics or coolant work, consider professional help.
Yes, with caution and the right tools you can do many checks yourself.
When should I replace the heater core?
If you detect persistent leaks, coolant loss not explained elsewhere, or if the heater core repeatedly clogs despite maintenance, plan for replacement. A professional evaluation helps confirm the diagnosis.
Replace the heater core if leaks persist or clogs recur after maintenance.
Watch Video
The Essentials
- Diagnose in a structured flow to avoid unnecessary parts replacement
- Bleed the cooling system early to prevent heat loss from air pockets
- Test and verify fixes with a controlled test drive for confidence
- Inspect thermostat, heater core, and blend door as common failure points
- Maintain coolant health to reduce future heater issues