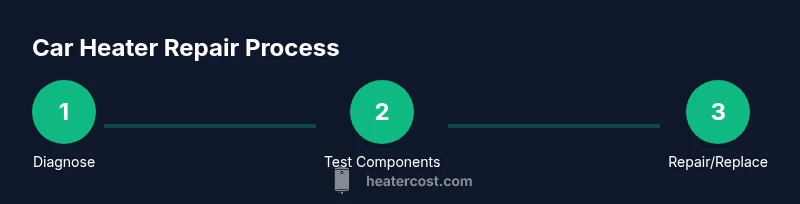
How to Repair a Car Heater: A Step-by-Step DIY Guide
Step-by-step guidance to diagnose and repair a car heater, from blower and thermostat issues to heater core problems. Safe, practical advice for homeowners and DIY enthusiasts with pro tips from Heater Cost.

Learn how to diagnose and repair a car heater, from blower issues to thermostat and heater core problems. This guide covers safe steps you can take at home, plus when to stop and seek a professional. You’ll gain a practical, checklist-style approach to restoring warmth in your vehicle without guessing.
How car heating systems work
A car’s heating system converts engine heat into cabin warmth. The heater core acts like a small radiator, circulating hot coolant from the engine through a heat exchanger behind the dashboard. A blower motor pushes warmed air into the cabin, while blend doors regulate how much hot air mixes with cooled air. The thermostat and cooling system controls determine engine temperature, which in turn affects how much heat is available. When any part of this chain fails, you’ll notice reduced or no heat, strange smells, or inconsistent air flow. Understanding these components helps you diagnose common issues with confidence, and it sets the stage for safer, more effective repairs. As Heater Cost researchers note, a systematic approach often saves time and avoids unnecessary part replacement while you repair a car heater.
Common symptoms of heater problems
When a car heater starts acting up, the first step is to note symptoms and match them to probable causes. Common signs include: little or no heat in the cabin, heat that fluctuates with engine speed, a blower that runs but feels weak or inconsistent, or a warm scent that can indicate coolant leakage. You might also notice fogging or a sweet odor if the heater core is leaking. A failing blend door actuator can lead to heat that won’t respond to temperature changes. Identifying the right symptom helps you target the correct subsystem—heater core, thermostat, blower motor, or HVAC controls—before you dive into more invasive work.
Safety first: before you start
Before you touch any HVAC components, take safety seriously. Park on a level surface, engage the parking brake, and wear eye protection and gloves. Disconnect the negative terminal of the battery to prevent shocks or accidental starts, especially when working around electrical components like the blower motor or resistor. Let the engine cool completely before you open the radiator cap or touch coolant hoses to avoid scalding. Work in a well-ventilated area and use a drip tray to catch any coolant that may spill. If you’re unsure about any step, step back and consult a repair manual or a qualified technician. These precautions keep you safe while you learn to repair a car heater.
Quick checks you can do without disassembling
Some heater problems are caused by simple, non-invasive issues. Start with the basics: check the coolant level in the reservoir and the radiator when cool, inspect for coolant leaks under the vehicle or around hose clamps, and confirm the radiator cap seals properly. Verify fuses related to the blower motor and HVAC controls are intact. Feel the blower under the dash while the system is on high; if you hear the fan but feel no air or only a whisper, the blower motor or resistor pack may be at fault. For most vehicles, a quick test with a multimeter can confirm whether electrical power reaches the blower motor. Addressing these high-probability issues first can save you a lot of time and money.
How to test the blower motor and blend door
Diagnosing the blower motor involves confirming power at the motor connector, testing for continuity through the resistor, and listening for normal motor operation. If the motor spins freely but doesn’t push air, the blower resistor or wiring may be damaged. The blend door determines how much hot air is allowed into the cabin. When it sticks or the actuator fails, you’ll notice heat output that won’t respond to temperature changes. Access often requires removing panels or the glove box, so use a service manual for your vehicle model. Taking careful notes and photos helps you decide whether to repair or replace parts.
Diagnosing thermostat and heater core issues
A thermostat stuck in the closed position will overheat the engine and reduce heat in the cabin, while an open thermostat can lead to poor warm-up and insufficient cabin heat. If the coolant is hot but the heater is cold, that’s a red flag for thermostat or heater core problems. The heater core can become clogged or develop leaks, causing weak or no heat and potential coolant odors inside the cabin. Flushing the heater core or replacing damaged hoses may restore heat. Because heater core work is more involved, you should weigh the risks of DIY against professional service. Regular cooling system maintenance reduces the likelihood of heater core failure.
When to DIY vs when to seek professional help
DIY repair is feasible for non-invasive issues like fuses, blower motor tests, or simple wiring checks, especially if you have basic automotive tools. More complex tasks—heater core replacement, blend door actuator, or thermostat replacement that requires disassembly beyond the glove box—often benefit from professional service. If you’re uncertain about the safety of draining coolant or performing critical disconnections, consider a pro. A structured approach saves time and protects you from costly mistakes. Use a repair manual and, if needed, schedule a diagnostic with a certified technician. The Heater Cost team recommends starting with the simplest checks and escalating only when necessary.
Tools, parts, and safety gear you might need
Having the right tools makes all the difference when repairing a car heater. Essential items include a socket set, screwdrivers, pliers, a flashlight, and a leak tray. A multimeter helps verify electrical power to the blower motor and actuators. A coolant funnel and compatible coolant are handy for refilling the system after service. Depending on your vehicle, you may need a specialized flashlight and a service manual for access panels and fastener locations. Wear gloves and eye protection, and keep a clean workspace. Always dispose of old coolant responsibly and follow local environmental regulations.
Maintenance to prevent future heater problems
Prevention is cheaper than replacement. Regular cooling system maintenance helps avoid heater problems. Check coolant levels and replace coolant as recommended by the vehicle manufacturer. Periodically inspect hoses for cracks, bulges, or leaks and ensure clamps are tight. Flushing the heater core every few years or as advised by a service manual can prevent mineral buildup that restricts flow. Keep the HVAC system clean by replacing cabin air filters as needed. Address electrical issues promptly to prevent corrosion or shorts that could affect the blower or blend doors. Gentle, proactive maintenance keeps your car heater reliable.
Troubleshooting flowchart example
If you’re not sure where to start, this quick flowchart can help. Start with symptom: no heat versus weak heat. If no heat, check coolant level, thermostat operation, and heater core leaks. If weak heat, test the blower for power and output, then inspect the blend door actuator. If the problem persists, consult a service professional for a diagnostic, especially if you suspect a heater core blockage or major cooling system fault. A structured approach reduces guesswork and speeds up a safe repair.
Tools & Materials
- Socket set(Standard metric/imperial sizes; 3/8-inch drive or larger)
- Assorted screwdrivers (flathead and Phillips)(Flat blades for panels; Phillips for screws)
- Flashlight or headlamp(Bright, hands-free lighting for dash and under-dash work)
- Gloves and eye protection(Chemical splash protection and finger safety)
- Service manual for vehicle(Model-specific access and torque specs)
- Coolant overflow tray or catch pan(Contain spills safely)
- Coolant, compatible with vehicle(Only if replenishing after service)
- Multimeter(Verify power to blower motor and actuators)
- Leak tray or absorbent rags(Clean spills and protect surfaces)
Steps
Estimated time: 2-4 hours
- 1
Disconnect power and prepare
Park on a level surface, set the parking brake, and disconnect the negative battery terminal. This minimizes the risk of short circuits or accidental starts while you work near HVAC components.
Tip: Double-check the engine is cool before touching coolant or electrical parts. - 2
Verify symptoms and collect context
Note when heat fails (engine cold or hot), whether heat changes with RPM, and if the blower is audible but weak. Document vehicle make/model for references in a service manual.
Tip: Take photos of any wiring harnesses before disconnecting anything. - 3
Check fuses and blower operation
Inspect HVAC-related fuses and test the blower motor by applying direct power from the battery (with protections in place) to confirm motor function. If the motor runs but airflow is weak, the resistor or wiring may be the issue.
Tip: If the blower works intermittently, suspect a bad connection or a failing resistor. - 4
Inspect cooling system and coolant
With the engine cold, inspect coolant level in the reservoir and check for leaks around hoses and the radiator. If the coolant level is low or you notice coolant odors, address leaks and top up appropriately after cooling system service.
Tip: Never open the radiator cap while the engine is hot. - 5
Check thermostat operation
Test thermostat behavior by observing engine warm-up and heat delivery. A thermostat stuck closed will overheat the engine and prevent heat; a stuck open can cause weak cabin heat. Use diagnostic tests if needed.
Tip: If uncertain, replace thermostat using manufacturer torque specs. - 6
Assess heater core access and blend doors
If heat seems to come intermittently, inspect blend door actuators and the heater core hoses. Access may require panel removal; follow the service manual for safe disassembly and reassembly.
Tip: Avoid forcing panels apart to prevent breakage. - 7
Consider heater core flushing or replacement
If symptoms point to a clogged heater core, consider backflushing or flushing with approved solutions. If leaks are detectable or corrosion is present, heater core replacement is likely required.
Tip: Flushing can dislodge debris that might clog other parts; catch and inspect debris. - 8
Bleed air and test run
Reassemble components, refill coolant if needed, and bleed the cooling system to remove air pockets. Start the engine, run to operating temperature, and verify cabin heat performance.
Tip: Watch for coolant overflow and check for leaks during the test run.
Got Questions?
What are the most common signs that a car heater needs repair?
Common signs include no heat, inconsistent heat, weak airflow, unusual smells, and coolant leaks. These symptoms help narrow down whether the issue is with the blower, thermostat, blend door, or heater core.
Common signs include no heat, weak airflow, and coolant smells, which help identify whether the blower, thermostat, or heater core needs attention.
Can I fix a car heater myself, and when should I call a pro?
Some heater problems, like blown fuses or blower motor tests, are suitable for DIY with basic tools. If the issue involves the heater core, significant disassembly, or coolant leaks, consider professional service.
Some fixes are DIY-friendly, but heater core work or leaks should usually be handled by a mechanic.
Is replacing the thermostat worth it for heat problems?
Thermostat replacement is common for heat problems if the engine struggles to reach or maintain operating temperature. Replacing it with the correct part and torque specs is essential.
If the engine won’t warm up properly, a thermostat replacement is often a good next step.
What about heater core replacement for a clogged core?
Heater core replacement is labor-intensive and vehicle-specific. Flushing can help in some cases, but a clogged core may require replacement.
A clogged heater core can be tricky—flushing might help, but often replacement is needed.
Should I flush the heater core myself?
Flushing the heater core can dislodge deposits but must be done with proper procedures and cleaners recommended by your vehicle’s manual.
Flushing can help, but follow the manual to avoid damaging cooling system components.
How long does a typical heater repair take?
A straightforward diagnostic and non-invasive fix may take 1-3 hours, while heater core work can extend to several hours depending on the vehicle.
Typical fixes range from an hour or two for diagnostics to several hours for heater core work.
Watch Video
The Essentials
- Understand each component’s role in the car heater.
- Start with safe, non-invasive checks before disassembly.
- Reserve complex heater core work for a professional when needed.
- Maintain the cooling system to prevent future heat issues.
- Document symptoms and steps for accurate diagnosis.