Fix Car Heater: DIY Guide to Diagnose & Repair at Home
Learn how to fix car heater issues with our step-by-step DIY guide. Diagnose heat loss, blower failure, or thermostat problems safely, plus tools, costs, and when to call a pro. Heater Cost provides clear, actionable instructions for homeowners.

You will learn how to diagnose and fix a car heater problem yourself, including common issues like weak heat, no heat, or a stuck blower. This guide covers safe steps, essential tools, and when to seek professional help. By following the steps, you can save time and reduce repair costs while keeping your vehicle comfortable year-round.
Why car heater failures happen
Car heaters fail for a variety of reasons, from coolant system issues to electrical faults. A heater relies on a steady flow of hot coolant and properly functioning blower components to deliver warm air into the cabin. Over time, worn hoses, a stuck thermostat, or a failing blend door can reduce heat output or divert airflow away from the passenger compartment. As you pursue a fix, remember that safety matters: coolant is toxic, hot surfaces can burn, and dealing with pressurized cooling components requires care. According to Heater Cost, understanding cost drivers and repair feasibility helps homeowners budget for fixes and decide whether the problem is a DIY job or a professional repair. Start with a checklist of likely culprits and proceed in a logical order rather than replacing parts at random. This approach reduces wasted time and unnecessary expense while keeping you in control of the repair journey.
Common causes of heater problems
There are several frequent culprits behind a failing car heater. Low coolant level or air trapped in the cooling system can prevent heat transfer. A stuck or slow-responding thermostat can keep coolant from reaching the heater core, while a faulty heater core itself can leak or clog. The blower motor and related resistors or fuses control the actual delivery of air; if they fail, warm air may not reach the cabin. A malfunctioning blend door can misdirect airflow, causing cold air to come out even with the heater set to hot. Inspecting and testing each of these areas in sequence helps isolate the issue while avoiding unnecessary major repairs. For budget planning, focus first on the simplest fixes—fuses, coolant level, and bleed procedures—before considering core replacement.
Safety first: hazards and precautions
Working on a vehicle’s cooling system or electrical components carries risks. Always ensure the engine is cool before touching hoses or the radiator cap. Wear eye protection and gloves to protect against coolant splashes, which are toxic and can cause skin irritation. Disconnect the battery before inspecting electrical connections to avoid shock or short circuits. When testing the blower or thermostat in the cabin, keep children and pets away from the work area. If you notice a coolant leak, smell of sweet coolant, or engine overheating, stop work and seek professional help promptly to prevent costly damage.
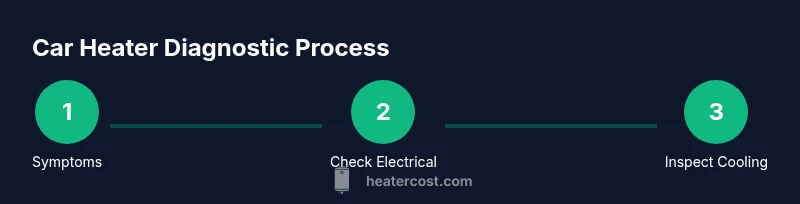
Diagnosing your heater issue: a structured approach
A methodical diagnostic path helps you pinpoint the root cause without unnecessary parts swaps. Begin with simple electrical checks: inspect fuses and the climate control settings, verify blower operation, and test for power at the blower motor. If the blower runs but heat level remains low, focus on the coolant system: check coolant level, inspect hoses for leaks, and bleed air if needed. If heat is intermittent or cabin temperature fluctuates with fan speed, inspect the blend door and its actuator. Keep a log of symptoms and test results; this record will help you decide whether a DIY fix is feasible or a pro is needed.
Tools, parts, and replacement options
Prepare a basic toolkit and some common spare parts before you begin: a screwdriver set, pliers, a multimeter, a drain pan, and clamps. You may also need fresh coolant and a cleaner for the heater core if you suspect clogging. For certain cars, you might replace a fuse, the blower motor, or a control module instead of diving into the heater core. If you detect a leak in the heater core or persistent overheating after a bleed, plan for professional service or full component replacement. Budget for parts and labor to avoid last-minute scrambles, and consider parts that come with a warranty for peace of mind.
Step-by-step checklist you can follow while working
This section expands on the steps outlined in the dedicated Step-by-Step block. Use it as a quick-reference guide to track progress, verify results, and ensure nothing is overlooked. Each action should be performed in a safe, controlled manner, with engine and coolant temperatures monitored and tools organized. Completing these checks in the right sequence increases your chances of a successful DIY repair and helps you decide when professional intervention is warranted.
When to bypass DIY and call a pro
Not every heater issue is a DIY fix. If you notice persistent coolant leaks, a strong sweet-smell, significant overheating, or structural dashboard work required to access the heater core, it’s time to bring in a certified technician. Electrical issues affecting critical safety features should also be handled by a professional. A pro can perform pressure testing, heater core replacement, and complex climate-control diagnostics with specialized tools, reducing the risk of accidental damage and ensuring the repair is carried out to manufacturer specifications.
Budgeting for car heater repairs and maintenance
Planning ahead makes car heater repairs more predictable and affordable. Estimate costs by listing potential parts (fuses, blower motor, blend door actuator, hoses), accessibility, and labor time if you hire a technician. Include regular maintenance tasks like coolant flushes and heater core inspections to prevent future breakdowns. A proactive approach often reduces total ownership costs by catching issues early and avoiding emergency repairs. Remember, even DIY repairs may incur hidden costs such as labor time, diagnostic fees, and potential rework if parts fail again.
Tools & Materials
- Screwdriver set(Phillips and flat-head, assorted sizes)
- Pliers (needle-nose preferred)(For hose clamps and small connectors)
- Multimeter(Test electrical circuits to blower and controls)
- Drain pan(Catch coolant during bleeding or leaks)
- Coolant (pre-mixed 50/50 or concentrate, plus distilled water)(Top off or flush cooling system as needed)
- Coolant hose clamps(Secure hoses after inspection or replacement)
- Replacement fuses(Spare fuses for the climate control circuit)
- Heat-safe gloves(Protect hands when handling hot components)
- Rags and sealant wipes(Clean up spills and drips)
Steps
Estimated time: 60-90 minutes
- 1
Assess symptoms and safety
Document what you’re experiencing (no heat, weak heat, or intermittent heat) and check for obvious signs like leaks or odd smells. Ensure the engine is cool, the parking brake is set, and the cabin area is safe before touching components.
Tip: Park on a flat surface, wear gloves, and avoid opening hot coolant systems. - 2
Check fuses and climate controls
Locate the vehicle’s fuse box and climate-control fuse. Verify power to the blower motor with the multimeter or test light, and confirm the blower responds to speed settings.
Tip: Consult your owner’s manual to locate the correct fuse and the blower motor circuit. - 3
Inspect coolant level and leaks
With the engine cold, inspect the coolant reservoir and radiator for level, while checking hoses for cracks or swelling. Look for wet spots under the dash or firewall that could indicate a heater-core leak.
Tip: Never remove the radiator cap when hot; allow it to cool completely first. - 4
Bleed air from the cooling system
If you added coolant, run the engine with the heater on hot and a high fan setting to push air out of the system. Top off coolant as air escapes and monitor the gauge for proper operating temperature.
Tip: Follow the vehicle’s bleeding procedure exactly if it has a specific sequence. - 5
Inspect heater hoses and core access
If accessible, check heater hoses for soft spots or leaks. If the heater core is behind the dash, you may need professional access; do not force components apart or pry without the proper technique.
Tip: Only attempt core inspection if you’re confident; improper dash work can cause damage. - 6
Test blower motor and blend door
Apply power to the blower motor to test operation. If airflow is inconsistent, test the blend door actuator for proper movement and reattach or replace as needed.
Tip: Listen for unusual grinding or rattle sounds that indicate a failing motor. - 7
Reassemble and test again
Reconnect any components you opened, refill coolant to the recommended level, and run the engine. Set the heater to hot and observe whether heat output stabilizes across fan speeds.
Tip: Keep a log of temperatures and fan speeds to track changes. - 8
Decide on next steps
If heat returns only briefly or leaks persist, the issue may require heater-core replacement or professional diagnostic work. Evaluate the cost and time of DIY fixes versus shop labor.
Tip: Document symptoms with photos and notes to share with a technician.
Got Questions?
Can I fix a car heater at home?
Many common heater issues can be addressed at home with basic tools and careful safety practices. Start with electrical checks, coolant level, and obvious leaks before more involved work. If the heater core or dash components are involved, professional service is often the safer choice.
Yes, you can fix many heater problems at home, starting with safe, simple checks. If you reach the core components, consider a professional.
What is the most common car heater failure?
A stuck thermostat or air trapped in the cooling system is a frequent cause of reduced heat. Electrical issues with the blower or a blown fuse are also common and relatively easy to diagnose.
Thermostat issues and blower/fuse problems are among the most common heater failures.
How long does a typical heater repair take?
Simple checks and small fixes can take under an hour, while diagnosing a heater core or dashboard components may require several hours or a professional service.
A quick check can be under an hour; more extensive work may take several hours.
Is it safe to drive with a heater issue?
If overheating occurs or there is a significant coolant leak, stop driving and seek service. Minor heat problems may not affect safety, but persistent issues can indicate cooling system damage that needs attention.
If you notice overheating or leaks, stop driving and get it checked.
What maintenance can prevent heater problems?
Regular coolant flushes, timely thermostat checks, and blade/vent inspections help prevent heat delivery issues. Keep hoses clamped securely and inspect for leaks during routine service.
Regular coolant maintenance and hose checks can prevent many heater problems.
Should I replace the heater core?
Heater core replacement is labor-intensive and often costly. Consider this option if leaks are confirmed or if heat delivery remains poor after other components are tested. A professional evaluation helps determine the best course.
Heater core replacement is a big job; get a professional opinion first.
Watch Video
The Essentials
- Identify whether heat loss or airflow is the primary issue
- Start with simple checks (fuses, coolant level) before complex diagnostics
- Keep a tool kit and spare parts ready for DIY work
- Know when to call a professional to avoid costly mistakes
- Regular maintenance can prevent heater problems