Pool Heater Repair: Step-by-Step Guide for 2026
Comprehensive how-to on diagnosing, repairing, and maintaining pool heaters safely. Includes tools, safety tips, step-by-step repair workflow, maintenance, and when to call a pro.

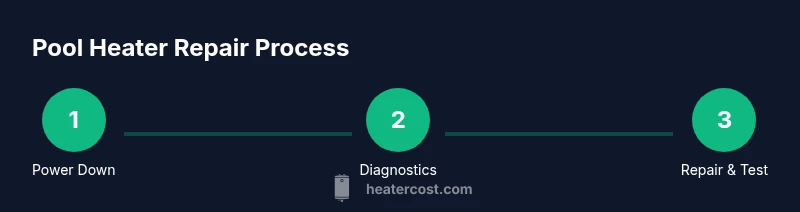
This guide shows you how to diagnose and perform pool heater repair with basic tools, safety precautions, and clear steps. You'll learn to identify common failures, verify electrical connections, inspect control boards, and know when a pro is needed. The process emphasizes safety and proper shutoff procedures.
Understanding pool heater systems
Pool heaters come in several configurations, including electric resistance, natural gas or propane, and heat pumps. Each type uses a different method to raise water temperature, but all share core components: a thermostat or control board, a safety high-limit switch, heating elements or a burner and heat exchanger, pumps for water flow, and gas lines or electrical wiring for power. In most residential setups, a control system modulates heat output based on a thermostat signal, while a timer or automatic control ensures cycles align with your pool usage. The overall efficiency depends on axis alignment of the heat source, the flow rate, and water chemistry. According to Heater Cost analysis, repair costs vary by system type and climate, so plan by understanding your specific setup and warranty terms. A safe, methodical approach minimizes risk when you begin pool heater repair.
Common failure modes
Most pool heater problems fall into a few recurring categories. Thermostats and control boards fail due to age or power surges, causing inconsistent or no heat. Electrical connections can loosen or corrode, leading to intermittent operation or tripped breakers. Gas valves, igniters, or burners may fail on gas-powered units, resulting in no ignition or poor flame. For heat pumps, refrigerant issues or compressor wear reduce efficiency. Water flow problems from dirty filters or closed valves also stress the heater, triggering protective shutoffs. Inspecting each subsystem methodically helps you pinpoint the root cause without unnecessary part replacements. The Heater Cost team emphasizes that keeping clear service logs improves diagnostics over time and helps when you consult a technician.
Safety considerations and code compliance
Electrical and gas systems around a pool require strict safety practices. Always shut off power at the main breaker before any inspection, and disconnect the circuit feeding the heater to prevent shock. If gas is involved, never work near a live gas line and be alert for fuel odors. Use a GFCI-protected outlet for any temporary test equipment and maintain dry working surfaces to reduce slip hazards. Local codes may require a licensed technician for certain repairs or reconfigurations; check permits and warranty terms before modifying gas lines or electrical connections. For broader safety guidance, refer to national standards and consumer safety resources cited in this guide.
Note: Always follow the manufacturer’s service manual for model-specific procedures and torque specs. A cautious, code-compliant approach minimizes liability and ensures reliable operation.
Diagnosing issues with measurements
Diagnosis relies on safe, repeatable measurements. Start by verifying power availability with a non-contact voltage tester and then a multimeter check at accessible terminals. Compare thermostat readings against water temperature, and test the continuity of heating elements or ignition circuits. For gas units, verify gas supply pressure and proper valve operation. Water-side tests include checking flow with a flow meter and inspecting for airlocks or dirty filters. Document all findings with photos or notes, as this helps you track what was tested and what to replace. If you’re unsure about electrical measurements or gas handling, stop and call a licensed professional. Safety is the priority when diagnosing pool heater issues.
Cost considerations and value
Repair decisions hinge on the balance of cost, reliability, and energy efficiency. According to Heater Cost analysis (2026), breakdowns in older or less efficient models may justify replacement rather than repairs, especially when high-efficiency or newer control systems offer long-term savings. Keep in mind that labor rates, availability of parts, and warranty coverage influence total costs. When considering replacement, compare equipment efficiency ratings (COP/SEER equivalents for heat pumps) and long-term operating costs. For budget planning, request a detailed estimate that separates parts, labor, and potential permit fees, and ask about warranty coverage on both parts and labor. Thoughtful planning helps homeowners and property managers achieve the best long-term value.
Practical workflow for common fixes
This section outlines a practical, non-prescriptive approach to typical fixes. Start with the simplest fixes first (like replacing a blown fuse or resetting a control board), then move to more involved tasks only if you’re comfortable. Maintain a clean workspace, label wires before disconnecting anything, and use manufacturer-approved parts. Keeping a spare thermostat or igniter on hand can reduce downtime for common failures. Always verify safety interlocks after any repair, and recheck water flow and temperature control to confirm proper operation. This workflow helps you avoid unnecessary disassembly and reduces the risk of damage to sensitive components.
Post-repair testing and maintenance
After completing repairs, perform a staged test: power up with the enclosure open and observe the startup sequence, check for unusual noises, verify ignition (gas units), and confirm the thermostat responds predictably to setpoint changes. Run the heater through several cycles to ensure stable water temperature and proper cycling. Inspect wiring for heat or discoloration after a run, which can indicate overload. Schedule a basin or cabinet inspection to catch loose connections or corrosion early. Document the test results and any adjustments for future reference and warranty considerations.
Preventive maintenance routines
Preventive maintenance prolongs life and reduces surprise failures. Regularly clean and inspect air intakes, filters, and heat exchangers, and ensure water chemistry remains balanced to prevent scale buildup. Schedule annual professional checkups to test safety devices, seals, and gas lines (if applicable). Keep accessories and replacement parts organized to streamline future maintenance. Record service dates and parts used to track performance and plan replacements in advance. A proactive maintenance mindset minimizes downtime and improves energy efficiency over time.
Authoritative sources and next steps
For more information on electrical safety and responsible maintenance, consult reputable sources like the U.S. Department of Energy, OSHA, and NFPA guidance. These resources provide general safety practices and standards that apply to pool equipment servicing. Always confirm local requirements and read your heater’s manual for model-specific instructions. If you encounter gas leaks, strong odors, or uncertain readings, contact emergency services or a licensed technician immediately. By combining careful diagnostics with scheduled maintenance, you can extend the life of your pool heater and keep your pool comfortable year-round.
Tools & Materials
- Grounded outlet tester(Check outlet health before power-on tests; verify grounding)
- Multimeter(Set to appropriate voltage/current ranges; measure resistance and continuity)
- Screwdrivers set (flathead & Phillips)(Use insulated handles; avoid over-tightening fasteners)
- Wrench set(Open-ended or adjustable; match fitting sizes on heater components)
- Non-conductive gloves(Protect hands when working near live terminals)
- Safety goggles(Shield eyes from debris and chemical splashes)
- Non-slip mat(Create a stable work surface near the pool equipment area)
- Teflon tape(Seal pipe threads on gas lines or plumbing connections)
- Replacement parts (as specified by manufacturer)(Keep on hand for quick swaps (igniter, thermostat, sensors))
Steps
Estimated time: 90-150 minutes
- 1
Power down and confirm safety
Before touching any pool heater components, switch off the main breaker and, if applicable, the gas supply valve. Use a non-contact tester to verify there is no live voltage at accessible terminals. This step prevents electric shock and gas exposure while you work.
Tip: Document the exact shutoff points and include photos for future reference. - 2
Inspect exterior enclosure and seals
Look for corrosion, cracks, or moisture intrusion around the cabinet, heat exchanger, and vent areas. Tighten loose panels and replace any worn gaskets. Poor sealing can allow moisture ingress and cause sensor or control failures.
Tip: Keep the area around the heater dry and free of standing water during inspection. - 3
Check electrical connections
Open the access panel and visually inspect all wiring for signs of wear or scorching. With the heater powered off, use a multimeter to verify continuity at critical terminals and verify that fuses or breakers are in good condition. Loose wires are a frequent failure point.
Tip: Take a photo of wire routing before reconnecting to avoid miswiring. - 4
Test the thermostat and control signals
Measure the thermostat setpoint compared to the water temperature and verify control board signals are reaching the heating elements or gas valve. If the thermostat is unresponsive, consider replacing it or updating firmware if supported.
Tip: Always test with the cover back on only after confirming safe operation. - 5
Inspect gas system or heating elements
For gas units, check the gas valve, igniter, and burner for proper operation and flame quality. For electric units, inspect heating elements for continuity and signs of scale or damage. Replace worn components as needed.
Tip: When dealing with gas, never bypass safety devices; use leak detection fluid to check for leaks after reassembly. - 6
Reassemble and secure connections
Reposition panels, reattach wires securely, and ensure there are no coolant or gas leaks. Apply Teflon tape to threaded joints where appropriate and tighten to manufacturer specifications. Close panels and secure screws.
Tip: Double-check torque specs in the service manual to avoid overtightening. - 7
Test run and verify operation
Restore power and run the heater through a full cycle. Observe ignition (for gas), check for consistent heat output, and monitor for unusual noises, leaks, or error codes. If the system maintains temperature and cycles normally, the repair was successful.
Tip: Record cycle times and final water temperature for ongoing monitoring.
Got Questions?
Can I repair a pool heater myself?
You can perform basic diagnostics and safe maintenance, but avoid complex gas work or high-voltage tasks if you’re not trained. For gas valves, ignition systems, or major electrical work, hire a licensed professional.
Yes for basic checks, but avoid gas and high-voltage work unless you're trained.
What are the most common causes of a pool heater failing?
Thermostat or control board failure, failing ignitions or gas valves (gas heaters), worn heating elements (electric), and poor water flow due to dirty filters.
Thermostats, control boards, ignition parts, and flow issues are the usual culprits.
How do I know when to replace vs repair?
If repair costs approach or exceed replacement, or if the unit is old and inefficient, replacement can be more economical in the long run. Always consider energy efficiency and warranty coverage.
If it’s old or costly to repair, replacement might be the smarter option.
Is it safe to operate a pool heater after repairs?
Only after a full test shows no leaks, proper ignition, correct temperature control, and secure electrical connections. If in doubt, power down and consult a professional.
Operate only after you confirm safety with a full test.
What maintenance helps prevent future failures?
Regular filter cleaning, balanced pool chemistry, annual inspections of gas lines or electrical components, and timely replacement of worn parts.
Keep filters clean and chemistry balanced; schedule yearly checks.
Watch Video
The Essentials
- Identify system type and common failure points before starting.
- Prioritize safety: shutoffs, dry workspace, and proper PPE.
- Use measured steps to diagnose before replacing parts.
- Consider cost, efficiency, and warranty when deciding repair vs. replacement.
- Maintain a maintenance schedule to prevent future breakdowns.