Pool Heater Installation: A Step-by-Step Guide
Learn how to install a pool heater safely and efficiently with this comprehensive, step-by-step guide. Covers sizing, permits, electrical and gas considerations, installation costs, and maintenance to keep your pool warm year-round.

According to Heater Cost, pool heater installation is best approached with careful sizing, code-compliant electrical or gas hookups, and a clear maintenance plan. This quick guide outlines core steps from sizing and permits to safe startup, enabling homeowners to proceed confidently. The Heater Cost team emphasizes accuracy, safety, and long-term efficiency in every installation.
Understanding pool heater installation basics
Pool heater installation is the process of adding a heating system to a swimming pool to extend usable season and improve comfort. A correct install considers pool volume, climate, desired water temperature, and the heater type best suited to the site (electric, gas, or heat pump). Proper placement, ventilation, and outdoor-rated equipment are essential. According to Heater Cost analysis, well-planned installation reduces heat loss and ensures safe operation, especially when you align equipment with local codes and manufacturer guidance. In many homes, installation involves coordinating with electrical, gas, or plumbing trades to ensure a safe, code-compliant connection. Keep in mind that not all pools require the same heater size, and oversizing can waste energy while undersizing leads to inadequate heating. After you finish the install, a professional should verify clearances and connection integrity.
Sizing and selecting the right heater
Sizing a pool heater installation starts with your pool’s volume, surface area, water temperature goals, and climate. A properly sized unit will reach target temperatures more quickly and run more efficiently. Work with a licensed pro to calculate BTU requirements and factor variables like wind exposure, pool cover use, and desired warm-season duration. When choosing a model, compare efficiency ratings (COP or AFUE equivalents) and ensure the unit can handle peak outdoor temperatures. Heater Cost analysis shows that investing in an appropriately sized heater saves energy and reduces wear over time, especially when paired with an energy-saving pool cover and a variable-speed pump.
Heater options: electric, gas, and heat pump
You’ll typically choose among electric resistance heaters, gas-fired units, or heat pumps. Electric heaters offer precise control and quiet operation but can be costly to run in very cold climates. Gas heaters heat quickly and are effective for larger pools or high-demand periods but require venting and ongoing gas supply considerations. Heat pumps are the most energy-efficient option in moderate climates and can deliver comfortable temperatures with lower operating costs, particularly when used with a pool cover. In every case, evaluate installation complexity, fuel availability, and long-term operating costs before deciding.
Permits, codes, and safety considerations
Pool heater installation often triggers local permitting and inspection requirements. Start by checking with your city or county building department to determine which permits apply to electrical, gas, or plumbing work. You’ll likely need schematics, equipment specifications, and contractor licenses. Safety considerations include correct venting for gas units, proper clearance for service access, and CO monitoring for fuel-burning heaters. The Heater Cost team recommends obtaining all required permits before ordering equipment to avoid delays and ensure compliance with safety standards.
Electrical and plumbing groundwork
Electrical and plumbing groundwork is a critical component of pool heater installation. A dedicated circuit with appropriate gauge wiring, grounded outlets, and weatherproof enclosures is required for electrical hookups. Gas-powered units demand certified gas lines, shutoff valves, and venting installed by licensed professionals. Throughout this phase, verify that all connections are leak-tested, pressure-tested, and compliant with local codes. This groundwork reduces the risk of electrical faults, gas leaks, or moisture intrusion that could compromise performance.
Site preparation and mounting
Choose a dry, accessible location with adequate clearance for service and maintenance. Ensure there is proper ventilation for gas models and protect the heater from the elements with a weatherproof enclosure if needed. Mount the unit on a stable pad, level and securely fastened, then route water and fuel lines with appropriate fittings and supports. Proper site preparation minimizes vibration, reduces corrosion risk, and simplifies future servicing.
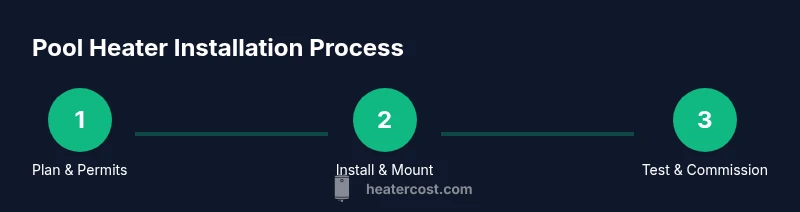
Step-by-step installation outline (high-level)
This section provides a high-level framework for the install, not a substitute for the detailed steps performed by qualified professionals. Phase 1: plan and obtain permits; Phase 2: install electrical or gas connections and mount the heater; Phase 3: connect piping, install sensors, and verify seals; Phase 4: fill, bleed air, test for leaks, and perform a safety check; Phase 5: commission the system and set temperature controls. Always follow the manufacturer’s installation manual and local codes.
Startup, testing, and maintenance plan
Start the heater and run through a full test cycle to check heat output, control responses, and safety devices. Inspect all joints for leaks and confirm venting is functioning (for gas units). Set up a maintenance schedule that includes annual inspections, filter changes (if applicable), scale removal, and thermostat calibration. Keeping a log of maintenance and performance helps identify inefficiencies early and prolongs heater life.
Tools & Materials
- Pool heater (electric, gas, or heat pump)(Choose a unit sized for your pool and climate; efficiency matters)
- Dedicated electrical circuit and disconnect(GFCI protection per code; appropriate gauge wiring)
- Gas line components (for gas heaters)(Shutoff valve, venting, and local code-compliant fittings)
- Venting components and vent cap(Required for combustion heaters; ensure proper clearance)
- Piping: PVC or copper, fittings, clamps(Leak-free connections with proper supports)
- Sealants, Teflon tape or pipe dope(Ensure watertight, gas-tight joints)
- Pipe cutters, wrenches, pliers, screwdrivers(Essential hand tools)
- Leak-test equipment (soap solution or electronic tester)(Verify water and gas connections after assembly)
- Safety gear: goggles, gloves(Protect during all installation steps)
Steps
Estimated time: 4-8 hours
- 1
Assess site and heater type
Evaluate pool size, climate, and desired temperature. Decide between electric, gas, or heat pump based on efficiency, availability, and upfront cost. This step sets the foundation for all subsequent work.
Tip: Document pool dimensions and climate data to support sizing calculations. - 2
Check permits and local codes
Research required permits and code requirements with your local authority. Gather plans and equipment specs to support your permit submission.
Tip: Submit plans early to avoid installation delays. - 3
Plan electrical or gas connections
Coordinate with licensed professionals to design wiring or gas routing. Ensure compliance with distance, clearance, and venting requirements.
Tip: Verify service panel capacity and available conduit routes before purchasing parts. - 4
Shut off power and gas supply
Lock out and tag out the installation area. Confirm that the site is de-energized before any work begins.
Tip: Double-check all energy sources to prevent accidental energization. - 5
Mount the heater and mountings
Secure the heater to a stable pad and verify Level. Ensure there is adequate clearance for service and venting.
Tip: Use vibration isolation pads if the surface is uneven. - 6
Connect water lines and fittings
Install all water piping with appropriate fittings, unions, and leak-tested joints. Include backflow prevention where required.
Tip: Bleed air from the lines before filling the pool. - 7
Install safety devices and sensors
Place temperature sensors and, for gas heaters, CO monitors. Connect shutoff valves and ensure easy access for maintenance.
Tip: Test all safety devices before system start-up. - 8
Commission, test, and adjust
Power the unit, run a full startup cycle, check for leaks, verify temperature regulation, and confirm proper venting. Calibrate controls to reach the target temperature.
Tip: Keep a record of settings and test results for future reference. - 9
Plan ongoing maintenance
Create a maintenance schedule for seasonal use, filter cleanliness, and periodic component checks. Document service visits and parts replaced.
Tip: Set reminders for annual professional inspections.
Got Questions?
Do I need a permit for pool heater installation?
Most jurisdictions require permits for electrical or gas connections and for pool equipment installations. Check with your local building department to determine the exact requirements and any inspection steps.
Most places require permits for pool heater installation and inspections, so check with your local building department.
Can I install a pool heater myself?
Electrical and gas work can be hazardous and is often restricted to licensed professionals. You can handle planning and routine maintenance, but hire licensed trades for connections and venting.
Electrical and gas work should be done by licensed pros; you can manage planning and maintenance.
What size heater do I need for my pool?
Heater size depends on pool volume, climate, and desired temperatures. A professional can calculate the required BTU rating based on these factors and usage patterns.
Size depends on your pool and climate; a pro can determine the right BTU rating.
What maintenance is required after installation?
Schedule annual inspections, clean or replace filters, check for leaks, and calibrate thermostats. Regular service helps extend heater life and maintain efficiency.
Annual checks, leaks, and thermostat calibration help maintain efficiency.
Are gas and electric heaters equally efficient?
Not always. Gas heaters heat quickly but can be less efficient over time in some climates; electric and heat pumps offer energy savings in moderate climates, especially with a cover.
Efficiency varies by model and climate; heat pumps often save energy in mild weather.
Should I compare costs before buying?
Yes. Compare upfront equipment costs, installation labor, energy costs, and potential rebates. A well-chosen system saves money over its lifespan.
Compare costs upfront and consider long-term energy savings.
Watch Video
The Essentials
- Size the heater to pool volume and climate.
- Obtain permits and hire licensed pros for electrical/gas work.
- Choose energy-efficient equipment and use a pool cover.
- Establish a routine maintenance plan for longevity.