Leaking Water Heater from Bottom: Troubleshooting Guide
Urgent guide to diagnose and fix a leaking water heater from bottom. Learn safety steps, common causes, step-by-step fixes, and prevention tips to minimize water damage, mold risk, and costly repairs.

Bottom leaks on a water heater are most often caused by a loose drain valve, a corroded seam, or a failing pressure-relief valve. For a quick check: 1) shut off power or gas to the unit, 2) close the cold-water supply, 3) inspect the drain valve and nearby fittings for moisture. If dripping persists from the tank or fittings, contact a licensed plumber immediately. According to Heater Cost, prompt action helps minimize damage.
Understanding Leaking Water Heater from Bottom
A leaking water heater from bottom is not always the same problem, but it almost always requires urgent attention. In many homes, bottom drips signal a valve issue, corrosion, or a compromised tank that could fail completely if ignored. The phrase leaking water heater from bottom conjures images of pooled water in basements or utility rooms, which can lead to mold growth and structural damage if left unaddressed. According to Heater Cost, homeowners should treat this as a high-priority safety and maintenance concern, especially in climates with freezing temperatures or high humidity. Early detection and a clear plan reduce potential damage and keep your family safe. By understanding common causes and the correct sequence of steps, you can decide whether a quick DIY fix is possible or if professional help is required. This guide blends practical checks with clear safety reminders to help you act decisively when you notice bottom leaks.
Immediate Safety and Quick Actions
Safety comes first. Before you do anything, turn off electricity at the breaker or the gas supply to the heater. If you hear hissing sounds or smell gas, evacuate and call emergency services. Once the unit is de-energized, shut off the cold-water supply to stop incoming water. Place towels or a bucket under the area to catch drips and prevent water damage. Do not attempt to thaw or heat frozen pipes around the unit, and avoid using the thermostat or other DIY adapters that could cause further issues. Heaters contain hot surfaces, moving parts, and delicate components; mishandling can cause burns or more serious leaks. The Heater Cost team emphasizes that safety and a calm, methodical approach are essential when dealing with a leaking water heater from bottom.
Common Root Causes of Bottom Leaks
Bottom leaks typically fall into a few categories. A loose or faulty drain valve lets water escape where you drain the tank. A corroded tank seam or compromised fittings near the base can also leak, especially in older models or units with mineral buildup. A malfunctioning temperature and pressure relief valve (TPR) may discharge water and appear as a bottom leak if the line runs down the side and drips externally. Finally, a loose inlet/outlet connection or a failing expansion tank can contribute to bottom leaks. Understanding these causes helps you target the right fix and avoid unnecessary repairs or premature tank replacement.
Quick Home Checks You Can Do (Non-Destructive)
Perform non-destructive checks to narrow down the source without draining the entire tank. Start by inspecting the drain valve for looseness or obvious moisture; tighten if appropriate with a valve wrench, ensuring you do not overtighten and strip the fitting. Check the cold-water supply line and fittings at the base for any signs of moisture or corrosion. Look for crusty mineral deposits around joints—these indicate slow leaks rather than a sudden break. Inspect the top and bottom of the tank for rust specks or damp spots that could signal a tank seam or structural issue. Finally, verify whether the expansion tank is properly charged and connected, as a faulty expansion device can force water toward the drain valve or base.
Diagnostic Steps You Can Perform to Narrow Down the Issue
If you’re comfortable, perform a systematic visual and tactile inspection to map moisture sources. Mark the exact spots with a pencil or tape to see if new drips appear after a period of observation. Compare the rate of dripping with the valve’s status: a slowly seeping valve may just need replacement, while a rapid, continuous flow from the tank indicates a more serious problem. Record weather and household water usage patterns; high demand can temporarily increase pressure and aggravate a leak. Use a flashlight and, if possible, a mirror to inspect seams and joints around the base. Remember, if you observe significant rust, bulging, or a wet drywall, you should call a professional service promptly.
Step-by-Step Fixes for the Most Common Causes
This section walks you through fixes that cover the most frequent bottom-leak scenarios. Start with the simplest: tightening or replacing a faulty drain valve, confirming that all connections are snug, and ensuring the plastic drain line is properly secured. If the leak persists, the drain valve may be cracked and require replacement. For corroded seams or walls of the tank, it’s generally safer to replace the unit rather than perform a risky field repair. A faulty TPR valve that discharges water should be replaced by a licensed plumber. Finally, if the expansion tank is not functioning, recharging or replacing it can resolve intermittent leaks. In all cases, insist on testing the system after any repair to confirm the leak is resolved and the unit holds pressure. The Heater Cost team notes that most long-term fix decisions hinge on the tank’s age and corrosion level.
Safety Tips, Warnings, and Common Mistakes
Always de-energize the unit before you touch electrical components or open service panels. Do not use excessive force on fittings; copper and brass threads can be damaged easily. Never work on a pressurized system without properly isolating the supply and releasing pressure safely. If you suspect a compromised tank, do not patch or seal cracks; replace the unit. Avoid copying professional advice from unreliable sources online—consult a licensed plumber for any repair that involves the tank itself. Finally, keep pets and children away from the workspace, and maintain a dry, clean area around the heater to prevent slips and electrical hazards.
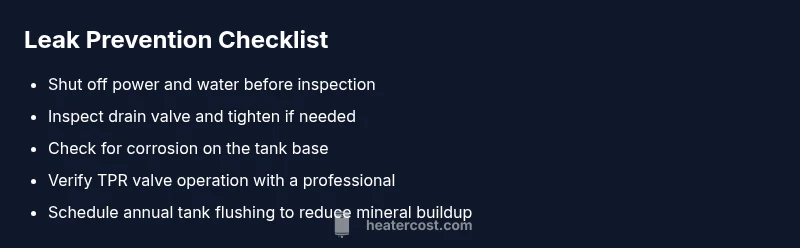
Preventing Future Bottom Leaks and Extending Life
Preventive maintenance helps avoid costly bottom leaks down the line. Schedule annual tank flushing to reduce mineral buildup that can corrode the tank and joints. Inspect valves, fittings, and the drain line annually for signs of wear or moisture; replace worn components promptly. Consider upgrading to a more robust drain valve or a higher-quality fitting if you live in an area with hard water. Maintain consistent water pressure within the manufacturer’s recommended range; excessive pressure accelerates wear and can trigger leaks at the base. Finally, replace aging units within the typical service life window and have a professional perform periodic inspections to catch early signs of corrosion or valve failure. The Heater Cost analysis shows that proactive maintenance reduces the risk of bottom leaks and prolongs heater life.
Steps
Estimated time: 45-60 minutes
- 1
Shut off power/gas and water
Power off the unit at the breaker or gas supply valve, then close the cold-water inlet to stop new water from entering the tank. This helps prevent further leakage during inspection.
Tip: Use a non-conductive tool and dry hands. - 2
Inspect the drain valve and fittings
Check for looseness or cracks in the drain valve and the drain line. If the valve is leaking, you may be able to tighten it slightly or replace the valve if needed.
Tip: Do not overtighten metal fittings; you can strip threads. - 3
Check for tank corrosion or leaks at seams
Look for rust around the bottom edge or any dampness that might indicate a seam leak. If corrosion is visible, plan for replacement rather than a patch repair.
Tip: Take photos for reference when speaking with a plumber. - 4
Test the TPR valve discharge line
If water is dripping from the discharge line, the TPR valve may be faulty or over-pressurized. Do not cap the valve; contact a professional to replace it.
Tip: TPR valve has a safety function; handle only if you know how. - 5
Call a professional if leaks persist
If the leak continues after checking valves and lines, or if you see significant rust or damage, stop DIY attempts and call a licensed plumber.
Tip: Persistent leaks may indicate a failing unit that requires replacement.
Diagnosis: Mobile water dripping from the bottom of the water heater
Possible Causes
- highLoose or faulty drain valve
- mediumCorroded tank seam or rusted fittings
- lowFaulty or leaking temperature/pressure relief valve
Fixes
- easyTighten or replace the drain valve; reseal connections if needed
- mediumInspect tank for corrosion; replace the valve or tank if necessary
- hardReplace faulty TPR valve or adjust discharge line; call a plumber
Got Questions?
Why would a water heater leak from the bottom?
Bottom leaks usually come from valve issues, tank corrosion, or a failed pressure-relief valve. Identifying the exact source requires careful inspection of valves, joints, and the tank surface.
Bottom leaks typically come from valve issues, corrosion, or a failed relief valve. Inspect valves and tank area to determine the source.
Can I fix a bottom leak myself?
Some fixes, like tightening a drain valve or replacing a faulty valve, can be DIY-safe if you follow safety guidelines. Leaks from the tank seam or large rust areas usually require a licensed professional and tank replacement.
Some valve-related fixes are DIY-safe, but tank issues require a pro.
How urgent is a bottom leak?
Bottom leaks can cause water damage, mold, and electrical hazards. Treat them as urgent and arrange for inspection or a professional service promptly.
Bottom leaks are urgent; address them quickly to prevent damage.
When should I replace the water heater?
If the tank shows extensive rust, frequent leaks, or if repairs exceed a recommended budget, replacement is often the best option. Discuss options with a licensed plumber.
Consider replacement if rust or repeated leaks occur.
What maintenance helps prevent bottom leaks?
Regular tank flushing, valve inspections, and ensuring proper pressure can dramatically reduce bottom-leak risk. Keep the unit in good repair and replace aging components as needed.
Flush the tank regularly and inspect valves to prevent leaks.
Who should I contact for a suspected leak?
If you’re unsure about the source or the leak persists after basic checks, contact a licensed plumber. They can safely diagnose and replace faulty parts or the entire unit.
Call a licensed plumber if in doubt or if the leak continues.
Watch Video
The Essentials
- Shut off power and water immediately when you notice a leak.
- Start with the drain valve and fittings; many leaks are valve-related.
- If you see rust or the tank seams show signs of wear, plan for professional evaluation.
- Regular maintenance reduces the risk of bottom leaks and extends heater life.