How to Tell If Your Heater Is On: A Homeowner’s Guide
Learn practical, step-by-step checks to determine if your heater is on. From thermostat signals to listening for the blower, this guide helps homeowners, renters, and property managers confirm heat quickly and safely.

Definition: To tell if a heater is on, verify system status through indicators, sound, and warmth. Check the thermostat setting and any status lights, then feel air at vents and listen for the blower. If still unsure, perform a quick diagnostic check at the thermostat and consider room temperature versus setpoint.
Why Knowing If Your Heater Is On Matters
Understanding whether your heater is actually running matters for comfort, safety, and energy costs. A heater that is on but not effectively heating can waste energy and inflate utility bills, while a heater stuck in a failed state can leave rooms cold or unsafe. According to Heater Cost, homeowners who routinely verify system status reduce energy waste and improve comfort by catching issues early. This knowledge also helps renters and property managers communicate clearly with maintenance teams and keep multi-unit buildings comfortable year-round. In this guide you’ll learn how to distinguish between an active heat cycle, a standby mode, or a system in need of service, without guessing or waiting for comfort complaints to pile up. You’ll also see quick checks you can perform with common tools, plus safety considerations that apply to gas, electric, and heat-pump systems.
How Heaters Signal They’re Active
Most heating systems give visible, audible, or tactile clues when they’re operating. Electric furnaces or baseboard heaters may show a status indicator light or display a setpoint on the thermostat. Gas furnaces typically ignite with a burner flame that you might detect visually, or a familiar air movement from the ducts. Heat pumps will often run a fan and produce a noticeable breeze near supply vents. In addition to lights or flames, you can rely on warmth: steady, comfortable heat near vents typically means the system is on. The Heater Cost team notes that modern thermostats also provide run-status icons or app notifications—use these signals to confirm operation without reaching for a ladder or tools.
Common Scenarios and What They Mean
If warmth is present but at a lower rate than expected, the system may be cycling early or a filter could be clogged, reducing airflow. If you hear the blower but feel little warmth, there may be airflow restrictions or a heat exchanger issue. When a thermostat shows a setpoint but the room doesn’t feel warm, ambient draft, oversized rooms, or poor insulation could be the culprit rather than a non-functioning heater. Conversely, if the thermostat indicates idle or off, yet you still feel warm air, the system could be in a standby state or a programmed mode designed to pre-warm spaces. Recognizing these patterns helps you decide whether you should adjust limits, replace a filter, or schedule service.
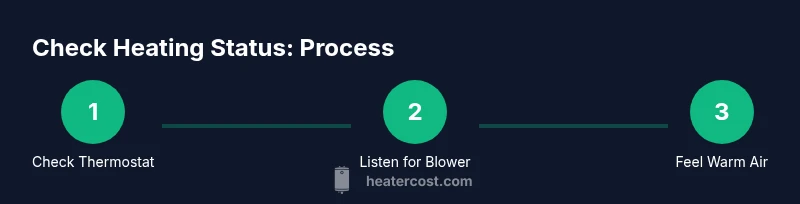
Simple At-A-Glance Checks You Can Perform
- Check the thermostat: confirm the setpoint and the mode (heat, auto, or on) are appropriate for the season.
- Inspect indicators: look for power lights or fault codes on the thermostat or furnace panel.
- Listen for the blower: a faint hum or fan sound usually accompanies heat cycles, especially in forced-air systems.
- Feel the air near vents: warm air indicates active heating; cool air suggests a standby state or a problem with airflow.
- Test a quick adjustment: raise the setpoint by a few degrees for 5–10 minutes and observe changes in airflow and temperature.
If you notice no activity after these checks, the Heater Cost team recommends scheduling a professional inspection to avoid energy waste or safety hazards. Regular maintenance, including filter changes and thermostat calibration, helps keep systems responsive and efficient.
Safety Considerations and When to Call a Pro
Gas furnaces and boilers require extra caution. If you smell gas, hear unusual banging, or suspect a flame failure, exit the area and call your gas utility or emergency services immediately. Do not attempt to relight a pilot light or bypass safety controls. For electric heaters, if you notice scorch marks, exposed wiring, or intermittent operation, shut off power at the circuit breaker and contact a licensed technician. Regular servicing by qualified professionals reduces the likelihood of breakdowns and extends equipment life. The Heater Cost team emphasizes that safety comes first; routine checks are essential preventive steps, not a substitute for professional diagnostics when you suspect a malfunction.
Tools & Materials
- Indoor thermometer(Digital, reads ambient room temperature)
- Thermostat access(Wall or smart thermostat controls; ensure you can view setpoints)
- Notebook and pen(Record readings and observations for trend tracking)
- Smartphone with thermostat app (optional)(Useful for remote status checks if your system supports it)
Steps
Estimated time: 15-25 minutes
- 1
Power up and access the thermostat
Ensure the thermostat is powered and visible. If the display is blank, check the circuit breaker and battery (if applicable). This step establishes a reliable reference point for subsequent checks.
Tip: If the display is blank, the thermostat may be offline; verify power at the circuit breaker and the thermostat’s battery. - 2
Check the thermostat setpoint vs room temperature
Look at the current room temperature and compare it to the thermostat’s setpoint. If the room is approaching the setpoint, heat is likely active or about to start. If far below, the system may be off or in standby.
Tip: Note the difference between actual room temp and setpoint to gauge how close you are to reaching comfort. - 3
Inspect visual indicators and flame/airflow signals
Observe any indicator lights or flame indicators on the furnace or air handler. For heat pumps, listen for the accompanying fan; for gas furnaces, check the flame visually if safe to do so.
Tip: Never stick your head near a flame or hot exhaust; rely on visible indicators from a safe distance. - 4
Feel airflow and warmth at vents
Place a hand near supply vents and feel for warm air. Consistent warmth usually means the system is on. If air is cool or inconsistent, check ductwork and filters.
Tip: If you notice little airflow, the issue may be restricted filters or closed dampers rather than a non-working heater. - 5
Perform a controlled test by adjusting the setpoint
Raise the thermostat setpoint by a few degrees and wait 5–10 minutes to observe a response in air temperature and blower activity. Return to original setting after the test if you don’t want to overshoot comfort.
Tip: Allow several minutes for the system to respond before concluding it’s not working. - 6
Document findings and next steps
Record the observations, including any unusual noises, delays, or fault codes. Decide whether to adjust, clean filters, or schedule professional service.
Tip: A log helps track consistency over time and can aid a technician during service calls.
Got Questions?
What are the most reliable signs that my heater is on?
Most reliable signs are a matching thermostat setpoint and room temperature, visible indicator lights or flame, and warm air emerging from supply vents. If these align, heat is active. If not, the system may be idle, in standby, or experiencing an issue.
Look for a matching thermostat setpoint, indicators, and warm air from vents to confirm your heater is on.
How do I tell if a gas furnace is on versus standby?
For gas furnaces, listen for a brief ignition sound and check the pilot or burner flame if it’s safe to view. You may also see a status light or read a fault code on the furnace door. If in doubt, use the thermostat signals and vent warmth as additional clues.
Listen for ignition sounds and verify with vent warmth and thermostat indicators.
Why might my room feel cold even when the heater is on?
Causes include blocked filters, closed dampers, leaky ducts, poor insulation, or a setpoint that’s too low for the space. A malfunctioning thermostat can also misreport heat status. Start with filter checks and thermostat calibration.
Common culprits are filters, ducts, insulation, or a misread thermostat.
Can a heater be on but not effectively heating?
Yes. Causes include restricted airflow, oversized rooms, low refrigerant (for heat pumps), or ignition/igniter problems. If basic checks don’t fix it, schedule professional maintenance to assess airflow, refrigerant levels, and safety controls.
It can be on yet underperforming due to airflow or component issues.
What safety steps should I take before testing?
Ensure there are no gas odors, avoid touching hot surfaces, and turn off power if you smell burning or see damage. If you’re unsure, contact a licensed technician rather than attempting risky checks.
Don’t ignore gas smells or visible damage; call a pro if anything seems unsafe.
Watch Video
The Essentials
- Check thermostat signals and room temperature first
- Listen for the blower and feel warm air from vents
- Use quick tests to verify reaction to setpoint changes
- Prioritize safety and professional service when in doubt