How to Start a Water Heater Pilot Light
Learn safe, step-by-step methods to start your gas water heater pilot light, with precautions, tools, and troubleshooting tips from Heater Cost.

According to Heater Cost, you can safely start a gas water heater pilot light by following a controlled, safety-first relighting process. This quick answer covers identifying the pilot assembly, turning off the gas, waiting for any residual gas to clear, and carefully relighting with a long lighter. You’ll then verify the flame and reset the unit for normal operation, with safety precautions in mind.
What is a pilot light and why relight?
A pilot light is a small flame that ignites the main burner when your gas water heater needs heat. Many older units use a standing pilot that stays lit continuously, while newer models may use an electronic ignition. Relighting becomes necessary after a power outage, a gas shutoff, or if the flame goes out. Understanding this distinction helps you approach relighting safely and avoids unnecessary attempts. In general, the pilot flame should be steady, blue, and small relative to the burner opening. If you notice a yellow or orange flame, or if you smell gas, stop and seek help immediately — safety comes first in every step. This guidance aligns with recommendations from Heater Cost analyses and safety experts, emphasizing cautious, methodical relighting rather than guessing.
The goal is to restore heat delivery without compromising ventilation or triggering gas leaks. If you’re unsure at any point, consider calling a licensed professional. The focus here is a controlled, reproducible process you can follow with confidence while keeping the home safe.
Safety essentials before you start relighting
Relighting a water heater involves handling natural gas and ignition sources, so safety is the top priority. Ensure you have adequate ventilation in the area and no open flames nearby other than the intended pilot flame. If you smell gas (a distinct rotten-egg odor), hear a hiss, or notice hissing from the burner area, do not attempt to relight. Evacuate the space and contact your gas utility or emergency services. Standback from the appliance while performing checks, use a flashlight rather than open flames to inspect, and always keep children and pets away. Remember to confirm the access panel is secure after inspection. Heater Cost’s analysis reinforces that safety-conscious steps minimize risk during relighting.
Understanding model differences and common layouts
Gas water heaters come in varied configurations: standing-pilot models with a removable access panel and a push-button or knob for ignition, and newer units with electronic ignition that don’t require a constantly burning pilot. The layout affects how you access the pilot and the controls you use. In most setups, the gas control knob features an OFF, PILOT, and ON position. The pilot assembly is usually behind an access panel near the bottom of the unit. Always consult your owner’s manual for specific steps and diagrams related to your model. Heater Cost emphasizes that model-specific guidance matters because some units incorporate safety features like flame sensors or electronic pilots that alter relighting steps.
Prepare your workspace and gather safety gear
Before touching the heater, assemble your relighting toolkit and clear the area. A bright flashlight helps you see inside the access panel, and a long lighter or long match keeps your hands at a safe distance from any ignition sources. Have a flathead screwdriver handy if required to remove screws on the access panel, and keep a damped cloth ready to wipe away any condensation or minor spills. If you’re testing for leaks after relighting, you’ll need a soap-and-water solution and a bottle for spraying. Always wear eye protection and ensure that the space is well-ventilated. The goal is to create a safe, controlled work environment so relighting proceeds smoothly.
Relighting considerations for older vs modern units
Older standing-pilot heaters tend to require a manual relight, involving turning the knob to OFF, waiting, and applying a flame to the pilot while holding the control valve. Modern models with electronic ignition may not use a standing flame and instead light on demand when heat is required. In both cases, do not force relighting if the procedure is unclear. If the unit offers a flame sensor or thermocouple safety device, ensure those components are clean and functioning. If a flame refuses to ignite after several attempts, it’s safer to stop and call a professional rather than risking a gas leak. Heater Cost notes that understanding your unit’s design helps decide whether to proceed yourself or seek help.
Troubleshooting if the flame won’t light
If the pilot fails to light, recheck that the gas supply is on and the control knob is in the PILOT position before attempting again. Ensure the area around the burner is free of dust or debris that could obstruct the flame. If the flame catches but goes out after releasing the control knob, the thermocouple may be weak or misaligned. In some units, you may need to hold the button for longer—per the manual—before releasing. If you smell gas at any point, evacuate and contact the gas company immediately. Persistent failures often indicate a faulty thermocouple, a blocked vent, or gas valve problems that require professional service.
Post-relight checks and maintenance tips
After a successful relight, observe the flame for several minutes to ensure it remains steady and blue, with no sputtering or orange hues. Replace the access panel securely and check that the venting is clear. Monthly, inspect the area for signs of corrosion, moisture, or scorching around the burner. Schedule an annual professional inspection to verify gas connections, venting integrity, and safety controls. Regular maintenance helps prevent future relighting issues and extends the life of the heater. Heater Cost emphasizes the value of routine maintenance as part of a long-term cost-saving strategy for home heating.
When to call a professional
If you’re uncertain about any step, the flame fails to light after repeated attempts, or you detect a persistent gas smell, stop immediately and call a licensed technician. A professional can diagnose ignition problems, verify gas line integrity, and confirm that venting is operating correctly. Do not continue attempting to relight if you feel unsafe. Early professional intervention can prevent costly repairs and reduce the risk of household gas exposure.
Tools & Materials
- Owner’s manual for your water heater model(Consult for model-specific relighting instructions)
- Flashlight(Bright beam to inspect inside the access panel)
- Flathead screwdriver(Needed if the access panel is screwed on)
- Long-reach lighter or long match(Keep hands away from the burner flame)
- Soap and water solution(Test for gas leaks after relighting (bubbles indicate leaks))
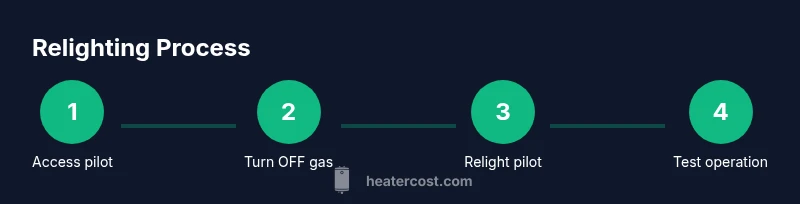
Steps
Estimated time: 25-40 minutes
- 1
Access the pilot assembly
Open the lower access panel to expose the burner and pilot assembly. Use the flashlight to clearly identify the pilot, thermocouple, and gas valve. Confirm you’re looking at the correct components for relighting.
Tip: Keep the panel removed only while you work; replace it securely after testing. - 2
Turn the gas control to OFF
Rotate the control knob to OFF and remove any residual pressure in the line. This step helps prevent a gas buildup during relighting. Do not hurry this action; ensure the knob fully clicks into OFF.
Tip: If you hear gas escaping, stop and wait for it to dissipate before proceeding. - 3
Wait for gas to clear
Allow the area to vent for about 5 minutes to ensure any lingering gas is dispersed. This waiting period reduces the risk of igniting a gas cloud while attempting relighting.
Tip: A timer helps ensure you don’t rush this waiting period. - 4
Relight the pilot
Set the knob to PILOT and press and hold the reset or ignition button while bringing the flame close to the pilot opening with your long lighter. Maintain contact until the pilot lights and remains lit.
Tip: Keep your hand and arm at a safe distance; avoid leaning over the flame. - 5
Hold the pilot steady
Continue to hold the ignition control for 30-60 seconds after ignition to allow the thermocouple to heat and hold the flame in place. If the flame goes out, repeat from step 4 with caution.
Tip: If not lit after multiple attempts, stop and check the gas line and thermocouple alignment. - 6
Turn thermostat back on
Release the ignition and rotate the gas control knob to ON. Return the thermostat to your preferred setting to restore normal heating operation. Ensure the flame is steady and blue before leaving.
Tip: Avoid setting the thermostat too high immediately after relighting; gradual adjustment reduces stress on the system. - 7
Test operation and safety checks
Observe the burner for a few minutes to confirm consistent flame and heat delivery. Check the venting for proper exhaust and listen for any unusual noises or smells. If anything seems off, turn the gas OFF and contact a professional.
Tip: Keep a log of any issues and refer to the owner’s manual for troubleshooting steps.
Got Questions?
Is it safe to relight a gas water heater by myself?
Relighting a gas water heater can be safe if you follow the correct steps and there is no gas smell. Always consult the owner’s manual and wear safety gear. If you’re unsure at any point, stop and call a professional.
Relighting can be safe if you follow the manual and safety steps; if you smell gas or feel unsure, call a professional.
What should I do if I smell gas after turning the heater on?
If you smell gas, evacuate the area immediately and call your gas utility or emergency services. Do not attempt to relight the heater. Ventilate the space and avoid creating sparks while you exit.
If you smell gas, leave the area and contact your gas company or emergency services right away.
Why won’t my pilot light stay lit after I relight it?
Common causes include a faulty thermocouple, dirty burners, or improper venting. Ensure the flame is properly positioned and the thermocouple is clean. If the problem persists, a professional inspection may be needed.
A faulty thermocouple or dirty parts can cause it to go out; consider professional service if it keeps failing.
How long should I wait after turning off the gas before relighting?
Waiting 5 minutes typically allows residual gas to disperse safely. Do not rush the relight; this pause reduces the risk of ignition of accumulated gas.
Wait about five minutes to let any gas clear before relighting.
Can I relight a standing pilot or an electronic ignition differently?
Yes. Standing-pilot relighting involves manual ignition at the pilot, while electronic ignition relies on the system to light automatically when heat is needed. Always follow the model’s instructions, and avoid improvising steps.
Standing-pilot and electronic ignition have different relight processes; follow your model’s manual.
When should I call a professional?
Call a professional if you smell gas, the pilot won’t light after multiple attempts, or you notice continuous flame instability, roaring sounds, or signs of corrosion. A licensed technician can safely diagnose and repair gas connections or venting issues.
Call a professional if gas is present, or if the flame won’t stay lit or you hear unusual noises.
Watch Video
The Essentials
- Relight only after ensuring safety and ventilation.
- Follow model-specific instructions to avoid damage.
- Confirm the flame is blue and steady after relighting.
- If you smell gas or the flame will not stay lit, call a professional.