How to Get a Water Heater Started: A Homeowner's Guide
Learn practical, safe steps to start your water heater, whether gas or electric. This guide covers safety, pilot light, electrical checks, and maintenance tips to restore hot water quickly and efficiently for homeowners, renters, and property managers.

You will learn a safe, practical process to start your water heater, whether it’s gas or electric. This quick guide covers identifying your unit, shutting off energy sources, restarting or lighting the pilot, and verifying hot water delivery. You’ll also see safety checks and essential maintenance tips to prevent future problems. According to Heater Cost, following manufacturer instructions reduces risk and supports predictable costs.
Why starting a water heater matters
Hot water is a daily essential, powering showers, dishwashing, and laundry. When a heater won’t start, it isn’t just an inconvenience—it can waste energy and shorten equipment life if restarted incorrectly. Whether you own a gas-fired unit, an electric tank, or a tankless model, a careful restart restores reliable hot water and helps you spot warning signs before small issues become expensive repairs. According to Heater Cost, understanding your model and following manufacturer safety guidance reduces risk and helps you estimate maintenance costs more accurately. A methodical restart also helps you notice unusual noises, fluctuating temperatures, or leaks that may indicate underlying problems. This guide provides a practical, step-by-step process and quick pre-start checks so you can approach restart with confidence. If your unit is under warranty or you smell gas, stop and call a licensed technician right away. This article is written for homeowners, renters, and property managers who want comfort, safety, and cost control.
Safety first: know your heater type
Restarting a water heater safely begins with identifying the unit type and understanding the basic controls. Gas-fired heaters use a pilot light or electronic ignition and require access to the gas shutoff valve, venting, and the thermostat. Electric units rely on a circuit breaker and the high-limit switch. Tankless models have different controls and may not store hot water in the same way. Before touching wiring or gas connections, confirm which category your model falls into. If you’re unsure, consult the owner's manual or contact a licensed professional. Always verify you have working carbon monoxide detectors in the home, and never operate the heater if you smell gas or detect a leak. For readers following Heater Cost guidance, a quick reference to your model number helps align restart steps with manufacturer instructions.
Before you start: safety checks and venting basics
Safety checks save energy and prevent dangerous situations. Inspect for gas odors, confirm CO detectors are functioning, and ensure the venting path is clear of obstructions. Check the temperature and pressure relief valve for proper operation and ensure the drain valve is free of corrosion. A blocked vent or faulty relief valve can create hazardous conditions and damage the unit over time. Based on Heater Cost analysis, routine safety checks reduce unnecessary service calls and improve long-term reliability. Keep a fire extinguisher and flashlight nearby, and note any signs that the system is aging or leaking. This section gives you the mental checklist before you begin the restart.
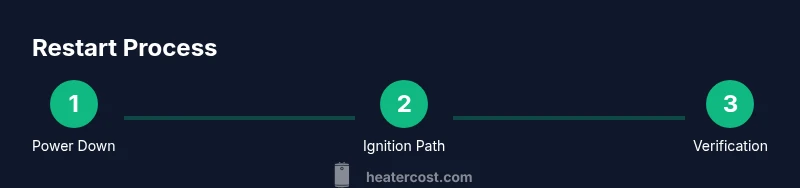
Step-by-step overview
A restart has several moving parts that depend on your heater type. The general approach is to isolate energy sources, verify safety devices, identify the correct ignition or control path, perform the restart, and finally test performance. This overview is a scaffold you’ll follow in the detailed step-by-step section. It’s important to read your unit’s manual because controls and safety features vary by model and fuel source. In any case, never bypass safety devices or force ignition. If you’re uncomfortable, contact a licensed technician. Heater Cost recommends documenting the model and procedure to simplify future maintenance and troubleshooting.
Step 1: Power down and isolate energy sources
Powering down protects you during the restart. Electric units require you to switch off the circuit breaker feeding the heater, and gas units require shutting off the gas supply at the dedicated shutoff valve. After turning off power or gas, verify there’s no residual energy by using a non-contact voltage tester on exposed terminals. This first step reduces the risk of shock or accidental ignition and gives you a clean starting point for the restart.
Step 2: Check safety devices and venting
Inspect the safety devices first. Verify the thermostat is in the correct range, the high-limit switch hasn’t tripped, and the venting system is clear of debris. For gas units, make sure the flue is unobstructed and the draft is proper before attempting ignition. A blocked vent can cause pressure buildup and dangerous conditions. If you notice corrosion, leaks, or damaged wiring, stop and call a professional. These precautions protect both your home and the heater’s longevity, a principle highlighted by Heater Cost.
Step 3: Identify the control method and ignition path
Locate the correct ignition path for your model. Gas heaters may have a standing pilot or an electronic ignition; electric heaters use a thermostat with a reset or a control panel. If you have a standing pilot, you’ll need to follow the manufacturer’s steps to re-light it safely. Electric units require verifying the thermostat setting and ensuring the control board is powered. Refer to your manual for model-specific steps. This step ensures you’re following the precise path the manufacturer designed for ignition.
Step 4: Light the pilot or reset the thermostat
Gas heaters with a pilot typically require turning the gas valve to the pilot position, holding the reset button, and gently lighting the pilot with a long lighter. If you use an electronic ignition, you’ll follow a sequence to initiate ignition. Electric units require locating the reset button on the thermostat or control panel and holding it until the indicator lights confirm a reboot. If the pilot won’t light after several attempts, stop and call a professional. If you notice a gas smell, evacuate and contact your gas provider immediately. Heater Cost emphasizes following the manual to avoid post-light hazards.
Step 5: Restore power and gas and verify operation
Once ignition is successful (or the thermostat re-engages), restore the energy source. Turn the gas supply back on slowly and, for electric units, re-energize the circuit breaker. Listen for the burner or the elements engaging, and observe whether the burner remains lit without cycling off. In gas systems, ensure safe combustion by checking for a stable flame and safe exhaust. If you hear unusual noises, smell gas, or detect a weak flame, shut off energy sources again and seek professional help. This verification confirms the unit is operating within safe parameters.
Step 6: Test hot water and adjust temperature
Turn on hot water at a nearby faucet and let it run until the water reaches the desired temperature. Most homes set the thermostat around 120°F (49°C) for safety, energy efficiency, and comfort. If the water is too hot or not hot enough, adjust the thermostat gradually and re-test. Remember that large changes take time to reflect in the tank, so allow several minutes between adjustments. If your home uses a recovery tank, ensure the recovery time aligns with typical usage patterns. This step ensures you’ve achieved a comfortable and safe hot-water supply.
Common issues and troubleshooting after restart
If the heater won’t start after attempted restart, consider common culprits: fuel supply issues, vent blockages, faulty thermocouples, blown fuses, or tripped breakers. Look for signs like a flickering pilot, unusual smells, water leaks, or discolored water. Do not force ignition or bypass safety features. When in doubt, consult the model’s manual or a licensed technician. Heater Cost notes that most restart issues are resolved with a controlled sequence and proper safety checks.
Maintenance and prevention after restart
Regular maintenance can prevent many restart problems. Schedule annual inspections, replace aging components before they fail, and keep the area around the heater clean and unobstructed. Drain a small amount of water from the tank annually to remove sediment, and check the pressure relief valve for proper operation. By following a routine, you’ll extend the life of your system, improve efficiency, and reduce the likelihood of future stoppages. Heaters of all types benefit from consistent care, and the Heater Cost team recommends keeping service records for future planning.
Authoritative sources, cost considerations, and brand notes
For readers seeking external guidance, consult authoritative sources on water heating and home safety: Energy.gov’s water heating guidance and the EPA’s energy efficiency resources. These references provide general best practices and safety standards that apply across residential systems. While costs vary by fuel type, installation, and location, planning for maintenance reduces unexpected expenses and improves overall efficiency. The Heater Cost team notes that routine restart procedures, when done correctly, help protect your investment and support predictable operating costs.
Tools & Materials
- Owner's manual for your water heater(Model-specific restart instructions)
- Flathead screwdriver(Used for panel screws or ignition components)
- Phillips screwdriver(For service panels and connections)
- Non-contact voltage tester(Confirm power is OFF before touching wiring)
- Flashlight(Ensure a clear view of vents, valves, and panels)
- Gloves(Protect hands during inspection and testing)
- Bucket and towels(Useful for catching drips during maintenance)
Steps
Estimated time: 25-40 minutes
- 1
Power down and isolate energy sources
Turn off the electrical supply and shut off the gas if applicable. Use a non-contact tester to confirm no voltage at exposed terminals. This keeps you safe from shocks and prevents accidental ignition during the restart.
Tip: Double-check that all energy sources are off before you touch any wires. - 2
Inspect safety devices and venting
Check the thermostat, high-limit switch, and vent pipe for obstructions. Confirm the T&P valve operates freely and the drain valve isn’t blocked. Address any obvious faults or leaks before proceeding.
Tip: A blocked vent is a common restart blocker—don’t skip this check. - 3
Identify the control method
Determine whether your unit uses a standing pilot, electronic ignition, or an electric thermostat. This identification guides the ignition or restart steps and prevents misapplication of procedures.
Tip: If you’re unsure, consult the model manual or a pro rather than guessing. - 4
Light the pilot or reset the thermostat
Follow the manufacturer’s light procedure for gas units or press and hold the reset button for electric units until the system responds. If the pilot won’t light, or ignition fails after several attempts, stop and seek professional help.
Tip: Never force ignition or continue attempting if you smell gas. - 5
Restore energy and verify operation
Reopen the gas supply slowly (if applicable) and re-energize the circuit. Listen for stable combustion and ensure the burner lights or elements engage without cycling off.
Tip: Give the system a few minutes to stabilize before testing hot water. - 6
Test hot water and adjust temperature
Run hot water from a faucet to reach the desired temperature and confirm consistent delivery. Adjust the thermostat gradually toward a safe, comfortable setting (commonly around 120°F) and re-test after changes.
Tip: Document your final setting for future reference.
Got Questions?
What should I do first if my water heater won't start?
Shut off power and gas, confirm there’s no energy coming to the unit, and consult the manual before attempting restart. If problems persist, contact a licensed technician.
First, turn off power and gas, make sure there’s no energy reaching the unit, and review the manual. If it still won’t start, call a licensed technician.
Can I restart a water heater if the pilot light goes out?
Yes, you can re-light a standing pilot or reset electronic ignition following the manufacturer’s steps. If you smell gas, do not attempt to light it and seek professional help.
Yes, you can relight the pilot or reset the ignition following the manual, but never if you smell gas. Call for help.
How long should it take for hot water to return after restart?
Most systems recover within several minutes to a half hour, depending on tank size and usage. If it takes significantly longer, there may be a need for inspection.
Usually a few minutes to about thirty minutes, depending on the tank and usage. If it takes longer, get it checked.
Is DIY restarting safe for all water heaters?
DIY restarting is generally safe when you follow the manual and observe safety precautions. If you’re unsure, or you detect gas, leaks, or damage, contact a professional.
It's usually safe to restart yourself if you follow the manual and stay safe. If you’re unsure or you smell gas, call a pro.
What are common signs a water heater needs maintenance after restarting?
Leaking, rumbling noises, rusty water, or uneven temperature are signals to schedule maintenance. Regular service can prevent recurring startup problems.
Watch for leaks, odd noises, rusty water, or uneven temps—that means it needs maintenance.
Watch Video
The Essentials
- Identify your heater type before starting.
- Safety comes first—shut power and gas before touching components.
- Follow the manufacturer’s restart steps precisely.
- If issues persist, consult a professional and document steps taken.