How to Start a Heater Pilot: A Safe Lighting Guide
Learn how to safely start a heater pilot with a step-by-step approach, essential safety checks, and maintenance tips from Heater Cost. A practical guide for homeowners, renters, and managers.

This guide shows you how to safely start a heater pilot. You’ll locate the gas control panel, verify the area is ventilated, and follow a sequence to light the pilot flame. Use the proper long-reach lighter or igniter, and never skip safety checks. If the pilot won’t light, test the thermocouple and pressure regulator before calling a pro.
Why starting a heater pilot matters
Starting the heater pilot correctly is essential for safe operation, energy efficiency, and reliable heating. A properly lit pilot ensures the main burner ignites consistently and reduces the risk of gas buildup or delayed heat. For many older gas furnaces and boilers, the pilot light is the gateway to safe, controllable heat. If you’re learning how to start a heater pilot, this guide covers the steps, emphasizes ventilation, and explains how lighting quality affects monthly energy costs. According to Heater Cost, pilot reliability is a key driver of overall heater efficiency and long-term maintenance costs. By following manufacturer guidance and safety checks, homeowners can light the pilot with confidence and minimize the risk of gas leaks or flameouts.
Understanding your heater's gas control system
Most gas heaters use a gas valve, a thermocouple, a pilot tube, and an igniter. The pilot light is the ignition source for the main burner; if the pilot flame is weak or goes out, the main burner may fail to start or cycle incorrectly. The igniter should spark reliably, and the thermocouple must stay hot to keep the valve open. Knowing these components helps you diagnose why a pilot light won’t stay lit and highlights why a gentle, methodical lighting sequence is essential for safety and efficiency.
Safety prerequisites before you begin
Always ensure good ventilation and verify there are no gas odors in the area. Keep children and pets away during lighting. Install or check a working carbon monoxide detector on every floor where a heater is used, and have a shutoff valve accessible. If you smell rotten eggs or gas is escaping, evacuate the area and call emergency services. Read your heater’s manual for model-specific safety notes, and never bypass safety devices or attempts to light a heater in a poorly ventilated space.
Tools and materials you’ll need
Before you start, gather essential items to light a pilot safely:
- Long-reach lighter or extended match stick
- Safety glasses to protect your eyes during inspection
- Flashlight for a clear view of the burner area
- Screwdriver (Phillips or flathead) to access the pilot panel when required
- The heater’s owner’s manual or model guide for reference
Having these on hand reduces delays and helps you follow the steps precisely, as recommended by Heater Cost analyses.
Step-by-step overview of the lighting sequence
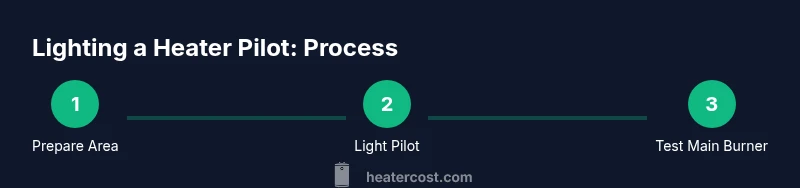
The lighting sequence generally follows a controlled approach: you prepare the area, access the pilot assembly, set the control to Pilot, press and hold the knob while lighting, verify the flame, and then switch the control to ON. Each model can have subtle differences, so always follow manufacturer directions printed on the unit. The sequence emphasizes a steady, deliberate lighting action and a safe inspection afterward to confirm a steady, blue flame.
Troubleshooting common pilot lighting problems
If the pilot won’t stay lit, common culprits include a dirty thermocouple, a weak gas supply, or a draft that blows out the flame. Ensure the area is clear of drafts and recheck the thermocouple connection. If you smell gas or cannot light after multiple attempts, shut off supplies and consult a pro—gas work carries real safety risks. Yellow or flickering flames indicate incomplete ignition or inadequate gas pressure and require service.
After lighting: confirming safe operation
Once the pilot is lit, observe the flame color and stability for a full minute. A healthy pilot should produce a steady blue flame with a small, consistent glow around the emitter. If the flame goes out, wait a few minutes, repeat the lighting sequence, and recheck the safety devices. Confirm there’s no gas odor and test the thermostat or remote for responsive control. CO detectors should indicate normal readings before reoccupying the space.
Maintenance tips to keep the pilot reliable
Schedule regular burner and pilot cleaning according to the manual. Dust and debris can impede ignition, so perform gentle cleaning with a soft brush or cloth. Inspect or replace the thermocouple if the pilot light cycles off randomly. Keep the surrounding area free of clutter and ensure the venting pathway remains unobstructed. Routine checks help you prevent unexpected outages and maintain efficiency.
When to call a professional and safety reminders
If lighting the pilot still proves difficult after several attempts, or you notice a persistent gas smell, CO alarm alerts, or corrosion around fittings, contact a licensed technician. Gas work requires specialized tools and safety knowledge. The Heater Cost team recommends timely professional service for anything beyond simple relighting, especially if your unit is older or under warranty.
Tools & Materials
- Long-reach lighter or long matches(Keeps hands away from flame; prefer a tool with a long handle)
- Safety glasses(Eye protection while inspecting the burner area)
- Screwdriver (Phillips or flathead)(To access the pilot panel as per manual)
- Flashlight(Bright, angleable light to view burner and pilot tube)
- Owner’s manual or model guide(Model-specific steps, safety notes, and torque specs)
Steps
Estimated time: Estimated total time: 15-25 minutes
- 1
Prepare the area and read the manual
Clear combustibles, ensure ventilation, and review your heater’s start sequence in the manual. Confirm the space is free of gasoline or solvents and that CO detectors are functioning. This prep reduces risk and helps you follow model-specific steps accurately.
Tip: Keep a clear path to the shutoff valve and avoid loose clothing near the burner. - 2
Shut off power and gas as applicable
If your unit has an electrical control, switch off power at the breaker or use the switch on the furnace. For gas safety, ensure the valve is closed or in the OFF position before you begin the lighting sequence.
Tip: Only proceed when you’re certain there is no active gas flow before attempting ignition. - 3
Access the pilot assembly
Remove the access panel with the appropriate screwdriver to reveal the pilot valve, thermocouple, and igniter. Do not touch hot surfaces; wait for components to cool if the system has been recently in operation.
Tip: Use a flashlight to clearly see the pilot tube and thermocouple connections. - 4
Set the knob to Pilot
Rotate the gas control knob to the Pilot position. This sends gas to the pilot line while keeping the main burner off. Hold the knob in place during ignition.
Tip: If the knob feels stiff, do not force it; consult the manual to avoid damage. - 5
Press and hold while lighting
Press and hold the knob and simultaneously light the pilot with a long lighter. Maintain pressure for 30-60 seconds or as specified by the manual to heat the thermocouple.
Tip: Avoid shorter holds which can fail to heat the thermocouple properly. - 6
Release and observe the pilot
After the flame lights, keep the knob pressed for the recommended time, then slowly release. Check for a steady, blue flame and no yellow flicker.
Tip: If the flame goes out, wait a few minutes and repeat only once; persistent outages require service. - 7
Turn to ON and test
Move the knob from Pilot to ON. If the main burner ignites, observe smooth operation and proper flame height. If not, you may have a gas or ignition issue.
Tip: If the main burner won’t ignite, stop and consult the troubleshooting section or a pro. - 8
Light the main burner (if required)
If your system requires a separate step to light the main burner, use the ignition source while ensuring the pilot flame is stable. Avoid over-pressurizing the gas line.
Tip: Never adjust gas pressure yourself; call a licensed technician if you suspect supply issues. - 9
Verify safe operation
Monitor flame stability for a few minutes and verify there’s no gas odor. Ensure CO detectors show normal readings and confirm the thermostat responds to calls for heat.
Tip: Document the date of lighting and any irregularities for maintenance records. - 10
Close up and finalize
Reinstall the access panel, restore power, and keep tools out of reach of children. Store the manual for future reference and maintenance reminders.
Tip: Leave a small note inside the panel with the last service date.
Got Questions?
Is it safe to light a pilot light myself?
Yes, you can light a pilot yourself if you follow the manual, maintain ventilation, and never ignore gas odors. If you’re unsure or uncomfortable, contact a licensed technician.
Yes, you can light a pilot yourself if you follow the manual and stay safe. If unsure, call a professional.
How long should I hold the knob after lighting?
Typically 30-60 seconds, depending on the model. Refer to the manual for the exact duration to heat the thermocouple.
Usually 30 to 60 seconds, check your model’s manual.
What causes a pilot light to go out?
Common causes include a dirty thermocouple, drafts, or insufficient gas pressure. Clean or reseat components per the manual, and if it persists, seek service.
A dirty thermocouple, draft, or gas issues can blow it out. Clean and reseat as instructed, or call a pro.
Can I relight if it keeps going out?
Repeated relighting can indicate a safety issue or improper gas supply. If it continues, stop and call a professional to inspect.
If it keeps going out, stop and get professional help.
Do I need a CO detector near my heater?
Yes. Install and maintain a certified CO detector near the heater and on other occupied levels as recommended by local codes.
Yes—have a CO detector near the heater and test it regularly.
Watch Video
The Essentials
- Prepare and ventilate before lighting any pilot.
- Hold the knob for 30-60 seconds to heat the thermocouple.
- If ignition fails, stop and seek professional help when in doubt.
- Regular maintenance improves reliability and efficiency.
- Always verify CO safety devices after lighting.