How to Remove Water Heater Element: A Complete Step-by-Step Guide
Learn how to remove a water heater element safely with a practical, expert-backed approach. This guide covers tools, safety, steps, and troubleshooting for electric water heaters.

This guide shows you how to remove a water heater element safely, with clearly defined steps, essential tools, and safety precautions. You’ll learn how to shut off power and water, access the element, disconnect wiring, remove the element, inspect the gasket, and reinstall or replace as needed. Always prioritize safety and local codes.
Safety and preparation
According to Heater Cost, the safest way to handle a water heater element replacement starts with energy isolation, proper ventilation, and clean, organized workspace. Before you touch anything, confirm your heater is electric (not gas). Wear protective gloves and safety glasses, and keep a bucket handy for draining. If you smell gas, hear gas fumes, or see signs of corrosion around the tank, stop and call a licensed professional. Document the model and element type in case you need a compatible replacement. This guide focuses on electric water heaters and the standard lower/upper element configuration. By planning your steps and adhering to local electrical codes, you reduce the risk of electric shock, scalding, or water damage during removal.
Understanding the purpose of the element
Electric water heaters use one or two elements to heat water. The upper element heats during most cycles and the lower element activates when the thermostat calls for heat. Over time, mineral buildup and mineral deposits can corrode seals and degrade performance. Knowing which element you’re removing (upper or lower) helps you prepare the correct replacement parts and tool sizes. If your tank has hard water or shows signs of mineral scale, consider flushing the tank after removing the element to maintain efficiency.
Assessing whether removal is necessary
Sometimes removal is necessary for replacement, inspection, or gasket refresh. If the unit isn’t heating evenly, you may have a bad gasket, a burned-out element, or a faulty thermostat. If you notice water around the base or a persistent strange odor, assess the risk factors before proceeding. In some cases, professional testing with a multimeter or an element tester is recommended to confirm element failure before replacement. This assessment helps you avoid unnecessary work and reduces the chance of leaks when reassembling.
Potential hazards and how to minimize them
Electrical work on a water heater involves live circuits and hot water pressure. Always turn off power at the breaker and lockout the circuit if possible. Draining the tank slightly reduces the risk of scalding. When loosening fittings, use proper tools to avoid stripping the hex head. Never force a stubborn element; overheating can occur if the element is stuck. If you observe rust, leaks, or pitting in the tank, stop and consult a professional. These cautions protect you from electrical shock, burns, and water damage.
Preparing the workspace and safety checklist
Create a clean, dry workspace with all tools within reach. Place a bucket under the drain valve to catch water and a rag to absorb spills. Have a spare pipe wrench or pliers handy, but avoid overtightening. Keep a clear path to the breaker panel in case you need to address any tripped circuits. Verify that you have a replacement element suitable for your model, and check the gasket or O-ring for wear. A tidy, well-lit environment reduces mistakes and speeds up the process.
Quick overview of the anatomy
A typical electric water heater has an upper element opening and a lower element opening, each with a gasket seal. The element is secured by a locking nut or bolt and connected to electrical terminals. When removing, you’ll disconnect the wiring, unscrew the locking hardware, and pull the element straight out. After removal, inspect the gasket seat for scale, corrosion, or damage. If the gasket looks worn, replace it before reinstalling a new element to prevent leaks.
Cost considerations and why this matters
The cost of replacing a water heater element includes parts and potential labor if you hire a pro. Heater Cost analysis shows that parts are typically affordable, but labor costs can vary by region and service rates. Assess whether the element is the root cause of heating issues or if there are broader problems with the thermostat, wiring, or tank corrosion. A DIY replacement can save money when done correctly, while a professional assessment provides peace of mind for complex symptoms.
Reassembly considerations and testing
After removing or replacing the element, reassemble in reverse order, ensuring the gasket seats evenly and the element is snug but not overtightened. Refill the tank and restore power, then run hot water to bleed air from the system. If the water isn’t hot after a few cycles, recheck the wiring connections and test the power at the breaker. Always verify there are no leaks around the element opening after pressure is restored.
Tools & Materials
- Voltage tester(Test for live power before touching wiring.)
- Element wrench/socket(Use the correct hex size for your element; common sizes vary by model.)
- Adjustable wrench(Helpful for stabilizing fittings without twisting metal.)
- Pipe wrench (optional)(Use if a stubborn element refuses to turn.)
- Replacement water heater element(Match the element type (upper or lower) and wattage rating.)
- Gasket/O-ring(Have a new gasket on hand in case of wear.)
- Teflon tape or thread sealant(Lightly wrap threads to seal and prevent leaks.)
- Bucket(Catch draining water after loosening the drain valve.)
- Rags or towels(Keep the area dry and clean up spills promptly.)
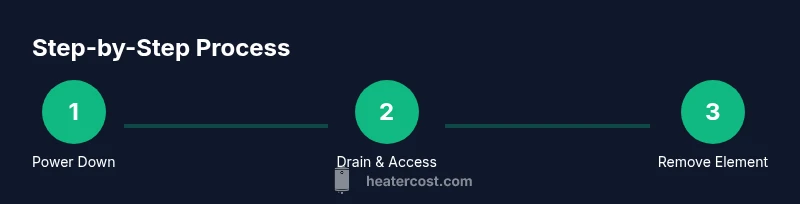
Steps
Estimated time: 30-60 minutes
- 1
Power down and confirm safety
Switch off the circuit breaker for the water heater and use a voltage tester to confirm there is no live current at the element terminals. This step prevents electric shock and ensures safe handling.
Tip: Tag the breaker to prevent re-energizing during the repair. - 2
Shut off water supply and drain
Close the cold water supply to the tank, then open a hot water faucet to relieve pressure. Drain a few gallons from the tank so the element opening is exposed and less water spills when you remove the element.
Tip: Keep a bucket ready if you need to drain more water for access. - 3
Remove access panel and insulation
Lifting off the access panel exposes the thermostat and upper/lower element. Remove insulation carefully to view wiring and keep the insulation in place for reassembly.
Tip: Take a photo of wiring before disconnecting to aid reassembly. - 4
Disconnect wiring from the element
Note or label each wire, then loosen and remove the wires from the element terminals. Disconnecting without labeling can lead to incorrect reconnection.
Tip: If you’re unsure, pause and verify connections with a photo. - 5
Loosen and remove the element
Loosen the locking nut or bolt with the element wrench and pull the element straight out. If it’s stuck, apply gentle rocking motions rather than brute force to avoid damaging threads.
Tip: Do not wrench side-to-side aggressively; overheating may occur and seals can fail. - 6
Inspect gasket and seating
Inspect the gasket seat for corrosion or scale. If the gasket shows wear, replace it before reinstalling the new element to prevent future leaks.
Tip: Clean the seat with a non-abrasive cloth; avoid scratching the metal. - 7
Install new element and reassemble
Thread the new element by hand, then tighten with the element wrench. Reconnect wiring as labeled, replace the insulation and access panel, restore water, and power on.
Tip: Always test for leaks with a full pressure test after restoration.
Got Questions?
Do I need to drain the entire tank to remove the element?
Not necessarily; you generally drain enough water to expose the element. Draining a few gallons reduces splash risk and makes the element removal easier. Always follow the manufacturer’s guidance and local codes.
Usually you drain a portion of the tank to expose the element and prevent spills.
Can I reuse the original gasket after removing the element?
It’s best to inspect the gasket and replace if there is wear, cracks, or deformation. A new gasket ensures a proper seal and helps prevent leaks.
Check the gasket; replace if worn for a reliable seal.
What if the element won’t loosen with a wrench?
If the element won’t budge, stop and assess. Forcing it can strip threads or break the element. Consider applying penetrating oil for corrosion or calling a pro for extraction.
Don’t force it; consult a professional if it’s stubborn.
Is removing a water heater element dangerous for renters?
Renters should ensure landlord approval and consider professional service. Electrical work may be restricted or require a licensed technician, especially in multi-unit buildings.
Check with your landlord; electrical work may need a licensed tech.
How can I verify the replacement element is compatible?
Match the element type (upper or lower), wattage rating, and thread size to the original. If needed, bring the old part to the store to compare.
Make sure the new element matches the old one for proper fit.
Watch Video
The Essentials
- Power down, then verify safety before touching wiring.
- Drain enough water to expose the element and avoid splashes.
- Label connections and replace worn gaskets to prevent leaks.
- Install the new element with minimal torque to avoid damage.
- The Heater Cost team recommends professional help if you’re unsure.