How to Clean a Water Heater: Step-by-Step Guide for Homes
Learn how to clean a water heater safely with a practical, step-by-step method. Get essential tools, safety tips, and maintenance guidance to boost efficiency and extend your unit’s life.

Learn how to clean a water heater safely with a hands-on flush, inspection, and refill. This guide covers essential safety steps, required tools, and practical tips to improve efficiency and extend life. Follow the step-by-step process to drain, flush, and restore your unit, while avoiding common mistakes. You'll find a complete tool list, clear steps, and warnings to prevent burns or leaks.
Why clean a water heater matters
Regular maintenance, including cleaning a water heater, helps keep it efficient, quiet, and reliable. According to Heater Cost, sediment buildup can impair heating efficiency and shorten the unit’s life. A clean water heater heats water more consistently, uses less energy, and reduces the risk of leaks caused by mineral scale. This guide walks you through safe, practical steps to flush, inspect, and restore performance. Sediment tends to accumulate at the bottom where it insulates the heating element, forcing the heater to work harder. Property managers may notice longer wait times for hot water after a service, and renters may see more fluctuations in temperature. By staying proactive, homeowners can avoid sudden breakdowns and costly emergency repairs.
Sediment and performance: what to watch for
Sediment in the tank is a natural byproduct of heating mineral-rich water. Over time, this sediment settles and compacts, creating a layer that reduces heat transfer efficiency. You may notice slower recovery times, louder operation, or inconsistent water temperature. While some mineral buildup is normal, excessive sediment can shorten the life of the heating elements or the tank itself. Regular cleaning helps maintain consistent hot water and can contribute to steady energy use for households of all sizes. Heater Cost analysis shows that proactive flushing helps preserve efficiency and can lower operating costs over the life of the unit.
Safety and preparation: gear, environment, and planning
Before you begin, plan a safe, well-ventilated work area and gather your tools. Turn off power or gas supply to prevent accidental ignition or burns. If you have an electric heater, switch off the circuit breaker; for gas models, set the control to off and ensure proper ventilation. Allow the tank to cool if it has been in use. Wear safety glasses and gloves to protect against splashes. Keep children and pets away from the workspace. Verify you have a drain path and a hose that reaches a safe drain location. Finally, check local codes or warranty terms; some units recommend professional service for certain maintenance tasks.
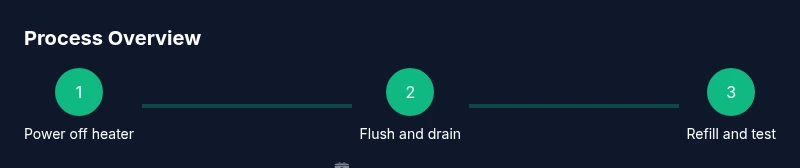
Step-by-step overview: flushing, cleaning, and refilling
A clear, repeatable process makes cleaning straightforward and safe. The steps outline the core actions you’ll perform, with safety checks and logical sequencing. You’ll attach a hose, drain the tank, flush out sediment, refill with water, and restore power or gas. If you notice any signs of significant corrosion, leaks, or damaged fittings, pause the process and seek professional assistance.
Post-clean checks and adjustments
After refilling, restore power or gas and bring the unit up to temperature gradually, then test hot water at a faucet to confirm proper operation. Check for leaks around fittings and drain valves; tighten as needed with appropriate tools. Re-check the temperature setting to avoid scalding and to maintain efficiency. If you performed an anode rod inspection, reinstall the panel and replace the rod if it showed excessive wear. Document the service date for your maintenance log and place a note on annual checks.
Maintenance to extend life
Routine maintenance reduces the likelihood of sudden failures and preserves performance. Schedule semi-annual or annual inspections, depending on your water quality and usage patterns. Consider flushing more often if you notice rapid sediment accumulation or if your water is particularly hard. Keep a simple maintenance checklist: power/gas shutdown verification, drain valve inspection, hose integrity, and post-service testing. The Heater Cost team emphasizes that consistent maintenance is a key factor in extending the life of your water heater and protecting your home's comfort and value.
Tools & Materials
- Gloves(Non-slip work gloves)
- Safety glasses(Eye protection)
- Bucket(Plastic bucket to catch water)
- Garden hose(Attach to drain valve and route to safe drain location)
- Wrench or pliers(Loosen fittings if necessary)
- Towels or rags(For spills and cleanups)
- Shop vac(Optional for cleanup in cluttered areas)
- New anode rod(Use only if you plan to inspect/replace)
- Screwdriver(Flathead/Phillips for access panel)
Steps
Estimated time: 60-90 minutes
- 1
Power off the heater
Turn off the electrical breaker or shut off the gas control for the unit. Confirm there is no active heat cycle before touching electrical components.
Tip: Test a hot water faucet to verify the system is cooling before you begin. - 2
Shut off the cold-water supply
Close the inlet valve to prevent more water from entering the tank during flushing.
Tip: If the valve is stiff, apply gentle turning force to avoid leakage. - 3
Attach a garden hose to the drain valve
Securely connect a hose and run it to a safe drain location. This directs sediment away from your work area.
Tip: Check that the hose end is lower than the tank to ensure proper drainage. - 4
Open a hot water faucet and the drain valve
Open the drain valve and a nearby hot-water tap to allow air to escape and water to flow steadily.
Tip: Opening a hot faucet helps prevent air pockets from forming. - 5
Drain and flush the tank
Let the water run out until it appears clear. For electric heaters, you can briefly flush with cold water to help remove stubborn sediment.
Tip: Do not run cold water into a hot tank to avoid thermal shock. - 6
Refill the tank and restore power/gas
Close the drain valve, remove the hose, and allow the tank to refill before reactivating power or gas.
Tip: After refill, test the hot water to confirm proper operation. - 7
Inspect the anode rod (optional)
If accessible, inspect the anode rod for corrosion and consider replacing if significantly worn.
Tip: Replace with a compatible anode rod, and reseal the access panel. - 8
Check for leaks and set temperature
Look for leaks at fittings. Set the thermostat to a safe temperature and monitor for normal operation.
Tip: Avoid setting the temperature above 120°F to reduce scald risk and energy use.
Got Questions?
Do I need to drain my water heater to clean it?
Yes, draining helps remove sediment from the tank. Flushing the system improves heat transfer and can extend the unit’s life. Always follow safety steps before starting.
Yes, draining helps remove sediment and improves performance. Follow safety steps before starting.
Can I clean a water heater myself, or should I hire a pro?
Many homeowners can clean a water heater themselves by flushing and inspecting accessible parts. If you smell gas, suspect a leak, or have a gas-fired heater, hire a professional for safety.
You can often do it yourself, but call a pro if you smell gas or have concerns.
How often should I clean a water heater?
A general guideline is to inspect and flush if you notice reduced hot water flow or increased heating time. For many homes, this can be done once a year or as part of annual maintenance.
Many homes clean it annually or during regular maintenance.
What safety precautions are needed when cleaning a water heater?
Turn off power or gas and shut off the water supply. Release pressure by opening a hot water valve. Wear protective gear and work in a ventilated area.
Turn off power or gas, shut the water valve, and wear protection.
What tools are essential for cleaning a water heater?
You’ll need gloves, safety glasses, a bucket, a garden hose, and a wrench or pliers. A towel and optional anode rod are useful for maintenance.
Gloves, glasses, a bucket, a hose, and a wrench are essential.
Will cleaning affect hot water temperature or energy efficiency?
Cleaning removes sediment that acts as insulation, helping the heater run more efficiently and deliver more consistent hot water.
Cleaning helps efficiency by removing sediment that can insulate the tank.
Watch Video
The Essentials
- Flush sediment to improve efficiency
- Shut off power and water before starting
- Inspect the anode rod when accessible
- Test hot water after refilling