How to Relight a Gas Water Heater Safely: Step-by-Step
Learn how to safely relight a gas water heater with a clear, step-by-step guide. This homeowner-focused tutorial covers safety checks, lighting technique, flame verification, and post-light maintenance for reliable hot water.

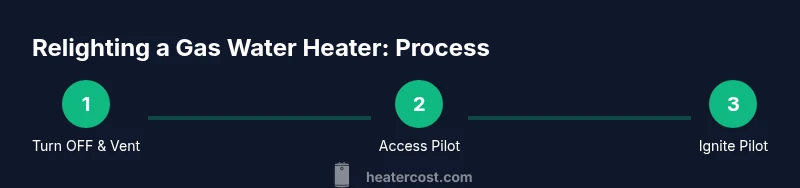
According to Heater Cost, relighting a gas water heater is a safety‑driven, step‑by‑step task to restore hot water. Before you start, ensure there’s no gas smell and the area is well ventilated. The Heater Cost team found that following the proper lighting procedure reduces the risk of gas leaks and ensures a reliable pilot flame.
Safety First: Before You Relight
Relighting a gas water heater requires careful attention to safety to prevent gas buildup or accidental ignition. Start by ensuring you can smell no gas in the area and that the room is well ventilated. If you ever detect a strong odor like rotten eggs, leave the space immediately and call your gas utility or a licensed technician. Keep children and pets away during the process. This guidance aligns with general safety practices recommended by home‑maintenance professionals and is echoed in Heater Cost analyses for safer home heating repairs.
Next, confirm the unit’s accessibility. Clear surrounding clutter, and have a flashlight and a working smoke/CO alarm nearby. If your water heater is in a confined space (like a utility closet) with little airflow, you’ll want to enhance ventilation before proceeding. This reduces the risk of gas accumulation and improves combustion efficiency once relighting begins.
Finally, review the manufacturer’s label on the heater itself. It provides model‑specific instructions, gas control settings, and warnings. Following the label reduces the chance of overheating, flameouts, or improper gas flow, which can lead to dangerous conditions.
In all cases, never attempt to light the burner if you’re unsure about the gas system’s status or ventilation. If in doubt, pause and call a qualified professional.
How a Gas Water Heater Pilot System Works
A traditional gas water heater uses a standing pilot light to ignite the main burner when the thermostat calls for hot water. When the pilot flame goes out, the gas valve closes to prevent gas from flowing, and you must reignite the flame by manually lighting the pilot. The thermocouple or thermopile acts as a safety sensor that signals the gas valve to stay open only when a flame is detected. If the pilot won’t stay lit, the problem might involve the thermocouple, dirty jets, or insufficient gas pressure. Understanding this system helps you identify which steps are most relevant during relighting and what safety checks should accompany the process.
From Heater Cost’s perspective, knowing the basics of the pilot system helps homeowners avoid unnecessary repairs and safely complete relighting without triggering alarms or gas leaks. If you notice persistent instability in the flame height or unusual burner noises after relighting, it’s a sign to stop and seek professional help.
In most cases, relighting involves locating the control valve, setting it to Pilot, holding a lit match or lighter near the pilot, and then releasing the control once the flame stays lit. If your heater uses an electronic ignition, the relighting steps will differ slightly, and you should consult the label for the exact procedure.
When to Relight vs. Replace
Not every burner issue warrants relighting. If the pilot repeatedly goes out, or you smell gas after attempting to light, stop immediately. Reoccurring outages may indicate a faulty thermocouple, a cracked valve, or significant corrosion that a professional must inspect. If your unit is older, frequent relighting attempts might be less cost‑effective than replacement. Heater Cost analyses emphasize that proactive maintenance can extend the life of a gas heater, but repeated failures often signal a bigger problem.
If your water heater is leaky or the flue is blocked, relighting becomes unsafe and should be left to a licensed technician. A blocked vent can cause carbon monoxide to accumulate indoors, which is a serious health hazard. In such cases, evacuate and contact emergency services if you suspect CO exposure.
Tools and Environment You’ll Need
Before you begin, gather the right tools to avoid delays. A long‑neck lighter or a long match is essential for reaching the pilot, while a flashlight helps you see the control area clearly. You may also need a screwdriver to remove the access panel, a dry rag to wipe away any residue, and protective gloves to avoid contact with hot components. Ensure you have a functioning smoke detector and a CO detector in the space and nearby. These tools help you complete the relighting process safely and efficiently.
Having a non‑gas‑detecting handheld detector can confirm a safe area before you illuminate the pilot. Keep a small amount of soapy water on hand to check for gas leaks around connections after relighting. If you see bubbles, there’s a leak that needs professional attention.
Step 1: Prepare the Gas Valve and Thermostat
Turn the thermostat on the hot water heater to the Off position and wait five minutes to clear any residual gas. This waiting period is crucial to avoid ignition of accumulated gas when you restart the flame. After the wait, locate the gas valve near the heater, and set it to Off if it isn’t already, to ensure all gas flow is stopped before you begin the relighting process. This initial safety step minimizes the risk of flare‑ups when you re‑ignite the pilot.
As you prepare, check that the access panel is removable without forcing it. If the panel is stiff, use a screwdriver to loosen screws gently and avoid bending the metal housing. A steady, unobstructed surface helps prevent accidental contact with hot components while you work.
Step 2: Access the Pilot Assembly
Remove the access panel to expose the pilot assembly. Keep track of screws and gaskets to avoid losing parts during reassembly. The pilot assembly typically includes a thermocouple, the gas control knob, and the pilot tube. Visually inspect for obvious signs of damage, corrosion, or dirt in the area. Clean any dust or debris with a dry cloth, but avoid dislodging delicate parts.
If you notice soot or heavy grime on the burner or thermocouple, this may indicate poor combustion efficiency. A proper cleaning can improve ignition reliability, but take care not to damage the delicate thermocouple tip. If the thermocouple is bent or corroded, plan for replacement rather than a DIY fix, as faulty sensors can lead to continued flameouts.
From a safety standpoint, never spray cleaners into the pilot or burner area. Residues can ignite and create dangerous fumes. Always allow any cleaning residue to dry completely before continuing.
Step 3: Ignite the Pilot
Turn the gas control knob to Pilot. Press and hold the knob down to allow gas flow to the pilot while you light it with a long‑handled lighter. Continue to hold the knob down for about 60 seconds after the pilot flame appears to heat the thermocouple. Release slowly and observe whether the pilot remains lit. If the flame goes out, repeat the steps, ensuring you maintain a steady hold on the knob during ignition.
If you are using an electronic pilot lighter, follow the specific control sequence described on the label. Some models require you to press and hold a button while pressing a separate ignition switch. Always follow the manufacturer’s instructions exactly, as the procedure varies across brands and models. If the flame does not ignite after several attempts, stop and check for gas pressure or valve issues.
Step 4: Verify the Pilot and Reassemble
Once the pilot remains lit, keep the flame steady for about a minute to ensure the thermocouple has warmed and the safety valve will stay open. Remove any residual gas by letting the area clear for a short period before you release the gas control. If you see a stable, blue flame with no yellow tips, that’s a good indicator of proper combustion. Reinstall the access panel and screws, ensuring the gasket seats evenly to prevent leaks.
Reconnect the thermostat and turn the control to the desired hot water setting. Allow the system to run and emit hot water. If the hot water output is inconsistent, give the system a few more minutes to stabilize before diagnosing further. A properly lit pilot should burn cleanly and not produce smoke or a strong odor.
Step 5: Test the System and Ensure Safe Operation
Test the hot water at a faucet or shower after the system has run for a few minutes. Check for any unusual noises, odors, or gas smells. If the water temperature fluctuates or you notice gas odor, shut down the heater and call a licensed professional. It’s a good practice to monitor the unit for the first 24 hours to confirm stable operation and avoid repeated relighting.
If your model has a CO alarm, ensure it remains within normal levels during operation. If the alarm sounds, evacuate and contact emergency services. Regular maintenance, such as annual inspections and periodic cleaning of the burner and vent, can minimize the risk of relighting issues and extend the heater’s life.
In summary, a properly relit gas water heater provides reliable hot water without compromising safety. The steps above align with general best practices and Heater Cost guidance for safe home heating repairs.
Step 6: Post‑Relight Maintenance and Next Steps
After relighting, perform a quick routine maintenance check. Inspect the flue vent for any obstructions, and verify that the gas line connections are dry and free from leaks (you can use a soapy water solution to check for bubbles). Review the heater’s venting path to ensure it is clear of debris, which can affect combustion efficiency.
Schedule regular inspections by a licensed technician, especially if you notice frequent flameouts, decreased hot water, or rising gas smells. Consistent professional checks reduce the likelihood of dangerous gas leaks and ensure safe operation over the heater’s lifespan. Remember, proactive maintenance can save energy and extend the life of your system. The Heater Cost team recommends annual checks for peace of mind.
Tools & Materials
- Non‑contact gas detector(To sniff for leaks without flames before re‑ignition)
- Flashlight(Bright, handheld for clear visibility in the panel area)
- Screwdriver set(Flat-head and Phillips for panel screws)
- Long‑reach lighter or LED lighter(Keeps hands away from flame; used to ignite the pilot)
- Gloves(Protect hands from sharp edges and heat)
- Soapy water (for leaks)(Dip connections to check for bubbles after relight)
Steps
Estimated time: 30-45 minutes
- 1
Turn the thermostat to OFF and evacuate the area
Set the water heater thermostat to OFF and wait for five minutes. This helps clear any residual gas and reduces the risk of ignition from trapped fumes. If you detect a strong gas odor, evacuate immediately and contact the gas utility or emergency services.
Tip: Take a minute to verify the area is well-ventilated before proceeding. - 2
Access the pilot area
Remove the outer access panel to reach the pilot assembly. Keep track of screws and ensure the area is well lit. Inspect for obvious damage or soot around the burner—this can indicate improper combustion.
Tip: Use your flashlight to clearly inspect the ignition area before proceeding. - 3
Turn gas valve to Pilot and prepare lighting
Rotate the gas knob to Pilot and press down to allow gas flow while you prepare to ignite. Keep the knob pressed for the full ignition period as specified by your model’s label (usually 20–60 seconds).
Tip: If you smell gas at this stage, stop and ventilate—do not ignite. - 4
Light the pilot
While holding the knob, ignite with a long lighter aimed at the pilot hole. Keep holding for about 60 seconds after the flame appears to heat the thermocouple. Release slowly and observe the pilot flame.
Tip: A steady blue flame with no orange tips indicates proper ignition. - 5
Test the flame and reassemble
If the pilot stays lit, reattach the access panel and restore the burner area. Turn the thermostat to a normal setting and let the system run to verify hot water production.
Tip: Watch for flame stability for several minutes after ignition. - 6
Final safety check and cleanup
Check for gas leaks with soapy water on connections. Ensure there is no odor or pilot flame flicker. Store tools and wipe away any residues before leaving the area.
Tip: Keep a CO detector active in the space for ongoing safety.
Got Questions?
Is it safe to relight a gas water heater on my own?
Relighting can be safe if you follow the manufacturer’s instructions, check for gas leaks, and ensure proper ventilation. If you smell gas or feel uncertain, contact a licensed professional.
You can relight if you follow the manual and safety steps, but if you smell gas, don’t proceed—call your gas provider.
What should I do if the pilot won’t stay lit?
If the pilot goes out repeatedly, power off and check for issues with the thermocouple, dirty jets, or gas pressure. If the flame refuses to stay lit after multiple attempts, stop and call a professional.
If the flame won’t stay lit after several tries, it’s best to call a pro rather than forcing it.
How long should I wait after turning off gas before relighting?
Waiting 5 minutes is typically recommended to clear residual gas. If you smell gas, do not light and ventilate the area.
Wait a few minutes to let any gas disperse before trying to relight.
Can a pilot light cause carbon monoxide buildup?
A faulty vent or blocked flue can cause CO accumulation. Ensure proper venting and use CO alarms for safety.
Carbon monoxide is a serious risk with vent problems—make sure the vent is clear and CO detectors are working.
Should I relight after a long outage or gas interruption?
If the gas service was interrupted, wait for the utility to confirm gas is safe, then follow relighting steps exactly as described in the manual.
Only relight after your gas provider confirms it’s safe to do so.
What maintenance should I perform after relighting?
Inspect for leaks, test burners, clean the area, and consider scheduling annual professional checks to maintain efficiency and safety.
Do a quick leak check and plan an annual professional inspection.
Watch Video
The Essentials
- Relight safely with proper ventilation and gas-off checks
- Identify the pilot system components to understand the process
- Follow specific model instructions to ignition and flame verification
- Schedule professional checks for persistent lighting problems