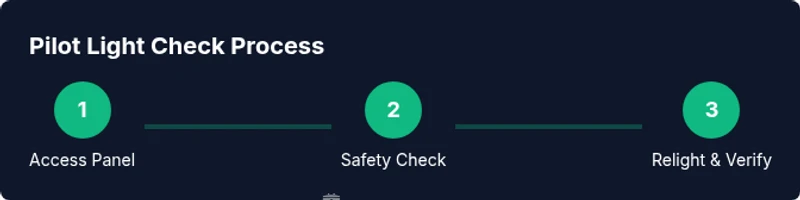
How to Check Your Heater Pilot Light
Learn how to safely check and relight your heater pilot light. This comprehensive guide covers safety, tools, step-by-step relighting, common issues, maintenance, and when to call a professional. Perfect for homeowners and renters seeking practical, expert-priced guidance.

By the end of this guide, you will know how to safely check your heater’s pilot light, identify common outages, and perform basic relighting or reset steps. You’ll understand critical safety precautions, which tools to gather, and how to decide when DIY maintenance is appropriate versus when to call a professional.
Understanding the Pilot Light and Why It Matters
The pilot light is a small flame that reliably ignites gas to heat your home. In older systems, a constant pilot flame burns, while newer furnaces use intermittent pilots or electronic ignitions essential for consistent heat delivery. A steady blue flame with a small yellow tip generally indicates proper operation, while a weak or extinguished flame signals a problem. The flame height should be modest—about 1/2 to 1 inch tall for most residential units. If you detect a sour or burning odor, or if the flame is invisible in a dark area, stop and ventilate the space, then investigate further or call a professional. According to Heater Cost, regular pilot light checks help prevent an unexpected cold snap and ensure your system runs efficiently, which can save energy costs over time.
In many homes, the pilot light also serves as a safety device. A properly functioning pilot helps ensure the gas valve will shut off if an abnormal flame is detected, reducing the risk of gas buildup. If your unit uses electronic ignition, the same checks apply to the ignition system, albeit with different relighting procedures. Familiarize yourself with your furnace model’s access panel location and your user manual so you can identify the pilot port, thermocouple, and gas valve before you begin any inspection.
This section sets the stage for safe handling, but never bypass safety steps. If you smell gas or hear hissing near the furnace, evacuate and call your gas supplier or emergency services immediately. Heaters that rely on gas must be treated with caution, and maintenance should align with local codes and equipment manufacturer recommendations. Heater Cost analysis shows that routine, careful checks can extend the life of your heater while reducing expensive emergency repairs.
Safety First: Before You Check the Pilot Light
Safety is non-negotiable when working with gas appliances. Start only if you can clearly access the furnace area without kneeling on wet or uneven surfaces. Never operate electrical switches near a gas leak and avoid creating sparks in the vicinity. Ensure pets and children are away from the work area. If you’re uncertain about the flame or gas smell, pause and contact a licensed technician.
Before touching anything, shut off the gas supply to the furnace and switch off the furnace’s electrical power at the disconnect switch or breaker. Ventilate the space by opening a window or door to prevent gas buildup. If you must re-enter the area, wear eye protection and gloves to guard against sharp edges inside access panels. After the area is clear, you can proceed with inspection and relighting steps. These precautions minimize risk and are a core part of maintenance best practices recommended by Heater Cost.
Tools, Supplies, and Prep (What to Gather)
Before starting, assemble the basics in a well-lit area: flashlight, clear access to the furnace, and the appropriate ignition method for your unit (match or long-reach lighter, or built-in igniter). You’ll also want a non-slip work surface, a clean rag for any minor cleanup, and a cup of water in case you need to dampen a small spill. If you’re working with older equipment, a basic screwdriver set can help gently remove access panels. Have a helper nearby in case you need an extra hand. Keep a record of the unit’s model number and any recent maintenance so you can share details with a technician if needed. Proper preparation reduces delays and safety risks during the process.
Note: only perform checks on equipment that you are authorized to service. If your unit is under warranty, consult the manual or an authorized technician before attempting DIY maintenance. As Heater Cost notes, following the manufacturer’s guidelines is key to maintaining efficiency and safety.
Diagnosing Common Causes and Quick Checks
If the flame is weak, flickering, or extinguished, there are several common, non-invasive checks you can perform. Ensure the gas valve is fully open and that the venting is clear of debris. Inspect the thermocouple or flame sensor for signs of corrosion or buildup; a dirty sensor can prevent the flame from staying lit. A clogged pilot orifice may also hinder ignition, especially after a long period of inactivity. Do not attempt aggressive cleaning with metal tools; use a soft brush or compressed air to remove dust.
During inspection, verify that the thermocouple is properly positioned in the flame. A misaligned sensor can fail safety tests and shut off the gas supply. Check for any recent changes to the furnace location, weather-related debris, or HVAC renovations that might affect ignition. If you notice corrosion, damaged wiring, or cracked components, it’s wise to involve a professional to prevent further damage or gas leaks. These checks help homeowners identify simple fixes before needing a service call, saving time and money in many cases.
Finally, confirm that you are testing the correct burner and pilot assembly. Some furnaces might have multiple ignition points, and mixing up components can lead to false readings. Keep your model’s diagram handy for reference, and when in doubt, consult a professional. According to Heater Cost, accurate diagnosis reduces the number of unnecessary service visits and helps you prioritize repairs that matter most for efficiency.
Maintenance, Preventive Care, and When to Call a Pro
Regular maintenance goes a long way toward consistent heating and safety. Schedule seasonal checks to verify the pilot lighting system, thermocouples, and gas connections. Clean or replace dirty flame sensors as recommended by the manufacturer and inspect the venting for obstructions. If you notice any signs of wear or corrosion, address them promptly. Small preventive steps can prevent larger failures during peak heating season and extend the life of your furnace.
If relighting the pilot fails repeatedly, or if the flame won’t stay lit after holding the control knob, suspect a faulty thermocouple, dirty burner, or a gas supply issue. In such cases, contact a licensed technician. For homeowners, the cost of a professional diagnostic often pays for itself by avoiding incorrect DIY fixes and ensuring safe operation. Heater Cost emphasizes that routine maintenance is a smart investment in home comfort and energy efficiency.
Tools & Materials
- Safety glasses or goggles(Protect eyes from debris and sparks during access panel removal.)
- Work gloves(Keep hands safe from sharp edges inside the furnace cabinet.)
- Flashlight with fresh batteries(Illuminates hard-to-see burner and pilot components.)
- Long-reach lighter or matches(For piloting if your unit uses a standing pilot (use only if your model requires it).)
- Screwdriver set(Optional for accessing panels on some models.)
Steps
Estimated time: 15-30 minutes
- 1
Locate the furnace access panel
Turn off power to the furnace at the switch or breaker. Open the access panel to reveal the burner, pilot port, and the thermocouple. Use a flashlight to clearly view components without forcing any parts. Why: correct access prevents accidental damage and ensures you’re working on the right area. [image reference: pilot-access-diagram]
Tip: Have a helper hold the panel while you remove screws to avoid dropping it. - 2
Turn off gas supply and power
If your system has a manual shut-off valve, close it to ensure no gas pressure is flowing while you inspect. Then switch off the furnace power to avoid sparks. Why: safety first—gas leaks or electrical sparks can be dangerous near ignition components.
Tip: Label the valve position so you can reopen it correctly later. - 3
Wait for gas to clear
Allow at least five minutes for any residual gas to dissipate before attempting to relight. This reduces the risk of a dangerous flare-up. Why: lingering gas can ignite unexpectedly and cause an explosion in extreme cases.
Tip: If you smell gas at any point, evacuate and call your gas provider immediately. - 4
Identify the correct pilot and sensor
Locate the standing pilot or electronic ignition port. Identify the thermocouple or flame sensor and ensure it’s positioned in the flame. Why: a misaligned or dirty sensor can prevent ignition from staying lit.
Tip: Do not bend or force connectors; if you’re unsure, skip ahead to the professional option. - 5
Relight using the proper method
If your unit uses a standing pilot, follow the manufacturer’s relighting procedure with a long lighter or built-in igniter. If your model uses electronic ignition, you may need a remote relight sequence rather than a manual flame. Why: different furnaces require different relighting methods.
Tip: Do not rush the relight—steady, controlled ignition yields the best result. - 6
Hold the control until the flame stabilizes
Keep the pilot or burner on for 30-60 seconds after ignition to allow the thermocouple to heat and confirm the flame is stable. If it goes out, turn off gas and wait a full five minutes before retrying. Why: this ensures the safety valve remains open if everything is functioning correctly.
Tip: If the flame dims or goes out, recheck sensor alignment and venting before trying again. - 7
Observe flame quality and reassemble
A stable blue flame indicates proper operation. Reinstall the access panel, restore power, and gradually reopen the gas valve. Test by running the thermostat or system cycle to confirm heat delivery. Why: confirming after reassembly prevents premature shutdowns and ensures system readiness.
Tip: Record the date and any observations for future maintenance. - 8
Know when to call a professional
If the flame remains out, you detect persistent gas odor, or the flame is yellow/orange, consult a licensed technician. These signs suggest a faulty thermocouple, clogged pilot, or gas supply issue. Why: professional service ensures safety and code compliance.
Tip: Keep emergency contact information handy and schedule a diagnostic promptly.
Got Questions?
Can I relight a heater pilot light myself?
Yes, if your unit uses a standing pilot and you can safely follow the manufacturer’s relighting procedure. If you’re unsure, stop and call a professional. Always prioritize safety if you smell gas or see signs of a leak.
Yes, you can relight if your furnace uses a standing pilot and you follow the manual. If in doubt, contact a pro.
What should I do if the pilot light won’t stay lit?
Common causes include a dirty flame sensor, a misaligned thermocouple, or a weak gas supply. Clean the sensor carefully, recheck alignment, and allow enough time for the thermocouple to heat. If issues persist, have a technician diagnose the gas line and valve.
If the flame won’t stay lit, check the sensor and thermocouple, then consider a professional diagnostic.
Is it safe to use the heater while inspecting the pilot light?
Only if the system is powered down, and all safety steps are followed. Do not operate the unit while you are inspecting or relighting the pilot if you are not confident in the procedure.
No—don’t run the heater during inspection unless you’re following the exact safety steps.
Why is my pilot light flame yellow or flickering?
A healthy flame is blue with a small yellow tip. A yellow flame can indicate incomplete combustion, dirty burner, or insufficient gas. If it persists, call a professional for a combustion check.
A blue flame is normal; a yellow or flickering flame usually means a service check is needed.
How often should I check my pilot light?
As part of seasonal maintenance, inspect the pilot light before each heating season and after any major HVAC work. Regular checks help prevent outages during peak winter.
Do a quick seasonal check before winter and after major HVAC work.
What safety signs indicate I should call a pro immediately?
Gas smell, hissing sounds, soot around burners, or the unit appearing warm to the touch are all red flags. If you notice any of these, leave the area and contact emergency services or your gas provider.
If you smell gas or hear hissing, leave and call your gas company right away.
Watch Video
The Essentials
- Check flame color and stability for safety and efficiency
- Follow model-specific relighting procedures and safety steps
- Shut off gas and power before inspection to avoid hazards
- If ignition fails repeatedly or you detect gas odors, call a professional
- Regular maintenance improves energy efficiency and reduces unexpected outages