How to Light a Gas Hot Water Heater
Learn a safe, practical method to light a gas hot water heater, covering standing-pilot and electronic ignition models, essential safety checks, and maintenance tips from Heater Cost.

By following these steps, you will safely light a gas hot water heater and restore hot water. This guide covers standing-pilot and electronic ignition models, plus essential safety checks and what to do if the pilot won’t stay lit. Before you start, gather the needed tools, locate the gas shutoff, and confirm proper ventilation.
Understanding Safety Basics
According to Heater Cost, lighting a gas hot water heater carries inherent risks if safety steps are skipped. Gas leaks, improper ignition, or a blocked vent can cause fire or dangerous carbon monoxide buildup. Before you touch any controls, ensure there is adequate ventilation, there are no strong gas odors, and a working carbon monoxide detector is present in the area. If you smell gas, evacuate immediately and call your gas utility or emergency services. Take this seriously: even a tiny gas leak is a safety risk. Once you're sure the area is safe, you can proceed with the lighting process. This guide covers both standing-pilot and electronic-ignition models and explains the differences in ignition components like the thermocouple and igniter. You’ll also learn how to recognize warning signs that the system requires professional attention, such as persistent sulfurous smells, yellow flames, or soot around the vent.
Safety Basics: Key Concepts
- Do not attempt to light a heater if you suspect a gas leak. Leave the area and call the utility.
- Ensure proper ventilation: open a window or vent and avoid enclosed spaces.
- Verify that a working CO detector is present in the space and test it regularly.
- If the system or venting shows signs of damage, contact a licensed technician rather than proceeding.
- Always follow the manufacturer’s instructions for your specific model. This guidance aligns with best practices summarized by Heater Cost Analysis, 2026.
Prep Work: Tools, Ventilation, and Gas Safety
Before you begin, review the user manual for your model to confirm ignition type and any model-specific steps. Gather the essential tools and check the surroundings: clear any flammable materials, ensure the area is well-lit, and confirm you can access the gas shutoff valve. If you are lighting in a cold space, consider warming the area slightly to avoid moisture condensing on metal parts that can affect ignition. This stage is where most lighting failures originate—failure to have sufficient ventilation or to remove obstructions can block ignition. For homeowners, a quick safety recap: ensure the area is ventilated, the CO detector is functioning, and you can reach the shutoff valve quickly if needed.
Understanding Ignition Types and What to Expect
Gas water heaters come in two common ignition systems: standing-pilot and electronic ignition. Standing-pilot heaters have a small flame that burns continuously and requires occasional relighting if it goes out. Electronic ignition units light when you call for hot water, using a built-in igniter and thermocouple. The thermocouple acts as a safety sensor that detects heat from the pilot flame; if the flame goes out, the gas supply is automatically shut off. Knowing your system type helps you follow the correct steps and avoid unnecessary attempts that could waste gas or damage components. For most homes, the choice comes down to age and efficiency: older homes tend to have standing pilots, while newer units use electronic ignition with higher efficiency.
Lighting Scenarios: High-Level Overview for Different Models
If your unit uses a standing pilot, you typically light the heater by turning the control to PILOT, lighting the pilot with a long match or lighter, and then holding the knob to ensure the thermocouple heats and the flame stays lit. For electronic ignition models, you may simply press a button or turn the knob to IGNITE or ON and wait for the built-in igniter to start the flame. In either case, the flame should be steady and blue, with no yellow tipping or soot. If the flame fails to light or quickly goes out, stop and re-check the venting and gas supply; there may be an obstruction or a safety interlock that requires service. If you notice a persistent glow around the burner or a smell of gas after attempting ignition, shut off the gas and seek professional help.
Authority and Maintenance Considerations
Routine maintenance and safety checks are essential for reliable operation. After lighting, monitor hot water output and listen for normal burner sounds. If the heater does not produce hot water within a reasonable time or if you hear unusual noises, do not continue to run the unit; this can indicate a larger issue such as a dirty burner or vent obstruction. In addition, periodic professional inspections can identify wear on the thermocouple, gasket seals, and vent connections before a fault occurs. For further reading and safety guidance, see authoritative sources linked in the Authority Sources section of this guide.
Tools & Materials
- Gas shutoff valve key or adjustable wrench(Used to close the gas supply at the heater line if you suspect a gas leak or need to reset the valve.)
- Long-reach lighter or long match(Useful for standing-pilot models; electronic ignitions may not require this.)
- Flashlight (LED)(Provides clear visibility in tight or dim spaces around the heater.)
- Screwdriver set (flathead/Phillips)(Optional: needed to remove access panels on some models.)
- Non-slip gloves(Adds grip and protection when handling hot metal edges.)
- Carbon monoxide detector (working)(Ensure one is present in the area and test it before starting.)
Steps
Estimated time: 15-25 minutes
- 1
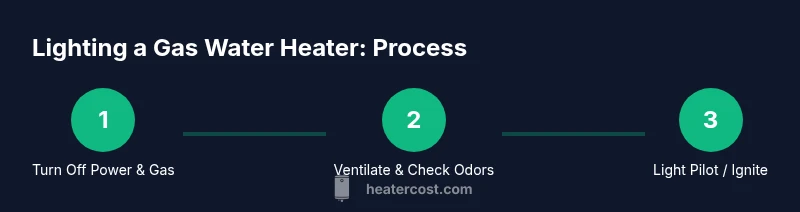
Turn Off Power and Set Gas to OFF
For safety, switch off electrical power to the water heater at the wall switch or the dedicated circuit breaker. Then locate the gas shutoff valve on the supply line to the heater and rotate it to OFF. This prevents any accidental ignition while you inspect or perform the lighting procedure.
Tip: If you cannot locate the valve, consult the owner's manual or contact a licensed technician. - 2
Confirm Area Is Ventilated and Free of Gas Odors
Open a window or vent to ensure good airflow. Check for gas odors around the unit; if you detect gas, evacuate the space immediately and call your gas utility. Never proceed if you suspect a leak. Ventilation is critical to avoid gas buildup during lighting.
Tip: Use a flashlight to inspect labels and the valve orientation so you know you’re adjusting the correct controls. - 3
Access the Pilot Assembly or Ignition Port
Remove the access panel to expose the burner area, pilot line, and thermocouple. Keep fingers away from hot surfaces. If your unit has an igniter, locate the IGNITE or PILOT control and review the label for correct settings.
Tip: Do not force panels loose; if screws resist, stop and seek professional help to avoid damaging components. - 4
Set the Gas Control to PILOT or ON
For standing-pilot units, rotate the control knob to PILOT. For electronic ignition units, set to IGNITE or ON as directed by the label. If you had to wait due to prior venting or odor checks, resume the process once the area is clear and the gas supply is ON at the shutoff valve.
Tip: Confirm you’re using the correct setting for your model to prevent lighting failure or gas leakage. - 5
Light the Pilot or Activate the Igniter
If using a standing-pilot, firmly press and hold the control knob while lighting the pilot flame from a safe distance with a long lighter. If your unit uses an electronic igniter, press the IGNITE/ON button and watch for a blue flame. Hold the knob for 20-60 seconds to ensure the thermocouple heats and the flame remains steady.
Tip: Keep hands away from the opening and metal edges; never lean directly over the flame during ignition. - 6
Return Controls to Normal and Verify Operation
Release the control knob slowly and set the gas control to NORMAL/ON. Observe a steady blue flame at the burner and listen for the burner sound. Restore power to the unit and run hot water to confirm heat. If the flame goes out or you still have no hot water after 30 minutes, shut off gas and contact a professional.
Tip: If you’re unsure about the flame quality or heat delivery, stop and call a licensed technician for safety.
Got Questions?
What should I do first if I smell gas?
Leave the area immediately and call your gas provider or emergency services. Do not operate switches or ignite anything.
If you smell gas, evacuate and call for help right away, then wait for professionals.
Can I light a gas hot water heater with an electronic ignition without matches?
Yes. Most newer units use an electronic igniter; follow the manual to press IGNITE or ON and wait for the flame.
Most modern heaters light with the built-in igniter—use the ON or IGNITE setting.
How long should I wait after turning gas off before relighting?
Wait about 5 minutes to dissipate residual gas; if you still smell gas, do not attempt to light and call a pro.
Wait five minutes before retrying, and if you still smell gas, call for help.
Is it safe to relight the heater after replacing parts like the thermocouple?
Relighting after part replacement should be done following the manual; if unsure, contact a professional.
If you recently replaced parts, check the manual or call a pro.
What maintenance should I perform after lighting?
Run hot water to test heat, inspect venting for obstructions, and verify CO detector functionality.
Run hot water and check safety devices to ensure proper operation.
Watch Video
The Essentials
- Check safety gear and venting before lighting
- Identify ignition type (pilot vs electronic)
- If flame goes out, turn off gas and wait 5 minutes before retrying
- Keep CO detectors active and vents clear
- Follow the manual for maintenance and safety