How to Get a Home Heater Working: Step-by-Step Guide
A practical, safe guide for homeowners to diagnose and fix a non-working home heater. Learn power, thermostat, fuel, and maintenance checks to restore heat efficiently—plus safety tips and when to call a pro.

This guide helps homeowners diagnose and restore a non-working heater with practical, safe steps. It covers power and fuse checks, thermostat settings, fuel supply for gas or oil systems, burner components, airflow, and routine maintenance to prevent future outages. The guide also highlights safety first and when to call a professional.
Understanding Your Heater and What Could Be Wrong
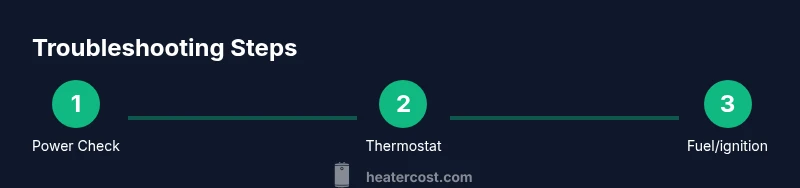
If you’re trying to figure out how to get heater to work in house, start by understanding the common failure points. Most residential failures come from power issues, thermostat misconfigurations, or fuel and burner problems. This section explains how to identify the likely culprits and how a systematic approach can save you time and money. Remember, safety first: if you smell gas, hear gas hissing, or see scorch marks, exit the area and call emergency services. According to Heater Cost, many outages trace back to simple, fixable causes when inspected carefully.
Key distinctions between electric, gas, and oil systems matter because each type has unique safety considerations and reset procedures. Electric furnaces and heat pumps rely on electrical components and controls; gas furnaces depend on the gas supply, venting, and the ignition system; oil furnaces hinge on fuel line, burner maintenance, and venting. By recognizing your system type, you can focus checks where they matter most.
In this guide, you will learn safe, incremental steps to diagnose and restore operation, with a clear path to professional help if the issue lies beyond routine maintenance. The goal is not to replace your system but to restore reliable heat while protecting household safety and efficiency. This is a practical, homeowners-first approach to getting your heater working again.
According to Heater Cost analysis, a structured, step-by-step approach reduces repair time and helps you prioritize fixes that deliver the most value for your heating dollar.
Basic Power and Fuel Checks
The first layer of troubleshooting is to verify that the system has power and, for gas or oil furnaces, that fuel supply is uninterrupted. Start by checking the main electrical panel for a tripped breaker or a blown fuse related to the furnace or air handler. If the breaker has tripped, reset it and test the thermostat and furnace operation. Replace any blown fuses with the same amperage—do not upsize fuses to protect wiring.
Next, inspect the furnace switch (often located near the furnace or on the wall) to ensure it is in the ON position. For gas or oil systems, confirm that the gas valve is fully open and that the oil supply line is free of kinks or air locks. If your home uses a dedicated thermostat circuit, verify that the thermostat is receiving power and that the display is lit. A dead thermostat can prevent the furnace from starting even when power is available.
If you find anything unusual—such as a tripped breaker that immediately trips again after reset, a gas smell, or a loud hum from the furnace—do not attempt risky repairs. Instead, contact a licensed professional. Heater Cost analysis suggests that most calls fall into a few repeatable categories: power issues, thermostat faults, or fuel-supply problems that trigger safety interlocks.
Inspect Thermostat, Controls, and Settings
A surprising number of no-heat calls come from incorrect thermostat settings or outdated batteries. Start by turning the thermostat to a heating setpoint above the current room temperature. If the thermostat is programmable, confirm it is set to the desired schedule and mode (heat, not cool or auto). For battery-powered thermostats, replace the batteries with fresh ones and reprogram any time-based schedules.
Check the thermostat wiring if you’re comfortable with electrical work: loose or frayed wires can prevent the furnace from receiving a signal to start. If you have a smart thermostat, ensure it is connected to Wi‑Fi and that its app shows the system as active. A simple reset—power cycling the thermostat and furnace—can fix many communication glitches between the two devices.
If a miscalibrated thermostat is the root cause, you may need to adjust or replace it. In the long term, consider a maintenance check for the thermostat location (drafts, sun exposure, or obstruction) that could cause erroneous readings. As you verify controls, keep a simple log of readings and outcomes to help a professional diagnose stubborn issues later.
Inspect the Heating System Components (Gas, Electric, or Oil)
Gas furnaces rely on a sequence: gas supply, ignition, and flame sensor. Electric furnaces rely on elements and relays; oil models depend on burner nozzles and pumps. If the system attempts to start but then stops, inspect the ignition system for signs of wear or dirt. For gas systems, a dirty thermocouple or dirty flame sensor can prevent ignition. For oil systems, clogged nozzles or air in the line can hinder operation.
If you can safely access the burners, look for signs of sooting, corrosion, or disconnected wires. Do not attempt to disassemble safety devices or bypass controls. Any persistent ignition failure should be handled by a licensed technician, as modern furnaces integrate safety interlocks that protect your home from dangerous situations.
A basic visual check can reveal obvious issues: loose wiring, burnt connectors, or a missing blower wheel cover. During this stage, note model numbers and any fault codes displayed on the control board to share with a technician. Heater Cost emphasizes documenting symptoms and timestamps to assist efficient diagnosis.
Airflow, Venting, and Filter Maintenance
Restricted airflow dramatically reduces furnace efficiency and can trigger safety shutoffs. Check that air filters are clean and seated properly; replace or clean filters every 1–3 months depending on usage and filter type. Inspect supply and return air ducts for obstructions such as furniture, toys, or dust buildup that could impede airflow. A clogged filter can make the blower work harder and cause overheating or short cycling.
Ventilation is essential for gas and oil furnaces. Ensure flues and vent pipes are clear and unobstructed. If you hear whistling, banging, or rumbling from vents, it may indicate vent obstruction or improper venting configurations. While some vent issues can be addressed, persistent problems should be evaluated by a professional to prevent carbon monoxide risk.
Maintaining proper airflow improves performance, reduces energy use, and extends equipment life. Create a simple routine—check filters monthly, inspect vents quarterly, and schedule professional maintenance annually to catch issues before they cause outages.
Safety Considerations and When to Call a Pro
Working with heating equipment involves potential hazards, including electrical shock, gas leaks, and carbon monoxide risks. If you smell gas, hear hissing, or notice dense furnace exhaust, evacuate immediately and call emergency services. Do not operate the furnace again until it has been inspected by a licensed technician.
If you perform the checks above and the system still won’t operate, or if you encounter error codes you don’t understand, contact a professional. A qualified technician can diagnose complex interlocks, control board faults, or unsafe venting conditions that require specialized tools and training. Do not attempt to bypass safety devices or perform unapproved repairs.
Scheduling a professional inspection can be an affordable preventative measure to protect your home and family. Heater Cost recommends documenting symptoms, dates, and any preliminary steps you took so the technician can diagnose more quickly and accurately.
Preventive Maintenance and Pro Tips
Prevention beats reactive repairs when it comes to heating systems. Create a simple annual maintenance plan that includes filter changes, lubrication of moving parts if specified by the manufacturer, burner tweaks, and a safety check for carbon monoxide detectors. Keep a maintenance log with dates and observations to track the system’s health and anticipate upcoming service.
Pro tips to sustain performance:
- Replace filters before peak heating season begins.
- Schedule professional tune-ups at least once a year, especially for gas and oil furnaces.
- Test carbon monoxide detectors regularly and replace batteries twice a year.
- Keep the furnace area clear of clutter and avoid storing items around the unit.
- Consider an inexpensive smart thermostat for better schedule management and diagnostics.
By following these practices, you’ll reduce the likelihood of future outages and improve long-term efficiency. For homeowners, a proactive upkeep plan saves money and enhances comfort during the cold months.
Quick Start Recap and Next Steps
Use the quick-start checklist below as a reminder of the essential steps to get heat back on fast. If any step reveals a hazard or the system remains non-operational after checks, contact a licensed professional.
Checklist:
- [ ] Check main power and furnace switch
- [ ] Verify thermostat power and settings
- [ ] Inspect fuel supply and ignition (if applicable)
- [ ] Inspect filters and airflow paths
- [ ] Look for obvious wiring or burner issues
- [ ] Review any fault codes with a tech
This practical approach helps homeowners regain warmth quickly while staying within safety boundaries. By combining careful checks with periodic maintenance, you improve reliability and comfort year-round.
What to Expect During a Professional Visit
If you decide to involve a pro, be prepared with details about the symptom timeline, any fault codes, and the steps you already took. A technician will typically verify power, inspect fuel and venting, test ignition systems, and assess safety devices. They may recommend a part replacement, a burner adjustment, or a full service with manufacturer-specific procedures. Having a clear history of symptoms helps shorten the service window and reduces the chance of unnecessary parts replacements.
Final Note on Safety and Longevity
Your home’s heating system is a complex integration of electrical, mechanical, and safety components. Prioritizing safety means recognizing when to halt DIY efforts and call a licensed professional. With proper maintenance and timely repairs, you can extend the life of your heater, maintain comfort, and minimize unexpected outages. This disciplined approach aligns with best practices recommended by industry standards and consistent with Heater Cost guidance.
Tools & Materials
- Screwdriver set (flat and Phillips)(Phillips #2 and flat-head #3 preferred)
- Multimeter(AC voltage and continuity checks)
- Flashlight(Inspect dark furnace areas and vent paths)
- Vacuum with brush attachment(Clean furnace intake and surrounding area)
- Gloves and eye protection(Safety first during inspection)
- Replacement air filter(If dirty, replace during maintenance)
- Vent cleaning brush(Used for minor duct cleaning if accessible)
Steps
Estimated time: 90-120 minutes
- 1
Power down and ensure safety
Turn off the furnace power at the service panel and the unit disconnect. Confirm that any gas valves are in the safe position if you suspect a leak. This prevents accidental startup while you inspect. After checks, reset power to test basic operation.
Tip: If you must touch wiring, wear insulated gloves and avoid metal jewelry. - 2
Check thermostat and controls
Verify the thermostat is set to heat and above room temperature. Replace batteries if needed and reset schedules. If you have a smart thermostat, confirm the device shows the system as active and connected.
Tip: Document any code or status shown on the thermostat to help diagnosis. - 3
Inspect electrical connections and fuses
Open the furnace panel and look for loose wires, burnt connectors, or obvious damage. Reset any tripped breakers and replace blown fuses with the same rating. Do not bypass safety circuits.
Tip: Take a photo before unplugging wires to aid reassembly. - 4
Verify fuel supply and ignition
For gas systems, check gas valve position and ensure the flame sensor is clean. For oil systems, confirm oil flow and inspect the burner for soot or clogs. If ignition fails, do not force a restart repeatedly.
Tip: If you smell gas, evacuate and call emergency services immediately. - 5
Inspect ignition components
Examine the igniter or pilot assembly for cracks, dirt, or wear. Clean or replace as needed per manufacturer guidelines. A faulty igniter is a common cause of no-heat scenarios.
Tip: Only attempt igniter cleaning if you feel confident following the manual. - 6
Check airflow and filters
Ensure air filters are clean and properly seated. Inspect ducts and return vents for obstructions. A restricted airflow can cause overheating and shut-downs.
Tip: Replace filters every 1–3 months during heavy use. - 7
Test operation and monitor
Restore power and run the system through a cycle. Listen for abnormal noises and watch for error codes. If heat is inconsistent, note conditions (time of day, temperature) and consult a pro.
Tip: Keep a simple log of cycles to share with a technician. - 8
Know when to call a pro
If you encounter gas smells, carbon monoxide risks, persistent ignition failures, or unsafe venting, contact a licensed technician. Complex interlocks and safety devices require professional handling.
Tip: When in doubt, pause and schedule a professional inspection.
Got Questions?
What should I check first if the heater won’t start?
Start with power: check the furnace breaker and switch, then verify thermostat settings and battery power. If still not starting, inspect fuel supply and ignition as appropriate for your system.
First check the power and thermostat, then look at the fuel supply and ignition if necessary.
Why does my pilot light keep going out?
A dirty thermocouple or sensor, weak gas pressure, or venting issues can cause ignition to fail. Cleaning or replacement by a pro is often required.
Ignition failure is usually due to a dirty sensor, gas pressure, or venting problems.
Can I fix a noisy heater myself?
Some noises come from loose panels or debris; others indicate motor or burner issues. If unsure, avoid DIY fixes and consult a pro to prevent damage.
Nasty noises can mean loose parts or more serious issues—best to have a pro check it.
How often should I service my heater?
Most systems benefit from an annual professional tune-up, with filters replaced every 1–3 months as needed.
Annual professional maintenance and regular filter changes keep it running well.
Is it safe to run the heater during maintenance?
If you’re not trained for disassembly or handling fuel, avoid running the system and wait for a professional. Follow safety guidelines in your manual.
Only run it if you’re sure it’s safe; otherwise, wait for a pro.
Watch Video
The Essentials
- Identify the root cause: power, thermostat, or fuel supply.
- Follow a safe, stepwise process before calling a pro.
- Regular maintenance reduces outages and improves efficiency.
- Document symptoms and codes to aid diagnosis.
- Call a professional for gas/oil systems or if safety is at risk.