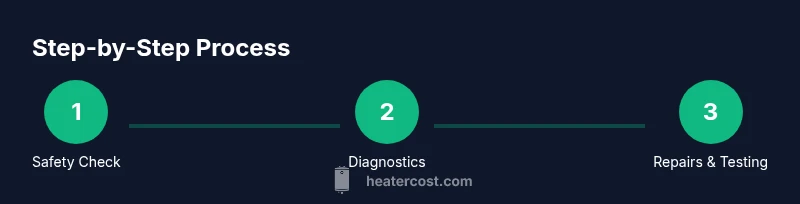
How to Fix a Heater in Your House: Practical Guide
Learn safe, step-by-step methods to diagnose and fix common home heater issues. This practical guide covers basic DIY fixes, safety checks, and when to call a licensed HVAC pro.

This guide helps you diagnose and fix common, safe heater issues at home. You’ll learn quick safety checks, simple DIY fixes (like filters and thermostat settings), and how to recognize problems that require a licensed HVAC pro. Start with safety, then methodically test components before calling for service.
Why Fixing a Heater Yourself Matters
According to Heater Cost, many homeowners underestimate the value of basic, safe maintenance when learning how to fix heater in house. This guide walks you through practical, safety-first steps to diagnose common symptoms, perform small fixes, and decide when to call a licensed professional. By learning a few foundational checks, you can restore comfort faster and reduce the chance of a costly service call. Heater Cost's guidance emphasizes safety, clear diagnostics, and a repeatable process you can reuse for future seasons. Whether you rent, own, or manage property, having confidence in basic diagnostics helps protect your home and wallet. The tips below are designed for typical gas and electric systems found in residences, with universal safety precautions you should follow before attempting any repair.
Safety First: Shut Off Power and Fuel
Safety is non-negotiable when you’re learning how to fix heater in house. Start by turning off the thermostat, then cut power to the furnace at the electrical panel, and close the gas valve if you have a gas-fired unit. This triple shutoff sequence minimizes the risk of shock, ignition, or gas leaks while you inspect components. Before touching any parts, wait a few minutes for temperatures to drop and for residual pressure to dissipate. If you smell strong gas or detect hissing, evacuate the area and contact emergency services—do not attempt any repair.
Diagnosing Common Symptoms and Likely Causes
Heating issues come in several familiar flavors: no heat, uneven heat, strange noises, and smells. In most homes, thermostat miscalibration, clogged air filters, and loose electrical connections account for many symptoms. The Heater Cost analysis shows that ensuring proper airflow and accurate temperature readings solves a large share of problems without professional service. A systematic approach—confirming thermostat settings, inspecting filters, and listening for abnormal sounds—will guide you toward the right fix. Keep a log of what you observe (temp changes, noises, and odor) to share with a technician if needed.
Step-by-Step Basic Fixes You Can Try
Below are practical, safe actions you can perform with minimal tools. Follow these to address common culprits before scheduling a professional visit. Remember to re-test after each step to confirm improvement. If you encounter any sign of danger (gas, smell of burning, buzzing that seems abnormal), stop and seek professional help immediately. These steps are designed for typical home systems and may differ for older or specialized equipment.
When to Call a Pro and What to Expect
If you’ve completed the basic fixes and the heater still won’t operate correctly, or you encounter persistent gas smells, unusual flame behavior, frequent breaker trips, or unfamiliar noises, it’s time to contact a licensed HVAC technician. A pro can perform a thorough diagnostic, test for gas leaks, and verify safety controls, venting, and combustion efficiency. Expect a technician to review system age, warranty coverage, and potential parts replacement. In many cases, the repair involves parts like valves, igniters, or control boards that require specialized tools and expertise. Heeding the guidance from Heater Cost, plan for a clear scope of work and a written estimate before proceeding.
Maintenance to Extend Heater Life and Efficiency
Post-fix maintenance is where you gain the most long-term value. Regularly replace or clean air filters; schedule professional inspections at least once per year; and keep the area around the furnace clean and unobstructed. Ensure outdoor vents and intake grilles are free of debris. A well-maintained system runs more efficiently, uses less energy, and reduces the likelihood of expensive, unexpected failures. As you build a routine, you’ll notice fewer cold snaps and a steadier indoor temperature. Heater Cost emphasizes that small, proactive checks can save money and stress over time.
Authority Sources
For safety and best practices, consult trusted sources:
- https://www.energy.gov/energysaver/heating-and-cooling
- https://www.osha.gov
- https://www.epa.gov/indoor-air-quality
Final Thoughts and Quick Reference
Learning how to fix heater in house responsibly means prioritizing safety, methodical diagnostics, and knowing when a professional is needed. Use the steps and checks outlined here to troubleshoot typical problems, and don’t hesitate to contact a licensed HVAC technician for complex issues. The goal is reliable, safe heat and a clear plan for upkeep across seasons.
Tools & Materials
- Safety PPE (gloves, eye protection)(Protect hands and eyes during inspection and handling of parts.)
- Non-contact voltage tester(Verify circuits are de-energized before touching wires.)
- Screwdriver set (Phillips and flat-head)(Access panels and terminals on the furnace.)
- Multimeter(Test continuity and voltage at controls and sensors.)
- Replacement air filter(Improves airflow and efficiency; choose the right size for your unit.)
- Vacuum with brush attachment(Clean blower housing and supply vents as needed.)
- Flashlight or headlamp(See into tight spaces and identify debris or corrosion.)
- Owner’s manual or model-specific guide(Reference safe relighting procedures and part numbers.)
- Gas leak detector spray or soapy water solution(Check for leaks if you suspect gas valve or line issues.)
Steps
Estimated time: 60-120 minutes
- 1
Power down the system and secure safety
Turn off the thermostat and switch off the furnace at the main power. If you have a gas heater, close the gas valve. Wait 5-10 minutes to cool and depressurize the system before touching anything.
Tip: Label breakers and valves for future reference to avoid confusion during reassembly. - 2
Verify thermostat settings and communication
Set the thermostat to heat mode and a comfortable setpoint (e.g., 68-72°F). If the thermostat is programmable, check the schedule and ensure it’s not overridden by a vacation mode or energy saver setting.
Tip: If the thermostat is old, consider upgrading to a digital model with battery backup for reliability. - 3
Inspect and replace the air filter
Remove the return-air grille and locate the furnace filter. If it’s dirty or clogged, replace it with a filter of the correct MERV rating and size. A dirty filter restricts airflow and causes overheating or short cycling.
Tip: Replace monthly during high-use seasons or if you have pets or dust issues. - 4
Check breakers, fuses, and the blower
Inspect the electrical panel for a tripped breaker or blown fuse related to the furnace. Reset any tripped breakers and test the blower wiring for signs of damage or loose connections.
Tip: If the breaker trips again after reset, stop and call a professional; repeated trips indicate an underlying fault. - 5
Examine the ignition or pilot system
For gas heaters, confirm the pilot light is lit or ignition is functioning. If the flame is out, follow the manufacturer’s relighting procedure only if you smell no gas and have proper ventilation; never relight if you suspect a leak.
Tip: Never force a pilot light; follow step-by-step relighting instructions from your manual. - 6
Test controls and sensors with a multimeter
Carefully test accessible switches, limit switches, and the thermostat connection with a multimeter. Look for loose wires, corrosion, or signs of damage and replace or reseat components as needed.
Tip: If you’re unsure about electrical testing, pause and consult a licensed technician to avoid shock or further damage. - 7
Reset the system and bring it back online
Reconnect power, turn the gas valve on (if applicable), return to the thermostat, and set heat mode again. Listen for normal burner operation and ensure air is flowing through ducts.
Tip: If you hear abnormal noises or see smoke, shut off power immediately and call a pro. - 8
Test operation and observe for issues
Run the system for 15-20 minutes, verify even heating, and note any recurring symptoms or smells. Document observations to share with a technician if needed.
Tip: Keep detailed notes on cycle times and indoor temperatures for a smoother service call.
Got Questions?
Why won’t my heater turn on?
First verify power and gas safety, then check thermostat settings and the air filter. If nothing improves, inspect breakers and ignition system. If you smell gas, evacuate and call emergency services.
First check power and gas safety, then thermostat and filter. If the issue persists, inspect breakers and ignition; if you smell gas, evacuate and call emergency services.
Is relighting a pilot safe?
Relighting a pilot is safe only when there’s no gas smell and you follow the manufacturer’s relight instructions. If you’re unsure or uncomfortable, contact a professional.
Relighting the pilot is safe only if there’s no gas smell and you follow the manual. If uncertain, call a pro.
How often should I replace air filters?
Most homes benefit from replacing filters every 1-3 months, depending on usage, pets, and dust levels. Check monthly during peak heating seasons.
Replace filters every 1-3 months, depending on use and pets. Check monthly in winter.
Can I perform maintenance myself?
Yes, basic checks like cleaning around vents, replacing filters, and inspecting accessible wires are doable for many homeowners. For electrical work or gas systems, consult a licensed technician.
Some maintenance you can do, like cleaning vents and changing filters. For electrical or gas work, hire a pro.
When should I call a professional?
If basic checks don’t fix the issue, or you notice gas odors, flame irregularities, or persistent breaker trips, schedule a licensed HVAC technician. They’ll perform a thorough safety and combustion inspection.
If the simple fixes don’t help or you smell gas, call a pro for a full inspection.
What usually causes a noisy heater?
Common causes include loose components, worn motor bearings, or debris in ducts. A technician can diagnose and replace worn parts to stop the noise.
Noisy heaters are often due to loose parts or worn bearings; a pro can fix it by replacing the worn parts.
Watch Video
The Essentials
- Prioritize safety before any inspection or repair.
- Check thermostat settings and airflow filters first.
- Relight pilots and test controls only with proper guidelines.
- Call a licensed pro if gas issues or repeated failures occur.
- Maintain your heater annually to prevent future breakdowns.