How to Install a Water Heater: Step-by-Step Guide at Home
A comprehensive, safe, and practical guide to installing a residential water heater, covering electric vs gas differences, permits, tools, step-by-step actions, safety, and post-install maintenance. Learn with Heater Cost insights.

By following this guide, you will install a standard residential water heater safely and correctly. It covers selecting the right unit (electric vs gas, capacity), preparing your space, shutting off utilities, connecting water lines, venting for gas models, wiring or coupling to power, testing for leaks, and obtaining any required permits. Use this as a step-by-step framework aligned with best practices from Heater Cost.
Why proper water heater installation matters
A correct installation ensures safety, efficiency, and long service life. When you install a water heater, you are joining together gas lines, venting, electrical connections, and plumbing. According to Heater Cost, a professional-grade installation reduces the risk of gas leaks, electrical faults, and water damage while maximizing energy efficiency and appliance lifespan. This guide emphasizes following manufacturer instructions and local codes to protect your home and family.
Across electric and gas models, a precise installation can lower operating costs and extend the unit’s life. You’ll avoid nuisance leaks, improper venting, and cold-water shocks by planning clearances, support, and correct pipe sizing. Throughout this article, Heater Cost’s team shares practical steps and safety considerations to help homeowners, renters, and managers approach installation with confidence.
Electric vs gas water heater installation considerations
Electric water heaters require a reliable power supply and a dedicated circuit sized for the unit's load, while gas models demand proper venting, combustion air, and fuel connections. A correct installation ensures vent piping is continuous and sealed, clearances to combustibles are respected, and a safe shutoff is accessible. The Heater Cost team notes that missteps in venting or electrical wiring are common causes of inefficiency, leaks, or safety hazards. Always follow the appliance manufacturer’s instructions and local code requirements.
For both types, ensure the space is dry, well-ventilated, and protected from freezing. Consider water heater isolation valves, thermal expansion containment, and seismic straps if your region requires them. These updates help protect against leaks and structural movement, and improve longevity.
Permits, codes, and site preparation
Permits and code compliance are critical for a safe, legal install. Depending on your locale, you may need a permit for replacement, gas work, electrical work, or venting modifications. The Heater Cost analysis shows that projects that secure permits and pass final inspections tend to have fewer post-installation issues. Collect manuals, confirm space requirements, and verify that the new unit’s capacity matches your household needs before you buy.
Site preparation includes dry-access to utilities, a stable mounting surface, adequate drainage, and a safe route for venting (gas models). Prepare to shut off utilities, drain piping if replacing an old tank, and arrange for proper disposal of the old unit.
Tools, materials, and safety gear
Before you begin, assemble the essential tools and safety gear. A basic set includes adjustable wrenches, a pipe wrench, screwdrivers, a voltage tester or multimeter, pipe thread sealant or Teflon tape, pipe dope, and a level. Personal protective equipment should include gloves, eye protection, and non-slip footwear. For gas installations, a gas detector and soap solution for leak testing are helpful. Always check the heater’s installation manual for any model-specific requirements.
Safety first: depressurize and drain the system, ensure power is off, and verify gas is shut off where applicable. If you’re unsure at any point, pause and consult a professional.
Step-by-step installation overview
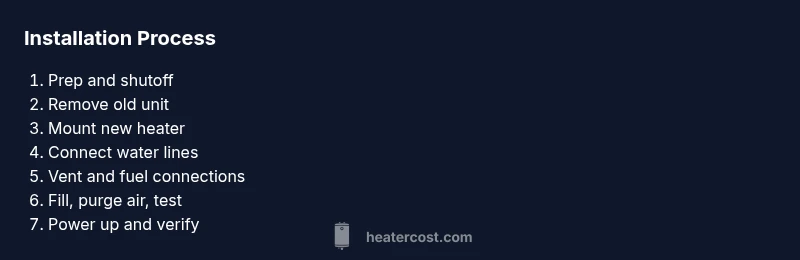
The installation process occurs in phases: prep and shutoff, removal of the old unit (if present), positioning and mounting the new heater, making water connections, handling gas supply and venting (gas models), powering the unit, and verifying operation. This overview helps you plan, but the detailed steps are provided in the dedicated STEP-BY-STEP section. Following a structured sequence reduces the chance of leaks and safety risks.
This is a high-level map intended to align with manufacturer instructions and local codes. If anything feels uncertain, contact a licensed professional to complete the job.
Post-install checks and maintenance
After installation, test all connections for leaks using a soap solution or leak detector. Check the pressure relief valve and ensure it operates freely. Fill the tank and relieve air from the lines by opening hot water taps. Set the thermostat to a safe temperature and document the installation details for future reference. Schedule annual maintenance, including flushing to remove sediment buildup and inspecting the anode rod (for tank-style heaters) to extend life. These steps help prevent costly failures and keep the system operating efficiently. The Heater Cost team emphasizes keeping up with routine checks as part of responsible home maintenance.
Tools & Materials
- Adjustable wrench(Best for garden-variety fittings and securing flexible hoses)
- Pipe wrench(Needed for tight fittings on galvanized or iron pipes)
- Gas shutoff valve wrench or key(Keep accessible near the heater location)
- Teflon tape (PTFE) or pipe thread sealant(Use on all threaded connections (gas & water))
- Pipe cutter or hacksaw (if needed)(For cutting copper or steel pipe to length)
- Drain pan and bucket(Contain accidental spills during drainage)
- Voltage tester or multimeter(Verify power is off before touching electrical connections)
- Leak-detect solution or soap(Test all water and gas connections for leaks)
- Safety gear (gloves, goggles, non-slip shoes)(Personal protection is essential)
Steps
Estimated time: 2-4 hours
- 1
Prepare workspace and safety checks
Clear the area, review the installation manual, and gather tools and materials. Verify power and fuel shutoffs are accessible and functioning. Ensure the space is well-ventilated and free from flammable materials.
Tip: Label circuits and valves before disconnecting anything to avoid confusion. - 2
Shut off utilities
Turn off the electrical power to the heater at the breaker panel and close the gas supply valve (for gas models). If you have a tankless or electric unit, focus on electrical isolation and water isolation.
Tip: Double-check that the circuit is de-energized with a voltage tester. - 3
Drain and remove old unit
If replacing an old tank, attach a drain hose to the drain valve, drain the tank completely, and disconnect the water and vent lines. Remove the old mounting hardware carefully.
Tip: Have a bucket ready to catch residual water. - 4
Position and mount the new heater
Place the new unit on a level, stable base. Secure it with mounting straps as required by code and the manufacturer. Ensure there is adequate clearance for service access.
Tip: Use a level to verify it sits perfectly flat. - 5
Connect water lines
Attach cold-water supply to the inlet and hot-water outlet to the house distribution. Use Teflon tape on threaded connections and tighten by hand then a quarter-turn with a wrench.
Tip: Seal the joints gradually to avoid twisting or leaking. - 6
Gas and vent connections (gas models only)
Connect the gas line with proper fittings and install or reattach the venting system. Ensure there are no leaks by applying soapy water to joints and watching for bubbles.
Tip: Do not overtighten fittings; use appropriate sealant. - 7
Electrical connections (electric models only)
Wire the unit to a dedicated circuit as per the manufacturer’s instructions. Use a proper strain-relief and secure grounding. Do not create parallel splices; keep connections inside an approved junction box.
Tip: If in doubt, hire a licensed electrician. - 8
Fill and purge air; test for leaks
Open the cold water valve slowly to fill the tank, then open hot taps to purge air. Check all connections for leaks with a soap solution and fix any leaks before powering the unit.
Tip: Patience during filling reduces post-install air noise. - 9
Power up and verify operation
Restore power or gas to the unit and observe the burner, ignition, or heating element cycling. Confirm hot water delivery at faucets and monitor for unusual noises.
Tip: Set thermostat to a safe temperature and document settings.
Got Questions?
Do I need a permit to install a water heater?
Permits are often required, especially for gas or electrical work. Check your local building codes and obtain approval before starting. A licensed professional can help ensure compliance.
Permits are usually required; check your local codes.
Can I install a water heater myself?
Gas water heater installation should be performed by a licensed professional. Electric units are safer to install if you have electrical expertise and follow the manufacturer instructions. Always follow local codes and safety guidelines.
Gas work should be left to a pro; electric work depends on your skill.
What safety precautions should I take before starting?
Shut off power and fuel supplies, depressurize and drain the system, wear PPE, and verify with appropriate testing tools. Do not proceed if you feel unsure.
Turn off power and gas, wear PPE, test for leaks.
How long does installation typically take?
Installation duration varies with unit type and home layout. Plan for several hours, including setup, connections, and testing. Expect more time when replacing an older unit.
It can take several hours depending on complexity.
What maintenance is needed after installation?
Schedule annual inspections, flush the tank periodically, inspect the anode rod (tank units), and test pressure relief valves. Proper maintenance extends life and efficiency.
Annual maintenance helps prevent problems.
What are common signs of a failing water heater after install?
Leaks, unusual noises, insufficient hot water, or foul odors indicate issues. If these occur, stop using the unit and consult a professional.
Leaks or noises can signal a problem—call a pro.
Watch Video
The Essentials
- Verify local permits before starting installation.
- Follow manufacturer instructions for venting and electrical work.
- Test all joints for leaks prior to final operation.
- Keep safety gear on and work with a helper for heavy tasks.
- Schedule professional inspection if required by code.