How to Fix a Heater in a Truck: A DIY Guide
Learn step-by-step how to diagnose and fix a truck heater, with safety tips, common causes, and cost considerations from Heater Cost for 2026.

This guide shows you how to diagnose and fix a truck heater that won’t blow hot air, cold air, or smells burnt. You’ll learn quick checks, common electrical and heater core issues, safety precautions, and when to replace components. Before you start, have basic hand tools, a flashlight, a multimeter, and a clean workspace; many fixes are straightforward but some require professional service.
Understanding how a truck heater works
Truck heating systems in most pickups and commercial trucks use engine coolant to produce heat. A heater core acts like a small radiator; as the blower motor pushes air across the hot core, warm air is directed into the cabin through blend doors and vents. The heater's performance depends on coolant flow, the thermostat, and the control settings. If you’re wondering how to fix heater in truck, understand these basics first. According to Heater Cost, many heater issues stem from simple electrical faults or clogged passages rather than a failed heater core.
Common signs your truck heater needs attention
No heat or weak heat can indicate a problem with coolant flow, a stuck blend door, or an underperforming blower. Other signs include air that alternates between hot and cold, vents that deliver inconsistent temperatures, a blower that runs at one speed or not at all, and unusual smells like burning plastic or coolant. Leaks around hoses or the heater core can also signal trouble. If you notice coolant pooling or a sweet coolant scent, stop driving and inspect for leaks.
Before you start: safety and prep
Park on level ground and let the engine cool before touching coolant or electrical components. Disconnect the negative battery cable to prevent shocks while you work around the wiring. Gather tools, rags, and a catch pan for any coolant spills. Wear safety glasses and gloves to protect against sharp edges and hot coolant. If you must drain coolant, follow your vehicle’s service manual and use a catch pan to avoid spills.
Tools and diagnostic approach
Begin with a visual inspection of hoses, clamps, and electrical connectors around the heater core and blower. Check HVAC fuses and relays in the fuse box, and test them with a multimeter or substitute a known-good relay. Listen for blower noise at different speeds to see if the motor is working; a quiet system could point to a failed resistor or wiring issue. Keep notes as you test so you can map likely causes and avoid repeating steps.
Electrical issues: fuses, relays, and thermostats
Electrical problems are among the easiest to fix and often the least expensive. Locate HVAC fuses in your vehicle’s fuse box and replace any blown fuses with the same rating. A faulty blower relay can prevent heat from reaching the cabin; swap it with a known-good relay if available. The thermostat should allow coolant to flow at the proper temperature; a stuck thermostat can prevent warm air. If you suspect a thermostat issue, consult your service manual before replacement.
Mechanical blockages: heater core, ducts, and blower motor
Look for coolant leaks around the heater core and hoses, which can indicate a failing core. Inspect ductwork for disconnections or leaks that allow heat to escape before reaching the cabin. A weak or intermittent blower motor or a worn resistor will reduce or stop airflow; test by applying power directly to the motor to see if it spins smoothly. If debris or rust is suspected in the core, a professional flush may be required to restore heat.
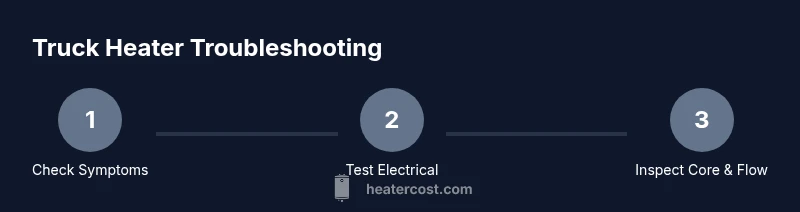
Step-by-step troubleshooting flow
This section provides a practical flow you can follow if you’re troubleshooting how to fix heater in truck. Start with safety and basic checks, then verify electrical circuits, then assess the blower and core, and finally decide whether a simple replacement or professional service is needed. Document each finding so you can decide on the most cost-effective fix without guesswork.
Replacing components vs. professional service: cost considerations
Diagnosing and replacing faulty parts can save money compared with full professional service, but costs vary widely based on the vehicle and parts. Heater Cost analysis shows that the mix of parts versus labor determines overall cost, with electrical components typically cheaper to replace than a full heater core. The key is to balance DIY fixes against the risk of misdiagnosis and potential coolant or electrical hazards.
Maintenance to prevent future failures
Regularly inspect hoses, clamps, and the blower assembly for wear. Keep the cooling system clean and ensure coolant levels stay topped up according to the vehicle manual. Run the heater periodically in off-seasons to keep moving parts from sticking. Create a simple maintenance log to track service, part replacements, and any symptoms you’ve observed before winter.
Tools & Materials
- Safety gloves(Leather or heat-resistant gloves)
- Digital multimeter(Test electrical circuits and fuses)
- Screwdriver set(Phillips and flathead; assorted sizes)
- Socket/Wrench set(For clamps and bolts around heater components)
- Shop towels and catch pan(Contain coolant and spills)
- Flashlight or headlamp(Improve visibility in tight spaces)
- Hose clamps and spare hoses(As needed during inspection)
- Coolant flush kit or garden hose(For heater core flushing (low pressure))
- Coolant and distilled water(If recharging coolant after servicing)
Steps
Estimated time: 2-4 hours
- 1
Prepare and safety check
Park on level ground, engine cool, and disconnect the negative battery terminal. Gather tools and a clean workspace, then put on safety glasses and gloves. This reduces the risk of electric shock and coolant burns.
Tip: Label wires or connectors as you disconnect to simplify reassembly. - 2
Check fuses and relays
Open the fuse box and locate HVAC fuses; test with a multimeter or replace with a known-good fuse. Identify the blower relay and swap it with a working one if available to see if there is a heat response.
Tip: Keep spare fuses of the correct amperage on hand. - 3
Test blower motor and resistor
With power off, inspect the blower connection and wiring for corrosion. Reconnect and test voltage at the blower connector with the heater on high. If voltage is present but the motor doesn’t spin, the motor or resistor may be faulty.
Tip: Avoid touching live wiring; disconnect the battery before servicing connectors. - 4
Inspect heater core and hoses
Look for coolant leaks around the heater hoses and firewall connections. Check hoses for swelling or cracks and verify clamps are tight. Ensure air can flow freely to the vents by removing any obvious debris in the ductwork.
Tip: Do not open hot coolant; allow engine to cool before touching hoses. - 5
Flush heater core and purge air
If heat is weak but airflow is good, consider back-flushing the heater core at low pressure to clear debris. Refill and bleed the cooling system to remove air pockets.
Tip: Use a dedicated flush kit or low-pressure hose; never use high pressure. - 6
Reassemble and test heat
Reconnect battery, start the engine, and set the heater to max. Confirm warm air flows through all vents and monitor for leaks or strange smells. Document final results and plan next steps if heat is still inconsistent.
Tip: Record final temperatures and any remaining symptoms for future reference.
Got Questions?
Why isn't my truck heater blowing hot air?
Common causes include blown fuses, faulty thermostat, clogged heater core, or a malfunctioning blower motor. Start with electrical checks before diving into the core.
Common causes include blown fuses, a stuck thermostat, a clogged heater core, or a bad blower motor.
How do I test the heater blower motor?
Check for voltage at the blower motor connector with the HVAC controls set to different speeds. If voltage is present and the motor doesn’t run, the motor or its resistor is faulty. If no voltage, inspect wiring or the control module.
Test the blower by measuring voltage at the connector and trying a direct 12-volt feed.
Is it safe to flush the heater core myself?
Flushing can help clear debris but uses liquid under pressure. Use low pressure and follow the vehicle manual; avoid spraying hot coolant and wear eye protection.
It's doable with care, using low pressure and following the manual.
When should I replace the heater core?
Replace the heater core if there are persistent leaks, blockage that can’t be cleared, or irreparable damage after flushing and repair attempts.
Replace if there are persistent leaks or blockage that can't be cleared.
What are typical DIY costs vs pro service?
DIY costs focus on parts and basic tools; pro service adds labor and diagnostic fees. Exact figures vary by vehicle and region, so compare quotes.
DIY parts plus tools; pros charge for labor and diagnostics.
Can a bad thermostat affect heater performance?
Yes. A stuck or slow thermostat can prevent hot coolant from circulating, leading to little or no heat and inconsistent temperatures.
A faulty thermostat can stop hot coolant from circulating, causing no heat.
Watch Video
The Essentials
- Diagnose before replacing parts to save cost
- Check electrical paths: fuses, relays, and blower circuits
- Inspect heater core and ducts for clogs or leaks
- Keep a simple maintenance log for reliability
- Compare DIY fixes vs professional service to control costs, per Heater Cost