How to Drain a Water Heater Tank: Step-by-Step Guide
Learn how to drain your water heater tank safely and efficiently with our step-by-step guide. Prep, drain, flush, and refill to prevent sediment buildup and extend heater life. Includes safety tips and timing.

Drain your water heater tank by turning off the power, closing the cold-water supply, attaching a drain hose, and opening the drain valve. Let the tank drain, flush sediment, then refill and restore heat. This steps-based guide shows you how to drain water heater tank safely and efficiently at home.
how to drain water heater tank: Why it matters for longevity and efficiency
Sediment buildup inside your water heater tank can hinder heat transfer, reduce efficiency, and shorten the unit’s life. Regularly draining the tank to flush out mineral deposits helps maintain consistent hot water temperatures and lowers energy costs over time. According to Heater Cost, homeowners who incorporate a controlled draining routine into annual maintenance see fewer cold-water pockets and less mineral buildup. In this article, we explain the physics of sediment, when to schedule a drain, and how this simple task fits into broader maintenance. The primary goal of how to drain water heater tank is to keep the heater operating at peak efficiency while preventing costly corrosion or clogging. Many households overlook this step, assuming it’s only for old or high-mineral-area systems. But even newer units benefit from periodic flushing to remove fine sediment that can settle at the bottom. By understanding the process, homeowners can protect their investment, save energy, and enjoy reliable hot water year-round.
When to drain and how often
Regular draining is not a daily task, but it’s not something you skip either. If you live in a hard-water area, mineral buildup happens faster, and you should flush at least once a year; more frequent flushing every 6-12 months can be beneficial in some homes. It’s also wise to drain after major repairs or after you notice a drop in heating efficiency or a change in hot water color or odor. The decision to drain should consider the tank’s age, sediment level, and the manufacturer's guidance. The goal is to keep the bottom of the tank clear so the burner or heating element can transfer heat more efficiently. The phrase how to drain water heater tank is central to this process; the technique remains the same regardless of your schedule, but frequency depends on sediment levels and water quality.
Understanding valves and safety
Drain valve, cold-water inlet, expansion tank, and pressure-relief valve (TPR) are critical components. Before draining, locate and identify the drain valve at the bottom of the tank, the cold-water supply valve at the top, and the TPR valve on the side. The drain valve is usually a small lever or knob; the cold-water valve is a ball valve or gate valve. Opening the drain valve without letting air in can cause a water hammer; to prevent this, open a nearby hot-water faucet to vent air. For safety, always turn off power or gas and wear eye protection and gloves. In some homes, the entrance to the attic or basement may be tight; plan a clear path for the drain hose. The keyword how to drain water heater tank appears throughout to reinforce the concept.
Step-by-step workflow overview
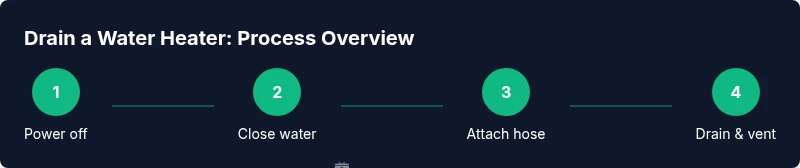
Below is a high-level flow you’ll follow in the detailed steps. This overview helps you anticipate what comes next and ensures you have the right tools ready. Expect to work with both electrical or gas utilities and to handle a heated tank, so proceed with caution. The core sequence is: shut off utilities, isolate water, attach a drain hose, bleed the tank, flush if needed, reseal, refill, and restore service. The phrase how to drain water heater tank anchors each action to safety and efficiency, reminding you that precision matters more than speed.
Common mistakes and troubleshooting
Common mistakes include rushing the process, opening the drain valve too quickly, or neglecting to vent air by opening a hot faucet. These missteps can cause spills, water hammer, or incomplete sediment removal. If water doesn’t drain, check for a kinked hose, a clogged drain valve screen, or a closed cold-water valve. If the drain valve won’t budge, power down the unit completely and consider using a wrench carefully, or call a professional if corrosion or a seized valve is suspected. By staying methodical and patient, you’ll achieve a cleaner tank and better long-term efficiency.
Aftercare: refilling and testing
Once the tank is drained, close the drain valve, remove the hose, and slowly reopen the cold-water supply to begin refilling. As water returns, listen for air and watch for steady flow from a hot water faucet nearby. When the tank is full, turn the power or gas back on and run hot water from a nearby faucet to purge air. Check for leaks at connections and around the drain valve. If you notice any drips, tighten fittings gently and re-test. This final phase ensures your heater operates safely and efficiently after a drain.
Maintenance plan and when to call a pro
Establishing an annual maintenance routine that includes draining and flushing the tank helps extend its life and keeps energy costs predictable. In hard-water areas, you might flush every 6-12 months. If you observe rusty water, persistent leaks, or inconsistent heating, it could signal deeper issues requiring a professional inspection. The Heater Cost team recommends documenting your maintenance dates and water quality, so you can track trends and plan future services. Regular flushing is a small investment with long-term benefits for reliability and comfort.
Tools & Materials
- Garden hose(Connect to the tank’s drain valve; run water to a safe location)
- Bucket or drain pan(Catches water and sediment during the drain)
- Towels or rags(Clean spills and keep the area dry)
- Adjustable wrench or pliers(Loosen fittings if needed)
- Non-contact voltage tester(Verify power is off for electric models)
- Safety gloves and eye protection(Protect hands and eyes from hot water)
Steps
Estimated time: 60-90 minutes
- 1
Power off and secure utilities
For electric heaters, switch the circuit breaker to OFF. For gas heaters, set the gas control to OFF. Verify nothing is live before touching the heater. This prevents electrocution and gas-related hazards.
Tip: Use a non-contact voltage tester to confirm the circuit is de-energized. - 2
Close the cold-water supply
Turn the cold-water shutoff valve clockwise until snug to stop new water from entering the tank. If you can’t reach the valve easily, use a wrench gently—don’t force it.
Tip: A slow, steady turn minimizes valve damage and avoids splashing. - 3
Attach the drain hose
Connect a garden hose to the drain valve on the bottom of the tank. Open the drain valve slowly to start the water flow, directing the hose to a floor drain or outdoors.
Tip: Keep the hose end lower than the tank to maintain gravity drainage. - 4
Vent air and drain the tank
Open a nearby hot-water faucet to vent air and prevent a vacuum. Open the drain valve fully and allow the tank to drain completely. Sediment may exit with the water.
Tip: Opening air vents prevents sputtering and speeds up drainage. - 5
Flush sediment (optional)
If you want a deeper clean, briefly turn the cold-water supply on and off to flush the tank, then drain again. Repeat until the effluent looks clear.
Tip: Be prepared for splashes and have towels ready. - 6
Close the drain valve and remove hose
Once the tank is empty, close the drain valve and remove the hose. Wipe the area dry and inspect for leaks around fittings.
Tip: Keep a bucket handy for any remaining drips. - 7
Refill and restore heat
Slowly reopen the cold-water supply and allow the tank to fill completely. Open a hot faucet until water runs clear, then restore power or relight the pilot and set the thermostat.
Tip: Bleed air until steady hot water flows to avoid air pockets.
Got Questions?
Why should I drain my water heater tank?
Draining removes sediment that accumulates at the bottom of the tank. This sediment reduces heat transfer efficiency, can cause temperature fluctuations, and may shorten the heater’s life. Regular draining helps maintain efficiency and reliable hot water.
Sediment buildup reduces efficiency and can shorten the heater’s life, so draining helps keep hot water consistent.
How often should I drain a residential water heater?
Most homes flush once a year, but mineral-heavy water can justify more frequent draining, such as every 6-12 months. Refer to your manufacturer’s guidance and local water quality.
A yearly drain is common, but hard water may require more frequent flushing.
Can I drain the tank if the water is very hot?
Yes, but take precautions. Let the water cool briefly if possible, drain slowly, and avoid scorching by keeping faces and hands away from hot surfaces.
If the water’s very hot, be careful and drain slowly to avoid burns.
What if the drain valve won’t open?
Power down the unit completely, check for debris, and try gently with a wrench. If stubborn, call a licensed plumber to avoid damaging fittings or causing leaks.
If the valve is stubborn, don’t force it—shut off power and call a pro.
Is flushing necessary after every drain?
Flushing helps remove finer sediment and improve efficiency. It’s recommended periodically, especially in areas with hard water, but the frequency can vary by conditions.
Flushing the tank helps keep it efficient and extends its life.
Watch Video
The Essentials
- Turn off power and water before starting
- Attach a hose and vent air for smooth drainage
- Flush sediment if desired for deeper cleaning
- Fully refill before restoring heat to avoid damage
- Regular flushing improves efficiency and extends heater life