How to Clean a Water Heater: A Step-by-Step Guide Today
Learn how to clean a water heater safely, flush sediment, inspect the anode rod, and restore efficiency with our comprehensive, step-by-step guide from Heater Cost.

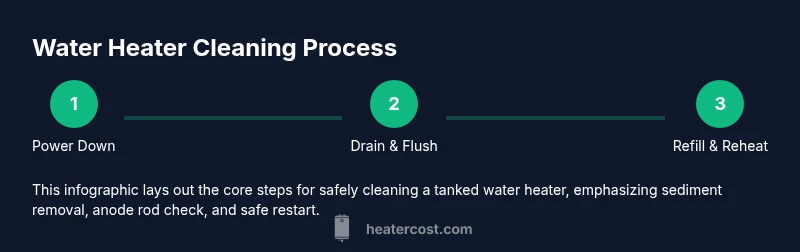
Goal: clean a water heater to remove sediment and restore efficiency. Steps: power off the heater, shut the cold-water supply, attach a drain hose, drain several gallons, flush with fresh water, inspect the anode rod, re-fill the tank, restore power or gas, set the thermostat to 120°F, and test the pressure relief valve.
Why Regular Cleaning Matters
Regularly cleaning a clean water heater helps prevent sediment buildup, which can insulate the water, reduce heating efficiency, and cause premature corrosion. In many homes, mineral-laden water creates sediment that settles at the bottom of the tank. Over time, this sediment forms a layer that makes the heater work harder, wasting energy and shortening service life. A well-maintained unit heats more evenly and delivers consistent hot water, while also reducing the risk of strange noises, cold patches, or rusty water. For homeowners, renters, and property managers, investing a few hours annually to clean your water heater can save on energy costs and repair bills. The Heater Cost team emphasizes practical maintenance as a cornerstone of long-term cost control and reliability. The process outlined here focuses on a safe, user-friendly approach that can be performed by most homeowners with basic tools. The goal is a durable, efficient system that delivers reliable hot water when you need it, without surprises.
Sediment and Its Impact on Efficiency
Sediment consists of minerals like calcium and magnesium that settle at the bottom of the tank as water is heated. As sediment builds up, it creates insulating layers that slow heat transfer, forcing the heater to run longer to reach set temperatures. This not only wastes energy but also accelerates wear on the burner or heating element, reducing efficiency and shortening the unit’s life. Regular cleaning loosens and removes loose sediment, helping your water heater perform closer to its rated efficiency. If you notice gritty water, increased mineral content, or unexplained temperature fluctuations, plan a flush. For homes with hard water, professional-grade descalers or periodic replacement may be warranted in older systems. Heater Cost recommends scheduling a flush every 1–3 years for most homes, with more frequent service in regions with very hard water.
Safety First: Power, Gas, and Water Considerations
Before you start, understand the safety risks and shutoffs. Electrical elements or gas burners can pose shock or fire hazards if exposed. Always power down the unit at the breaker panel or switch, and shut off the cold-water supply to stop new water from entering during flushing. Ventilation is important for gas units; ensure the area is well-ventilated and follow local codes. Never work on a live system when water is present, and wear protective gloves. This section aligns with general safety guidance from Heater Cost and national safety standards. If you’re unsure about gas connections or vent health, contact a licensed professional. Your safety and compliance with local codes are worth the extra step.
Preparing Your Space and Environment
Clear the workspace around the water heater: remove clutter, place towels and a drain pan to catch spills, and lay down absorbent mats. Have a bucket and a long-handled drain hose ready, plus a wrench or pliers for quick valve access. Ensure you have clear access to the drain valve and hot water outlets, and keep children and pets away during the procedure. Turn off electricity or gas to the unit, and shut the cold-water inlet to begin the flushing process. This preparation minimizes spills, protects flooring, and makes the flush smoother and safer.
What Happens During a Flush: Sediment Removal Explained
Flushing a water heater involves draining the tank and letting fresh water flow in to push out sediment that has settled on the bottom. The cold-water inlet acts as a flushing force, carrying sediment up and out through the drain valve. You may see cloudy water at first, which gradually clears as most debris exits. The process improves heat transfer by reducing insulating sediment layers, which helps your heater reach temperature faster and with less energy. A flush also helps reveal any leaks, valve issues, or signs of corrosion that may need attention.
Inspecting the Anode Rod and Other Components
The anode rod protects the tank from corrosion by diverting corrosive processes to itself. Over time, it sacrifices its magnesium or aluminum core, and a worn rod increases the risk of tank failure. During the flush, check the anode rod for excessive breakdown; if it’s very corroded or not easily removable, replace it to extend tank life. While you’re inspecting, look for signs of deterioration around the drain valve, connections, and the heating element. Address issues promptly to prevent bigger problems later.
Steps to Refill, Repressurize, and Restart the System
After flushing, close the drain valve and reconnect the cold-water supply. Allow the tank to re-fill completely, then restore power or gas to the unit. Turn the thermostat to a safe operating temperature—usually 120°F for most homes—and give the system time to heat water. Open a hot-water faucet somewhere in the home to purge air from the lines until the water runs smoothly. Finally, test the pressure relief valve to ensure it operates correctly. This phase completes the flush and stabilizes your water heater for normal operation.
Maintenance Schedule and Long-Term Benefits
A clean water heater offers consistent hot water, better energy efficiency, and a longer service life. Establish a routine—ideally annual or semi-annual in hard-water areas—to inspect the anode rod, test safety devices, and flush the tank. Record maintenance dates and parts replaced, and consider installing a water-softening system if mineral content is high. Regular maintenance reduces the likelihood of costly emergency repairs and ensures your system remains compliant with safety standards. When done, you’ll enjoy peace of mind and predictable hot water supply.
Tools & Materials
- Drain hose (garden hose)(Durable hose long enough to reach a safe drainage area)
- Drain pan or bucket(To catch draining water and prevent spills)
- Adjustable wrench or pliers(For loosening valve connections if needed)
- Towels or rags(To clean up spills and protect surfaces)
- Protective gloves(Heat-resistant if possible; for hand protection)
- Replacement anode rod (optional)(Install only if you detect significant corrosion)
- Thermometer or temp strip (optional)(For verifying incoming water and tank temperature)
- Flashlight(Better visibility near the unit)
Steps
Estimated time: 60-90 minutes
- 1
Power down and isolate the unit
Turn off the power at the breaker for electric heaters or switch off the gas supply. Shut the cold-water inlet to prevent new water from entering while you work. This prevents shocks, burns, or gas-related hazards and sets a safe baseline.
Tip: Confirm power is off by checking the unit’s display or a test light before touching any components. - 2
Attach the drain hose and prepare the drain area
Place a drain pan or bucket under the drain valve and connect the drain hose securely. Open a hot-water faucet nearby to vent air and speed up drainage. This step keeps the work area clean and reduces backflow risk.
Tip: Use a hose clamp if you have one to prevent leaks at the connection. - 3
Drain a portion of the tank
Slowly open the drain valve to begin draining. Let several gallons flow out before closing to avoid a rapid surge that can splash. Draining helps lift sediment from the bottom and prepares the tank for flushing.
Tip: Keep the drain valve controlled; don’t fully open it if you’re unsure of valve condition. - 4
Flush the tank with fresh water
Close the drain valve and briefly open the cold-water inlet to flush the tank. Let clean water run through until the discharge is clear of sediment. This clears mineral deposits and improves heat transfer efficiency.
Tip: If you see a lot of debris, repeat the flush once more. - 5
Check and replace the anode rod if needed
Locate the anode rod access and inspect for heavy corrosion or consumption. Replace the rod if it’s visibly degraded to protect the tank from serious corrosion. This helps extend the heater’s life and maintain interior coating.
Tip: Ensure the new rod is sized correctly for your tank and sealed with Teflon tape as needed. - 6
Refill the tank and restore power or gas
Close the drain valve, reopen the cold-water inlet, and allow the tank to fill. Once full, restore power or gas and wait for the unit to reach temperature. Run a hot-water test to purge air from lines.
Tip: Open a hot-water faucet to vent air until steady, continuous flow returns. - 7
Set the thermostat to a safe temperature
Adjust the thermostat to around 120°F (49°C) to balance comfort and energy use. Higher temperatures waste energy and can scald, while lower temperatures may not meet your needs. This setting helps reduce energy costs and improve safety.
Tip: Avoid setting too high; if you have young children or elderly guests, 120°F is a safer baseline. - 8
Test safety devices and verify hot water supply
Test the pressure relief valve to ensure it opens and reseals properly. Confirm that hot water flows smoothly from fixtures and check for leaks. If you notice dripping or steam, shut down and consult a professional.
Tip: Keep the drain area clear in case the relief valve releases while testing.
Got Questions?
What is the main purpose of flushing a water heater?
Flushing removes sediment that collects at the bottom of the tank. This sediment acts as an insulating layer, reducing heat transfer and wasting energy. Regular flushing improves efficiency and can extend the unit’s life.
Flushing clears sediment for better efficiency and longer heater life.
How often should I flush my water heater?
Most homes flush every 1–3 years, with more frequent maintenance in areas with very hard water. Hard water accelerates mineral buildup, so adjust frequency accordingly.
Typically every 1 to 3 years, more often in hard-water areas.
Can a tankless water heater be flushed the same way?
Tankless systems have a different maintenance procedure. Consult the manufacturer guide; regular descaling with appropriate cleaners is recommended, but avoid using the same method as for tank-type heaters.
Tankless systems require a different scale-removal method; check the manual.
Do I need to drain the whole tank during flushing?
You typically drain a portion to loosen sediment and then flush with fresh water. Draining the entire tank isn't always necessary and can waste water, but follow the manufacturer’s guidance for complete cleaning when needed.
Usually you drain some, flush, and re-fill; full drainage is not always required.
What should I do if I smell rotten eggs or notice rusty water?
Rotten egg smells often indicate bacterial growth or anode rod depletion. Rusty water points to corrosion inside the tank. In both cases, inspect the anode rod and consult a pro if the issue persists.
If you smell sulfur or see rusty water, check the anode rod and consider professional help.
Is it safer to hire a professional for cleaning?
Many simpler flushes can be done by homeowners with basic tools. If your heater is older, gas-fired, or shows leaks, corrosion, or venting issues, hire a licensed technician to avoid safety risks.
If in doubt about safety or gas connections, hire a pro.
Watch Video
The Essentials
- Flush to remove sediment and restore heat transfer
- Inspect and replace the anode rod as needed
- Set a safe temperature (about 120°F) to save energy
- Test safety devices after maintenance