How to Drain the Hot Water Heater: A Homeowner Guide
Learn to drain your hot water heater safely to remove sediment, boost efficiency, and extend tank life. This step-by-step guide covers prep, tools, safety tips, and best practices for homeowners, renters, and property managers.

Drain your hot water heater to remove sediment, flush minerals, and protect the tank. This guide walks you through prep, essential tools, safety steps, and a clear, step-by-step process you can follow today.
Why draining the hot water heater matters
If you're wondering how to drain the hot water heater, regular draining helps remove mineral sediment that builds up over time, reducing efficiency and shortening tank life. Sediment can insulate the water inside, causing longer heating times and more energy use. Draining also helps prevent odors and mineral buildup that can degrade hot water quality. According to Heater Cost, routine flushing—especially in hard-water regions—is a prudent maintenance step that can extend the life of your unit and lower the likelihood of sudden repairs. By understanding why this matters, homeowners, renters, and property managers can approach the task with confidence and avoid costly surprises.
When to drain and how often
Most homes in areas with hard water benefit from an annual drain and flush, while softer water may require less frequent action. If you notice longer heating times, reduced hot water flow, or gritty sediment at the faucet after drawing hot water, it’s a sign to flush. The Heater Cost analysis suggests starting with a yearly schedule and adjusting based on water hardness and usage. Keeping a simple log helps you detect trends and time flushing to coincide with low-demand periods, such as spring or summer.
Safety considerations before you begin
Drain work involves hot water and pressurized plumbing, so safety is essential. Always turn off the power or gas supply before touching the heater or its components. Use heavy-gauge gloves and safety goggles, keep kids and pets away, and place towels to catch spills. Ensure the area is well-ventilated and dry to prevent slips. If you’re unsure about shutting off a gas supply or if the heater is in a tight closet, pause and consult a professional. When in doubt, schedule the task for a lower-risk day.
Tools and materials you’ll need
Before you begin, assemble the essential tools and materials to prevent delays. You’ll need a drain hose that fits the valve, a bucket or basin to collect water, safety gloves and goggles, and a wrench or screwdriver for stubborn connections. Keep a towel handy and have a way to control the area around the heater to prevent water damage. Having everything on hand reduces the risk of leaving the drain halfway through.
Step-by-step overview
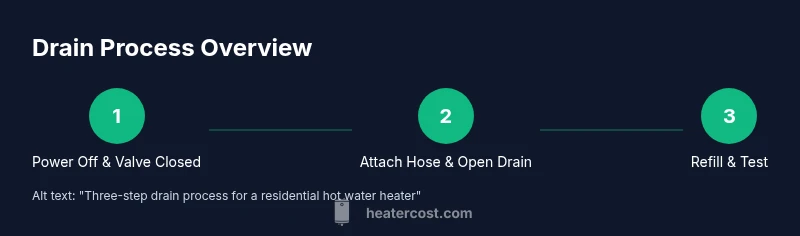
The process can be summarized in a few clear stages: disconnect the power, secure a drainage hose, open the drain valve slowly to avoid a surge, flush until the water runs clear, refill the tank, and restore power safely. Each stage has nuances depending on your heater’s make and model, but the general approach remains consistent for most residential units. The goal is a controlled, complete flush that removes sediment without causing a pressure spike.
Common mistakes and how to avoid them
Common missteps include rushing the drain, not securing the hose, or forgetting to shut off the water supply first. Opening the drain valve too quickly can cause sudden pressure release and splashing. Forgetting to vent air by opening a hot-water faucet can extend the flushing time. To avoid issues, take your time, support the hose, and follow a 1–2–3 sequence: shutoff, connect, drain. Heater Cost notes that patience pays off with a cleaner flush and safer restart.
Post-drain checks and maintenance tips
After the flush, inspect the drain valve for leaks and wipe up any water. Refill the tank slowly by turning the cold-water supply back on and watching the water level rise in the tank, often by feel or by the faucet. Once the tank is full, restore power or relight the gas. Run hot water from a faucet to confirm heat and proper operation. Keeping logs helps track performance over time.
Environmental considerations for disposal of flushed water
In most homes, flushed water can be directed to a utility sink or outdoor drain if local codes permit. Avoid disposing of hot water into a garden or lawn that could be damaged by high temperature. Check your local regulations if you are on a septic system or in a sensitive area. When in doubt, consult your local authority or a licensed plumber.
Troubleshooting if the tank won’t drain or water won’t flow
If the water won’t drain or you see a clogged valve, power down and reassess. Check the valve’s handle alignment, verify that the cold-water supply is fully closed before draining, and ensure the hose is properly connected. If you still see no flow, there may be a more serious blockage or a faulty valve, and you should contact a licensed plumber.
Tools & Materials
- Drain hose(Fits the drain valve; 6–8 ft length recommended)
- Bucket or basin(Large enough to catch water and minerals)
- Safety gloves(Protect hands from hot water and sharp edges)
- Safety goggles(Eye protection in case of splashes)
- Adjustable wrench(Useful for loosening stubborn fittings)
- Screwdriver(For adjusting drain valve if necessary)
- Towel or rag(Wipe spills and keep area dry)
Steps
Estimated time: 30-60 minutes
- 1
Turn off power and water supply
Locate the heater’s power switch or circuit breaker and switch it off. Then close the cold-water shut-off valve to stop inflow. If you can’t identify the shut-off, refer to the unit’s label or manual and proceed carefully.
Tip: If you’re unsure about electrical safety, pause and consult a professional. - 2
Attach drain hose and position the bucket
Securely connect the drain hose to the heater’s drain valve. Route the hose to a suitable drain or directly into a bucket. Confirm all connections are snug to prevent leaks during draining.
Tip: Use a clamp or zip tie to steady the hose to avoid kinking. - 3
Open drain valve and vent air
Slowly open the drain valve to allow water to begin exiting. If water flow is sluggish, keep the valve partially open and open a hot-water faucet on a distant outlet to help vent trapped air.
Tip: Open gradually to avoid a pressure surge that could splash hot water. - 4
Flush until water runs clear
Let water flow through the hose until it runs clear of sediment. This may take several minutes, depending on mineral content and tank size. If you see heavy sediment, repeat the flush a bit longer.
Tip: Stop if you notice a strong odor or unusual color and reassess the valve and hose connections. - 5
Refill the tank and restore energy
Close the drain valve and remove the hose. Slowly reopen the cold-water supply until the tank fills completely. Once full, restore power or relight the gas and set the thermostat to your desired temperature.
Tip: Open a hot-water faucet to vent air as the tank refills. - 6
Test for leaks and proper heating
Run hot water from a tap to check for leaks and confirm heating. If leaks appear at the drain valve or fittings, tighten connections or replace washers as needed. Allow the heater to reach temperature and recheck after 15–30 minutes.
Tip: Keep a watchful eye on the area for moisture for the first hour after restart.
Got Questions?
Is draining a hot water heater safe for beginners?
Yes, when you follow the safety steps and manufacturer guidance. Start with turning off power and the cold-water supply, wear protective gear, and proceed slowly.
Yes, it’s safe if you follow the safety steps and read your unit’s manual.
How often should I drain my hot water heater?
Frequency depends on water hardness and usage. Annual flushing is common for hard water; softer water may require less frequent flushing.
It depends on your water, but many hard-water homes flush yearly.
What if the water is dirty or rusty?
Sediment can indicate mineral buildup. Continue flushing until clear, and if it persists after several flushes, consult a plumber.
Keep flushing until the water runs clear; persistent sediment may mean a bigger issue.
Can draining harm the heater?
Draining is safe when done correctly. Improper procedure or leaks can cause damage, so follow steps carefully.
If you drain properly, it’s safe; otherwise, get help.
How long does draining take?
Most drains take about 30–60 minutes depending on tank size and water flow.
Usually half an hour to an hour.
Should I flush after maintenance like anode rod replacement?
Flushing is a separate routine task. Do it as needed or recommended by your service guidelines after maintenance.
Flushing is separate from other maintenance; do it when needed.
Watch Video
The Essentials
- Drain to remove sediment and improve efficiency
- Shut off power and water before starting
- Use a hose and bucket to control spills
- Refill and test the heater before resuming use