How to Flush a Hot Water Heater: A Step-by-Step Guide
Learn how to flush a hot water heater safely, remove sediment, and maintain efficiency with our detailed step-by-step guide. Includes tools, safety tips, and maintenance schedule from Heater Cost.

You will learn how to flush a hot water heater to remove sediment, improve efficiency, and extend its life. This guide covers required tools, safety steps, and a clear, step-by-step process you can follow. Expect a 60–90 minute procedure and always shut off power or gas before starting.
Why flushing hot water heater matters
Sediment naturally accumulates in water heaters as minerals precipitate out of water during heating. Over time, this sediment forms a layer at the bottom of the tank that insulates the water from the burner or heating element. That reduces heat transfer efficiency, causing your system to work harder and use more energy to reach the same hot-water temperature. It can also shorten the unit's life by increasing corrosion potential and causing mineral buildup in valves and outlets. Regular flushing removes sediment and refreshes the tank’s interior, helping maintain consistent hot water, extend equipment life, and keep energy costs lower. According to Heater Cost, routine maintenance including flushing can be a cost-effective way to protect your investment. A typical home may benefit from flushing every 1-2 years, depending on water hardness, system size, and usage. If you have very hard water, you may notice quicker sediment formation and should plan more frequent flushes. Always consult your system manual for any manufacturer-specific guidance and safe procedures.
Sediment and performance: what happens over time
Sediment buildup reduces the tank’s ability to transfer heat efficiently. When minerals settle at the bottom, the burner or electric element has to work longer to heat water, which raises energy use and wear on components. Scale can clog outlets and strain thermostats, leading to uneven temperatures and noisy operation. Over time, mineral buildup can contribute to leaks around fittings and valves. Flushing disrupts this cycle by removing settled minerals and refreshing the tank interior, helping preserve efficiency and reliability. Regular flushing also provides an early opportunity to inspect anode rods, valves, and drain hardware for signs of wear.
How flushing improves energy efficiency and lifespan
Removing sediment allows the heating element to transfer heat more effectively, so the heater reaches target temperatures faster and with less energy. This reduces running time and lowers utility costs, especially in homes with hard water. Flushing also minimizes stress on the tank and valves, decreasing the likelihood of leaks and extending the unit’s service life. In short, a well-maintained heater runs cooler and quieter, and avoids costly repairs down the line. Heater Cost’s guidance emphasizes routine maintenance as a proactive approach to long-term savings.
When to flush: frequency and indicators
Baseline flushing is typically recommended every 1–2 years, but actual frequency depends on water hardness, sediment content, and usage. Signs you should flush sooner include rusty or cloudy water, a drop in hot water supply, longer heating times, and rumbling or banging sounds from the tank (water hammer). If you notice mineral buildup on the drain valve or reduced pressure in hot water lines, plan a flush to restore performance. For households with very hard water or high usage, more frequent flushing may be appropriate.
Tools, safety, and setup
Before you flush, gather essential tools: a garden hose, a bucket, and an adjustable wrench. Wear safety goggles and gloves, and have towels or rags ready to catch drips. Review your heater’s manual for model-specific cautions. Always set the power supply to OFF (electric) or shut the gas supply and set the thermostat to PILOT (gas) before starting. Ensure the area around the heater is clear and the floor can handle a potential spill.
Pre-flush safety checklist
- Turn off power or set thermostat to PILOT and shut off gas if applicable.
- Close the cold-water inlet valve to stop more water entering the tank.
- Place a bucket and lay a garden hose on the drain valve, directing the other end to a safe drain.
- Open a nearby hot-water faucet to vent air and speed up drainage.
- Put on safety gear and keep children and pets away from the work area.
Step-by-step overview of the process
This section provides the overall flow of the flush, without duplicating the detailed steps. You will first isolate the heater from water and power, connect the discharge hose, drain a portion of the tank, briefly flush with fresh water, refill the tank, and then restore power/gas and test hot water. Having the right sequence reduces mess and protects you from scalds.
Tools & Materials
- garden hose(6–20 ft length; ensure hose end fits the drain valve and reaches a floor drain.)
- bucket or basin(Large enough to hold drained water and sediment.)
- adjustable wrench(For loosening valve connections if needed.)
- towels or rags(To catch drips and wipe spills.)
- safety gear (goggles, gloves)(Protect eyes and hands from sediment and splashes.)
- flashlight(To inspect the drain area and valve area in dim light.)
- owner’s manual(Manufacturer-specific instructions and safety warnings.)
Steps
Estimated time: 60-90 minutes
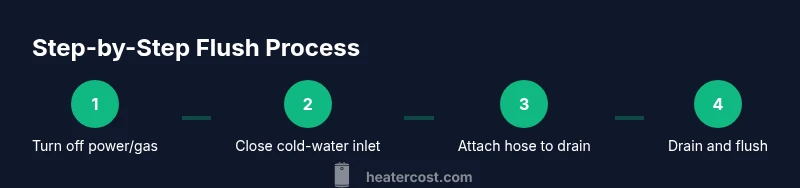
- 1
Turn off power or fuel supply
Electric units: switch off at the breaker for the water heater. Gas units: set the thermostat to PILOT or shut off the gas supply valve. This prevents electrical or gas combustion from occurring while you’re flushing. Waiting 5–10 minutes helps ensure water inside isn’t extremely hot.
Tip: If you’re unsure about the breaker, label the switch and contact a licensed electrician. - 2
Close the cold-water supply valve
Locate the cold-water inlet valve on the top or side of the tank and turn it clockwise until fully closed. This stops new water from entering while you drain the tank. If the valve is stiff, use a wrench carefully to avoid damage.
Tip: Don’t force the valve; if it doesn’t shut, stop and seek professional help. - 3
Attach hose to drain valve and position hose
Connect the garden hose to the drain valve and route the other end to a floor drain or external area. Ensure the connection is tight to prevent leaks. Place towels around the drain to catch drips.
Tip: Hand-tighten first, then snug with a wrench if needed, but don’t overtighten. - 4
Open the drain valve and start draining
Open the drain valve slowly to begin draining; you’ll see water and sediment exit the tank. If your unit has a manual drain, use the lever or knob. Keep the flow steady until you’ve drained enough water to inspect for clarity.
Tip: Open gradually to reduce splashing and avoid scalding from hot water. - 5
Vent with a hot-water tap
Open a hot-water tap on a sink or tub a few inches to allow air to escape and speed drainage. Once the water starts to flow smoothly, you can continue flushing. This also helps prevent a vacuum that could slow the process.
Tip: Choose a faucet close to the heater to minimize stagnant water. - 6
Briefly flush with fresh water and drain again
If the water is very dirty, briefly turn the cold-water supply back on to swirl the sediment and flush it out, then drain again. Repeat until clear and free of heavy sediment. This step improves sediment removal.
Tip: Do not run the heater dry; keep some water in the tank while flushing. - 7
Close the drain valve and remove the hose
Shut the drain valve once the tank is drained to the desired level, then detach the hose and set it aside. Leave the cold-water inlet open for refilling.
Tip: Keep the drain area clean to avoid slipping hazards. - 8
Refill the tank and restore power/gas
Turn the cold-water supply back on fully and allow the tank to refill. Once water flows from the hot tap, close it and restore power or gas to the heater. Let the heater reheat and verify hot water delivery.
Tip: If the hot water doesn’t get warm after a reasonable period, check the thermostat or gas supply and relight according to the manual. - 9
Test and clean up
Run hot water from a faucet to confirm proper operation and temperature. Wipe down any drips, store tools, and dispose of any sediment responsibly. Check for leaks around valves once the system is back in service.
Tip: Keep a log of the date and any observations for future maintenance.
Got Questions?
Can I flush a hot water heater myself?
Yes, most homeowners can flush a water heater with basic tools and careful steps. This guide provides a safe, structured approach, but always follow your model’s manual and consider hiring a professional if you’re unsure.
You can flush it yourself using basic tools, but follow the steps and safety tips, and call a pro if you’re unsure.
Do I need to turn off power before flushing?
Absolutely. Electric heaters must be powered down at the breaker, and gas heaters should have the thermostat set to PILOT or the gas shut off. This prevents hazards during draining and flushing.
Yes, turn off power or gas before starting to avoid hazards.
How often should I flush my water heater?
A common recommendation is every 1–2 years, but frequency depends on water hardness, usage, and unit size. Hard water may require more frequent flushing.
Most homes flush once every couple of years, but if your water is hard, you might do it more often.
What are signs you need to flush now?
Noticeable signs include rusty or cloudy water, reduced hot water supply, noise from sediment, and slow recovery after drawing hot water. These indicate sediment buildup that merits a flush.
Look for rusty water, slower hot water, or banging noises—that usually means it’s time to flush.
Is flushing safe for all water heaters?
Flushing is a common maintenance task for many traditional tank-type water heaters. Tankless systems and some high-efficiency units require model-specific procedures, so consult your manual.
Most tank-type heaters can be flushed safely, but check your manual for tankless or specialty models.
What should I do if water heater drains slowly?
Check for kinks or blockages in the hose, a clogged drain valve, or an accidentally closed inlet valve. If the drain remains slow, stop and seek professional help.
If drainage is slow, inspect the hose and valve for blockages and consider calling a pro if it doesn’t improve.
Watch Video
The Essentials
- Flush regularly to remove sediment buildup
- Always power off and close water inlet before starting
- Refill and test hot water after a flush
- Keep a simple maintenance log for scheduling
- Follow manufacturer guidance and seek a pro for complex systems